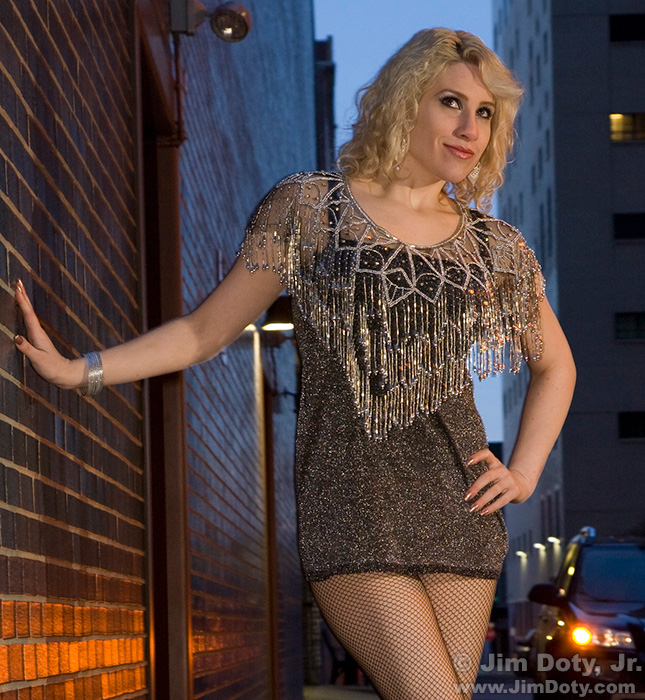
You would think a windchill of 4° Fahrenheit (-16°C) would be too cold for a photo shoot, but not with some models. We booked this January shoot weeks in advance so we knew it would be cold, but we had no idea how cold until the day arrived. Here’s the story behind this image and how to work with a model when it is so cold.
This is the tenth in an ongoing series of articles on winter photography (links below).
When the day arrived we knew it was going to be bone-chillingly cold, but Selina wanted to go ahead with the shoot anyway. So she left her home in Kentucky and drove to Columbus.
Shooting in the Cold
She wanted to shoot outside, which was our original plan, and she picked the dress from my photo shoot wardrobe. Between the cold and the wind we had to work fast. It would set everything up before show would get out of the car. When I was ready to go she would jump out of the car, we would shoot like crazy for 2 or 3 minutes, and jump back in the car to look at the images. If we got what we got wanted we would go on to the next location. If we didn’t, we would jump out of the car and do it again. When it is this cold with so much skin exposed it is important not to shoot much more than a couple of minutes at a time.
If one of your shooting location is to far from the car to go back and warm up, carry warm boots and a warm coat and/or a warm blankets along for the model to warm up. I keep a couple of blankets in the car and I have some felt lined boots if the model doesn’t have warm boots.
We went to several locations and did a lot of shooting, but only for 2 or 3 minutes at a time. This particular location was a back alley with a sidewalk along the building.
I was changing camera settings a lot so I didn’t shoot with gloves. My fingers would get numb. And as for Selina – well – you can imagine how cold she felt. Before you ask someone else to do this you need to know what it feels like. The next time the wind chill is 4 degrees where you live (my apologies to all of you who live in the tropics, you don’t get to do this), put on next to nothing and go stand outside for a few minutes.
Don’t Ruin Your Camera
If you bring your camera into a warm car after shooting out in the cold you can cause hundreds of dollars in damage to your camera. So you need to leave the camera outside the car until the shoot is over. When the shoot is over, zip up the camera in your camera bag before you pit it in the in the car. More information about protecting your camera in the cold and snow is here.
Mixing Ambient and Flash Exposures
I set the ambient light exposure to correctly capture the deepening blue sky. I metered the sky in manual mode (excluding the buildings which would throw off the meter reading) and set the exposure compensation scale to something like – 2/3. Much lighter than that and the sky would be too light. Much darker than that and the sky would be too dark. The light level was pretty low. Even with an ISO of 400 the shutter speed was 1/8 second. The lens aperture was f/8 which gave me enough depth of field to keep Selina sharp and slightly blur the background.
The light on Selina came from two Canon 550EX speedlites. The primary speedlite was on a tripod (camera right) out in the alley. I periodically had to move it out of the way as cars drove down the alley. The off-camera speedlite was controlled by the speedlite on my camera via an infrared signal. The flash exposure compensation (FEC) for the off-camera flash was set at about zero (0). The on-camera flash was the fill light so the FEC was set around minus one (- 1). I preset the FEC for each flash while Selina was in the car, but you have to do some tweaking of the FEC settings while you are actually shooting. I didn’t write down the FEC settings at the time. You don’t stop to write down FEC settings when you have a model out in the cold.
With current Canon DSLR cameras, flash exposure compensation is a separate system from exposure compensation for the ambient light exposure. Changing one does not change the other. You can make the sky as light or dark as you want, and do the same with the light on the model. There are some limits. You can’t exceed the Guide Number of your flash and still get the exposure you want. If your aperture is too small and the primary flash is too far from your subject, you won’t get a good exposure. You need to do a little quick Guide Number math in your head to make sure everything will work out ok. Check the links below for more information on off-camera flash.
As an added bonus for this image, someone left their car parked in the alley with the headlights on. I deliberately placed Selina at a location along the brick wall that would capture the glow on the wall from the car’s headlights.
Is the Model OK with the Cold?
Selina isn’t the only model who will brave the cold and wind. I have worked with several other models in the winter under circumstances this cold. There are some remarkably hardy models out there who will go the extra mile to get the shot. You should never book a cold weather shoot with a model without first asking if the shooting conditions are ok. Don’t be surprised if the model’s rate goes up as the temperatures go down. Not everyone is cut out for this kind of thing. I know a first class model who doesn’t shoot if the temperature is below 60°.
One more thing. The shoot is over when the model says “I have had enough”, whether or not you did everything you planned to do. Even with regular warm up breaks the cold is accumulative. There is always another day to shoot.
The Wind Chill Factor
The wind chill factor matters. At a given temperature, the stronger the wind the harder it is to shoot and the shorter the time you can be outside.
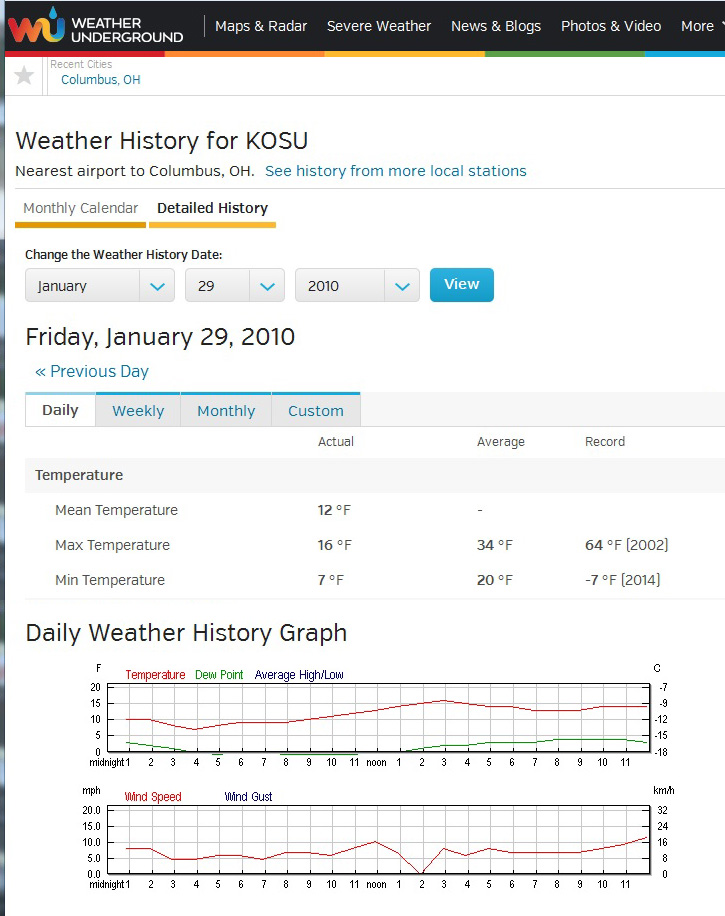
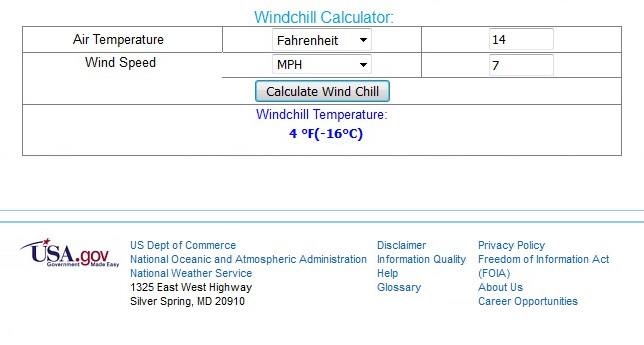
It was 15 degrees when Selina and I headed out and I knew the windchill, but I didn’t check the exact windchill at the time of this photo until quite a bit later. This photo was taken at 5:57 pm. The temperature was 14 degrees and the wind speed was 7 mph.
A quick check at NOAA’s online wind chill calculator told me the windchill was 4 degrees at the time of this photo. The windchill was 3° by the time we finished our shoot.
Photo Data,Selina: Canon 5D. 73mm lens focal length. 1/8 second, f/8, ISO 400. Two Canon 550EX speedlites. Exact speedlite settings were unrecorded.
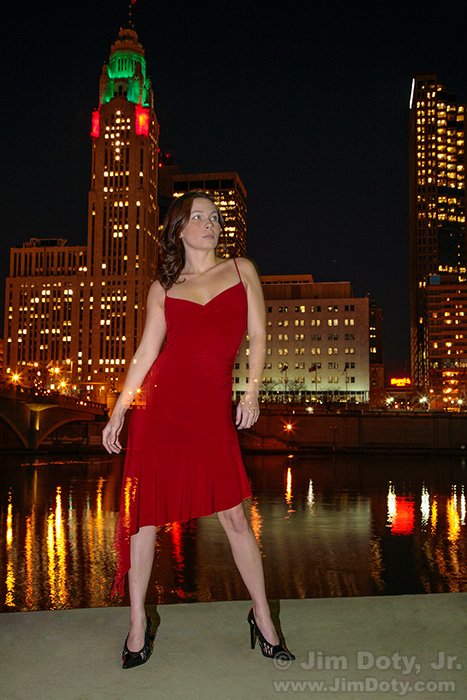
Photo Data, Sarah: Canon 5D. 40mm lens focal length. 2.6 seconds, f/11, ISO 400, Canon 550EX speedlite set to ETTL auto exposure. The story behind this image is here.
Originally posted Jan. 16m 2016, Updated Jan. 7, 2017.
Links
Protect Your Camera Gear in the Cold and Snow
Wind Chill Chart and Calculator
“How To†Series: Winter Photography – An Overview
How to Use Your Camera’s Exposure Compensation Scale
“How To” Series: Off-Camera Flash. Eleven articles on how to choose and use off-camera flash.
Some of the Best Off-Camera Flash Equipment
To learn more about portrait photography, ambient light metering, exposure compensation, flash exposure compensation, using the Guide Number for your flash, depth of field, and a whole lot more, read Digital Photography Exposure for Dummies, one of the highest rated books at Amazon.com. Learn more here and order it here.


