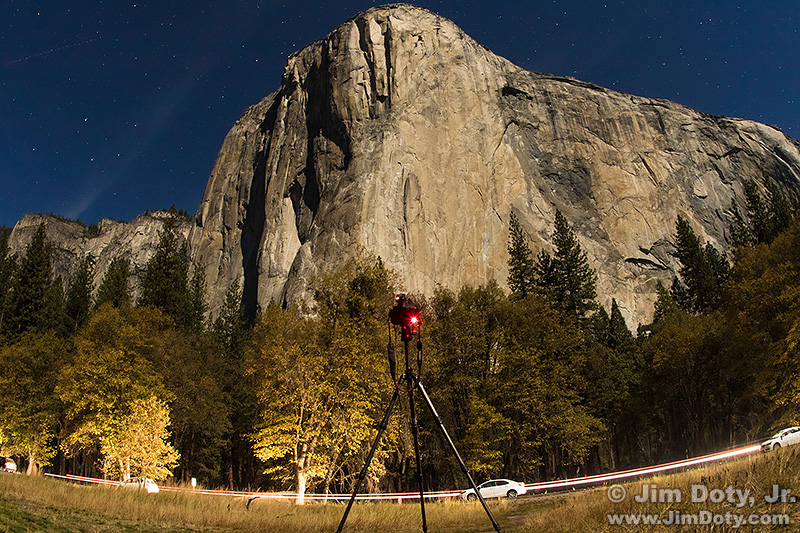
El Capitan in the moonlight along with a camera and tripod. El Capitan Meadow, Yosemite National Park, California.
GPS Data is increasingly important to photographers. It is the link between photos and photographic locations. It can be very helpful to drop GPS coordinates into a program like Google Earth to be able to tell exactly where a photo was taken. How do you do that?
This is part of an ongoing series of articles on photography and GPS data.
I was in El Capitan Meadow when I took the photo of El Capitan at the top of this article (along with my other camera on a tripod which was also taking a picture). What if I wanted to know exactly where I was in the meadow? The fastest way to figure that out is using the GPS coordinates in the metadata of the photo. The Canon 7D Mark II that was used to capture this image records GPS data for each photo if you use the 7D’s menu system to turn on the internal GPS receiver.
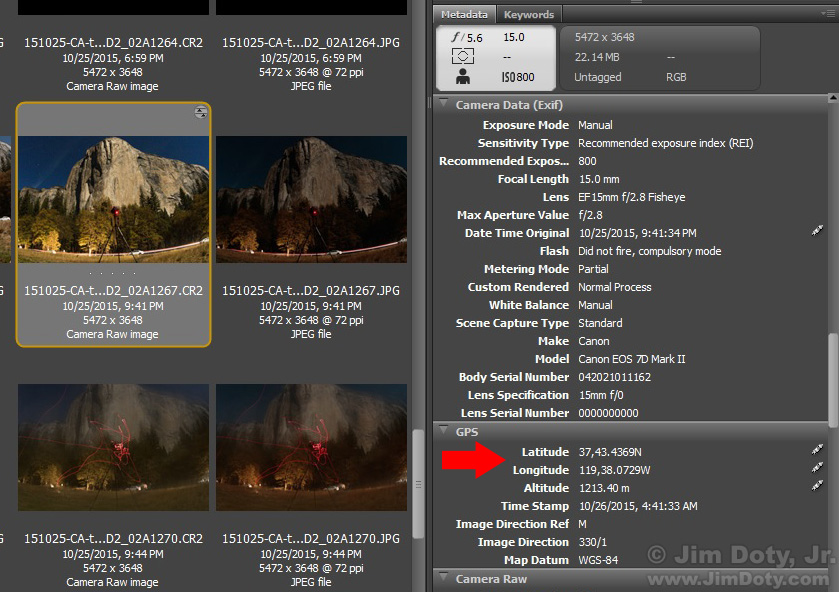
Partial screen capture of the El Capitan photo selected in Adobe Bridge with GPS coordinates indicated by a red X. Click to see a larger version.
The first step is to open the photo in Adobe Bridge (or Adobe Lightroom) to get the GPS coordinates. You can also get this information by opening the photo in Adobe Photoshop and go to File > File Info and choose GPS Data when the metadata panel opens.
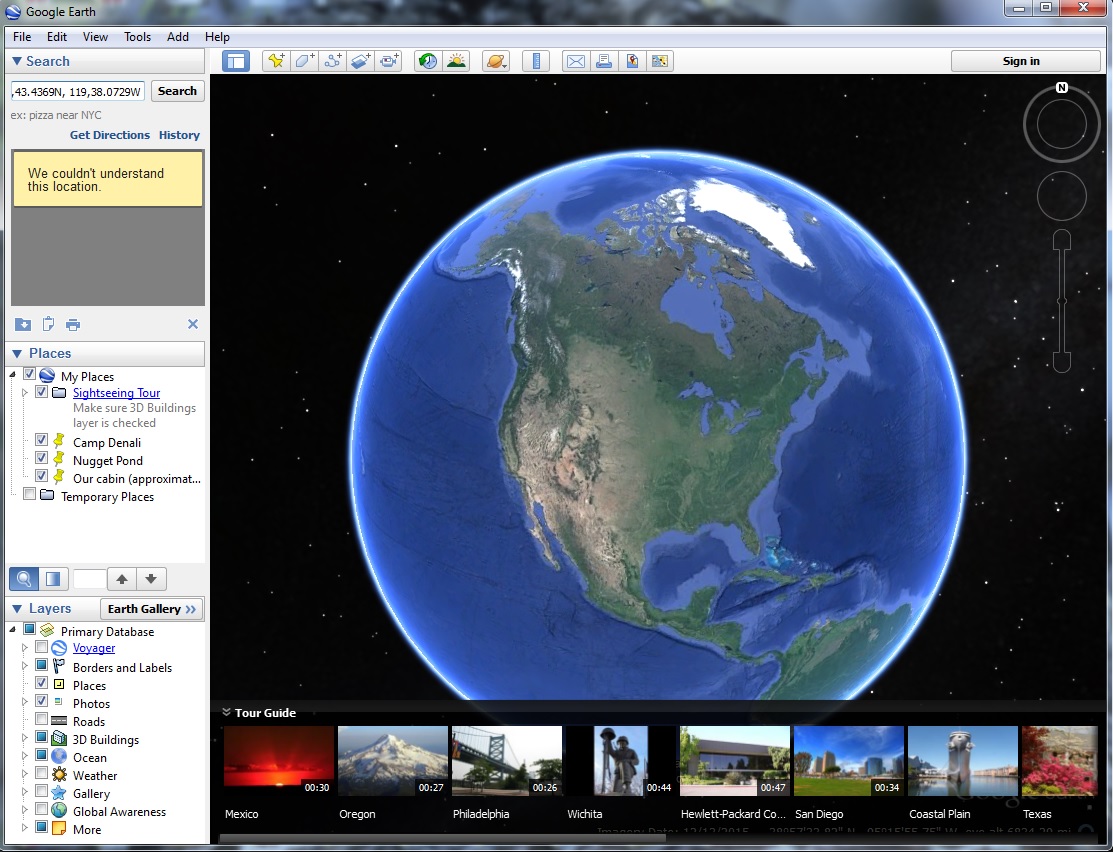
With Google Earth open, you can copy and paste the latitude and longitude coordinates for the photo into the search box in Google Earth but you need to convert the coordinates first. If you don’t, Google Earth will give you an error message in a yellow box that says “We couldn’t understand this location.”
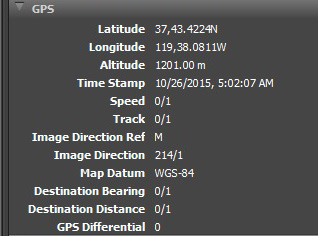
The conversion is simple. Take these two lines from the camera’s GPS information:
37,43.4369N
119,38.0729W
Replace the comma in each line with the degree (°) symbol. To get the degree symbol with a PC use ALT+0176. On a Mac use Option+Shift+8.
Then combine both lines into one line, latitude first, and separate latitude and longitude by adding a comma after the N so your line looks like this:
37° 43.4369N, 119° 38.0729W
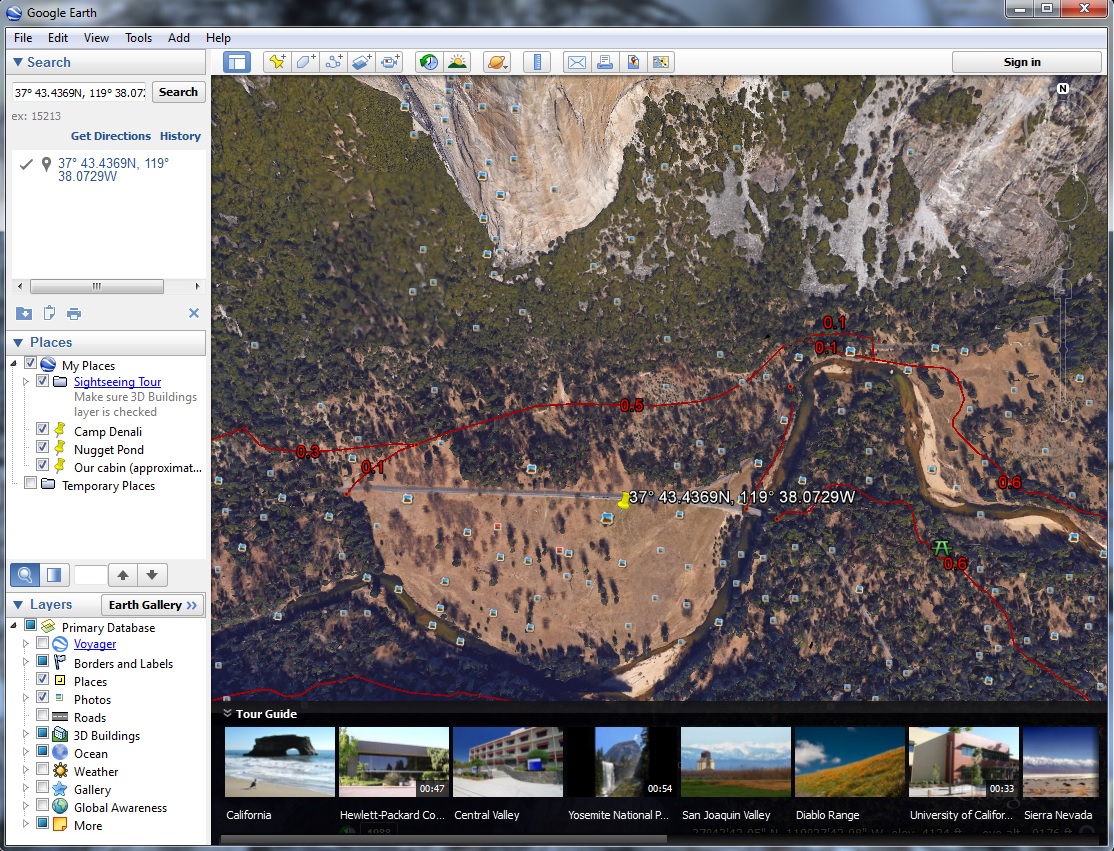
Now you can type or copy and paste this line into Google Earth’s search box. If you did the conversion correctly, Google Earth will take you right to your photo location.
Zoom in with Google Earth to get a closer view of your location, or zoom out to see a larger area.
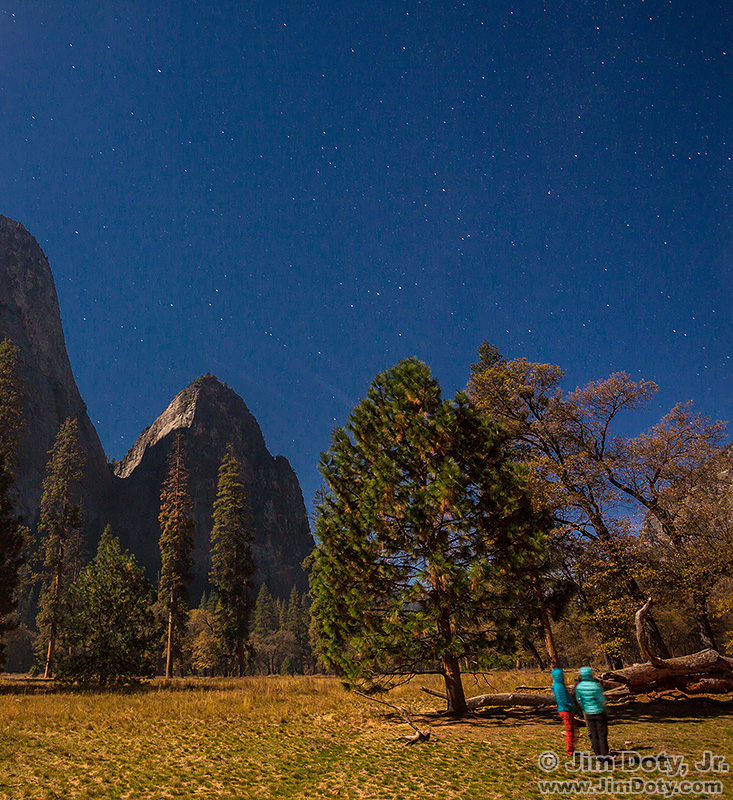
While I was busy taking pictures, three young women walked into the meadow. One of them stopped to ask me a bunch of photography questions. They ended up in my photo of Cathedral Rocks which was taken not far from the El Capitan photo. Note the evergreen tree not too far behind and to the left of them, and the large, dead, downed tree behind them.
I selected the image in Adobe Bridge to get the GPS coordinates. The camera was a Canon 5D Mark III which does not have a built in GPS receiver. I had a Canon GPS-E2 receiver in the hot shoe of the camera which adds GPS data to the metadata of each photo.
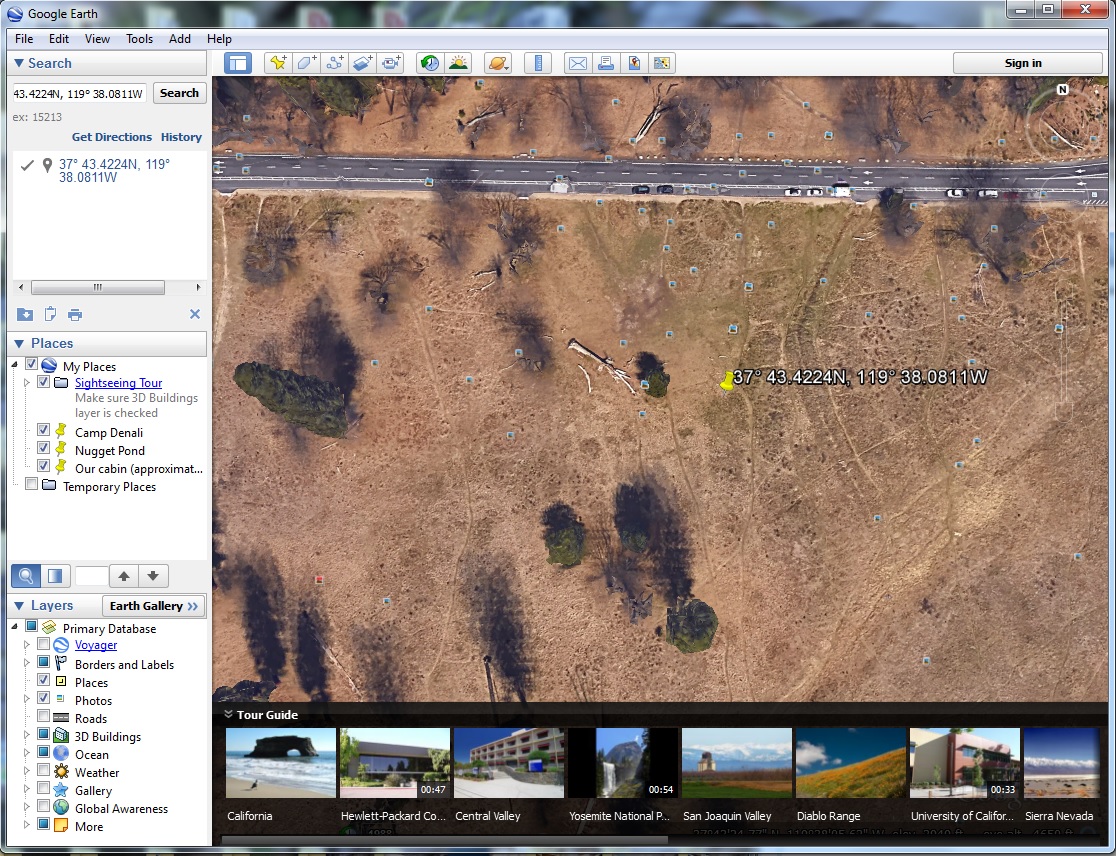
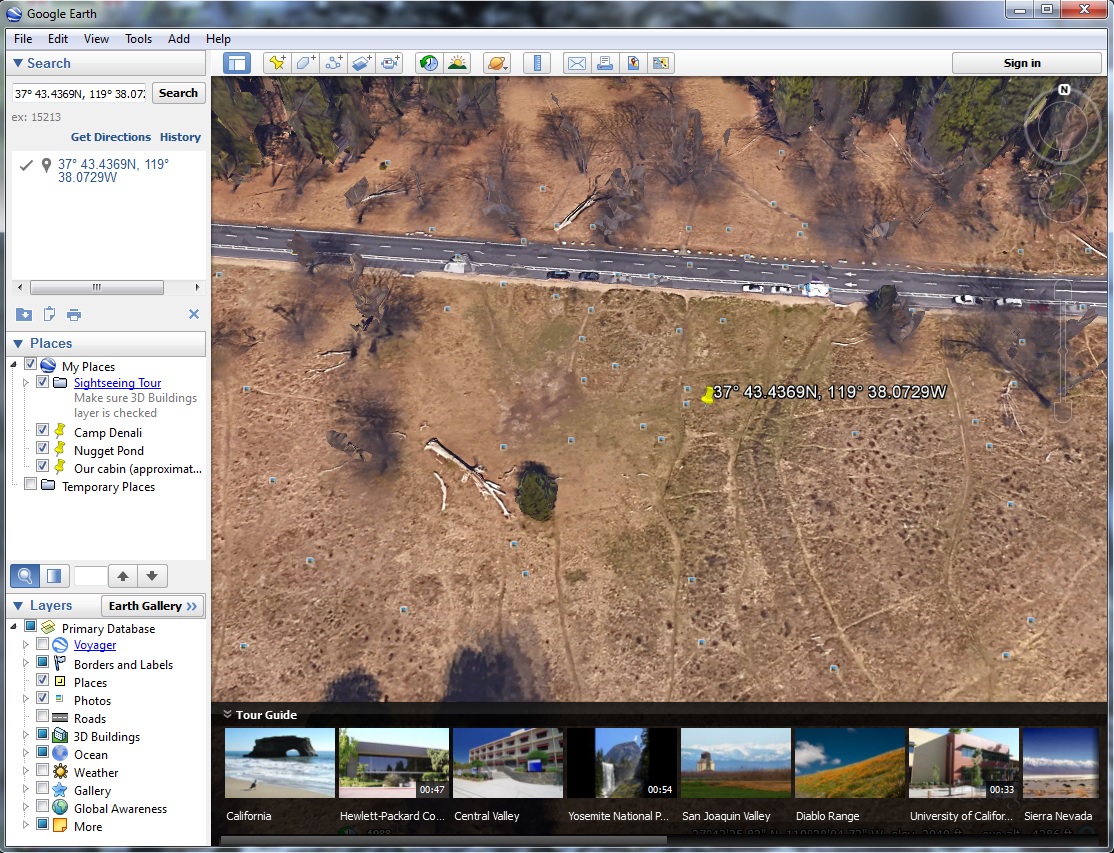
Photo location in Google Earth for the image of three women and Cathedral Rocks. Click to see a larger version.
The GPS coordinates from the GPS-E2 are in the same format as the coordinates from the Canon 7D Mark II. I converted them in the same way as I described above (replacing the comma with a degree symbol) and dropped the coordinates into the Google Earth search box. Google Earth found the location, again marked with a yellow pin. The evergreen tree to the left of the women in the photo and the large, dead, downed tree behind them are clearly visible in this Google Earth image.
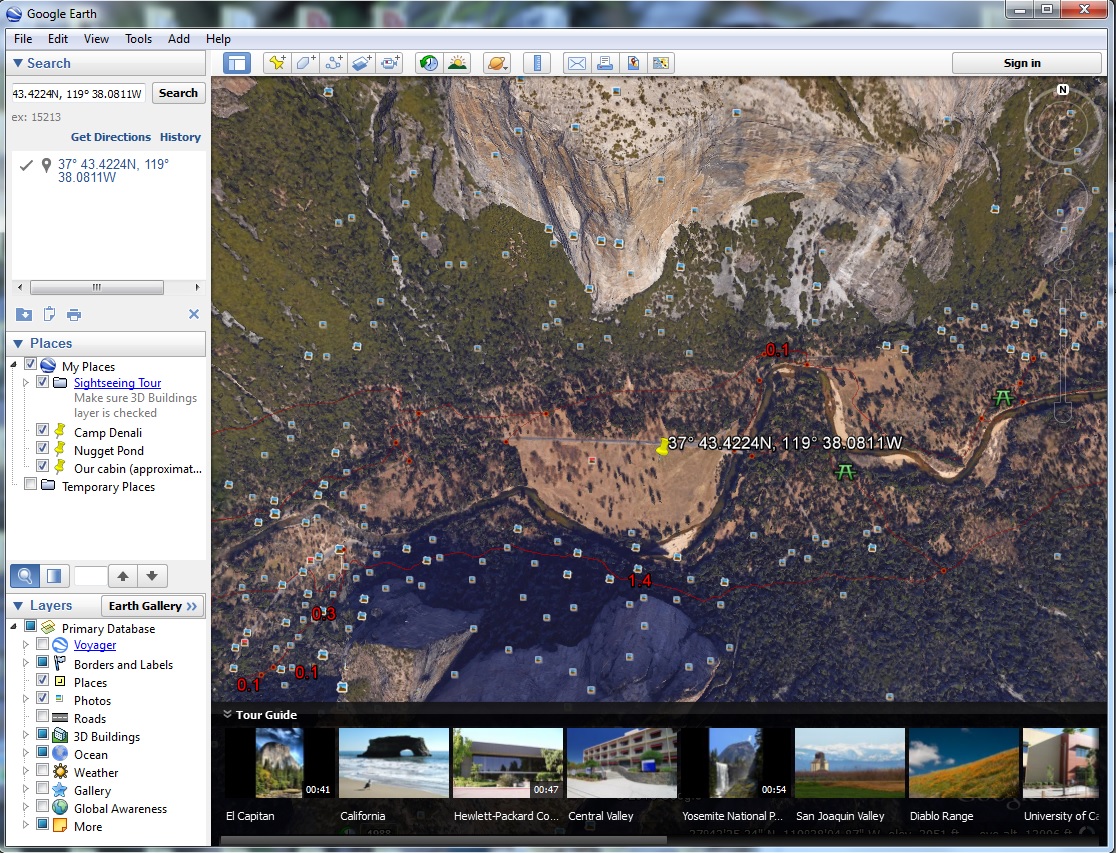
Photo location in Google Earth for the image of three women and Cathedral Rocks. Click to see a larger version.
Zooming out in Google Earth gives me a view of the whole meadow and the surrounding area. El Capitan is at the top of the image. Cathedral Rocks are visible at the bottom. They are mostly in the shade in this day time satellite view.
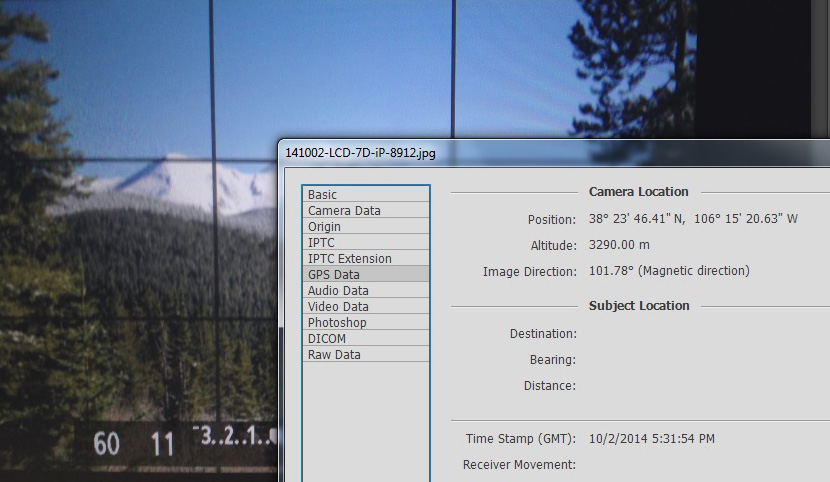
Apple’s iPhone and some other cameras provide GPS coordinates in a different format. This is an example from another article in this series. The coordinates for the Antora Peak photo are in degrees, minutes, and seconds. Google Earth understands this form of the coordinate system too.
Open Google Earth and drop the GPS data (38° 23′ 46.41″ N, 106° 15′ 20.63″ W) into the search box. The GPS data needs to be entered into Google Earth with all of the correct notations, including the degree symbol (°).
Photo Data: El Capitan. October 25, 2015. 9:41:34 pm PDT. Canon 7D Mark II. Canon EF 15mm f/2.8 lens. 15 seconds, f/5.6, ISO 800.
Photo Data: Cathedral Rocks. October 25, 2015. 10:02:13 pm PDT. Canon 5D Mark III with Canon GPS-E2 Receiver. Canon EF 17-40mm f/4 lens at 17mm. 30 seconds, f/5.6, ISO 800.
GPS Series Links
The Why and How of Adding GPS Information To Your Photos
Using Google Earth to Find the Name of a Mountain (and How to Get GPS Info Into Google Earth)
Checking the GPS Location Accuracy of Your Camera, Part One
Checking the GPS Location Accuracy of Your Camera, Part Two
More Links
Canon GPS Receiver GPS-E2 for use with the Canon 5D Mark III, Canon EOS-1D X or Canon 7D. More GPS-E2 compatibility information at the Canon web site. The Canon 7D Mark II has a built in GPS receiver which is one reason I upgraded from the 7D to the 7D Mark II.

