The most important and difficult step in night photography is to focus your lens at infinity. If you have tried to focus on the stars at night you have already learned that it is an impossible task for the autofocus system and just about impossible for you to do manually. You just can’t see clearly enough through the viewfinder in the dark of night to manually focus on the stars. Fortunately, there are some ways to get the job done.
Originally posted Jan. 8, 2017. Revised and expanded Feb. 10, 2017.
Red Headlamp
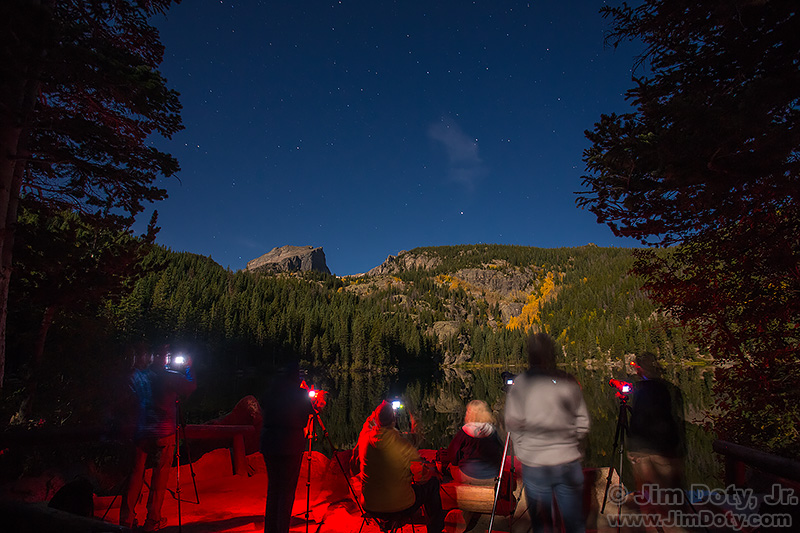
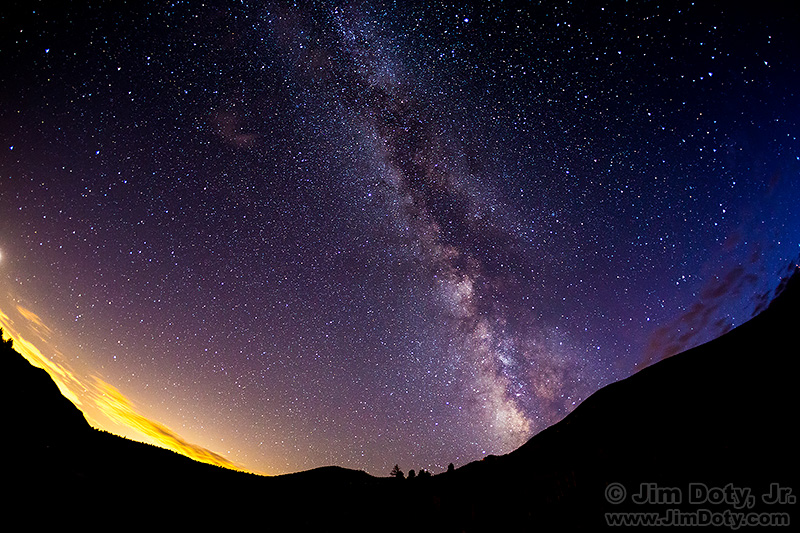
For starters, if you are going to do photography at night you will need a red headlamp. It will make things much easier for you and it is a courtesy to everybody else. Everybody in the photo above has a red headlamp. It is standard practice at all my workshops when we go out at night, and it is standard practice for most other photographers that shoot at night. Last September at Sprague Lake there were a bunch of folks doing night photography. Someone started around the lake with a white flashlight on. All around the lake voices yelled “Turn the flashlight off.” Why? It takes 20 – 30 minutes for your eyes to dark adapt and see well at night. If someone turns on a white light for just a moment, everyone is going to have to wait another 20-30 minutes to dark adapt again to take pictures. Be sure you get a headlamp that has separate switches for red and white. You don’t want a headlamp that makes you cycle through white to get to red. At Home Depot you can buy a basic headlamp for about $20. If you look through the plastic of the different packages you can actually see the type of headlamp that has two switches and one is painted red. That is the one you want.
Lenses With No Distance Scale
The worst case scenario for night photography is having a lens with no distance scale. But you can work around that.
First, zoom your lens to its widest focal length and leave it there. The infinity setting on a zoom lens changes with the focal length, so use the widest focal length and don’t change it.
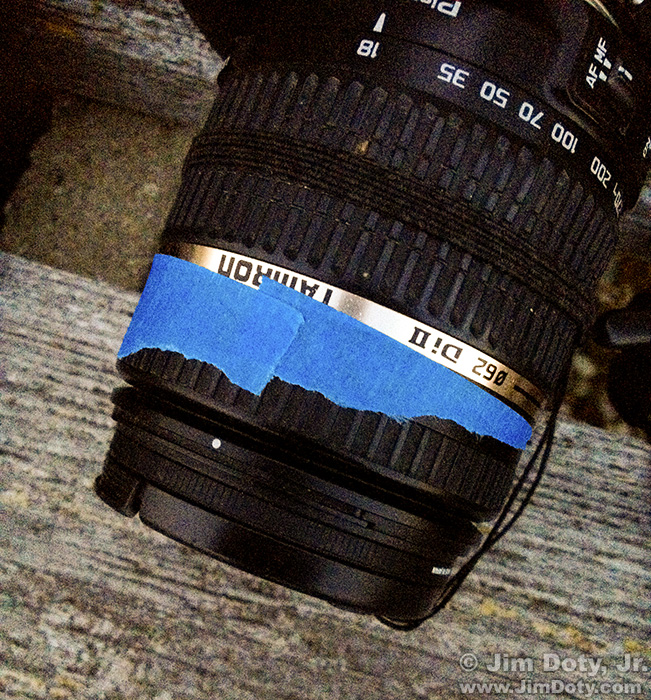
The key is to focus on something that is at infinity while it is still light enough to see. The ideal subject is the distant horizon where water and sky meet. Second choice would be a distance mountain range. With a tripod mounted camera, focus on the horizon with autofocus turned on. Then turn autofocus off and take a picture. Magnify the image on the back of the camera to make sure the horizon is sharp. If it is, tape the lens focusing ring so it doesn’t move. You are now set for the rest of the night. If the horizon isn’t sharp, start all over again. Focus, take a picture, magnify the image, and check for sharpness. Keep at it until you get a sharp image of the distant horizon. Then tape the focusing ring on the lens. Now wait for night to photograph the stars.
If you have a zoom lens with a distance scale, you will use part of this technique in the steps you will take below.
What if you wait until too late in the day and it is too dark to focus on the distant horizon? Read the next section on trial and error.
Finding Infinity by Trial and Error
What if you have no distance scale and you arrive on site too late to focus on the distant horizon? Or what if you accidentally bump the focus ring and mess things up? You can try and find infinity focus by trail and error.
Start by guessing where infinity might be. To do that, turn the focus ring in the direction of infinity as far as it will go. Then back off about 1/8 of an inch and take a picture of some bright stars. Magnify the image and see if the stars are tiny points of light. If they are, don’t touch the focusing ring for the rest of the night. You are good to go. If you have gaffers tape, tape the focus ring in place.
If the stars aren’t tiny point of light, turn the focus ring a tiny bit, take another picture and see if the stars are better or worse. If they are better turn the focus ring a tiny bit more in the same direction and try again. If the stars look worse than in your first picture, turn the focus ring a tiny bit in the other direction. Keep experimenting, turning the focus ring just a tiny bit each time until you finally get to the point that the stars are tiny points of light. Yes, this is a pain to do and sometimes it takes a long time.
Prime (Single Focal Length) Lenses With a Distance Scale
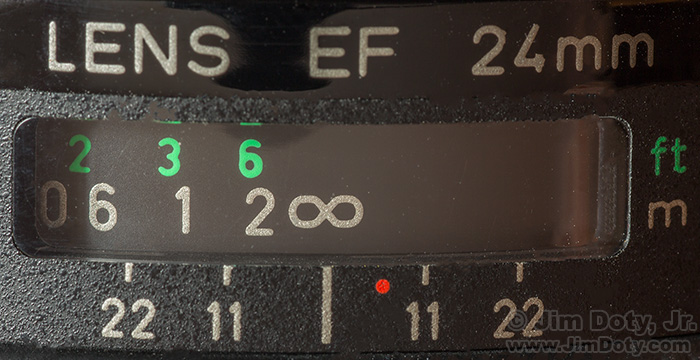
Single focal length (prime) lenses are as good as it gets for night photography. Turn off autofocus. Turn the focusing ring until it stops at infinity. It is as simple as that. You are all set for the night.
For the image immediately above the focus ring was turned until it stopped at infinity. You can see the infinity symbol is directly above the distance index mark. The lens is all set for night photography. These lenses are so simple to focus on infinity that some photographers buy primes lenses just for night photography. Plus prime lenses are faster so you can use shorter shutter speeds or lower ISO settings.
Zoom Lenses With a Distance Scale
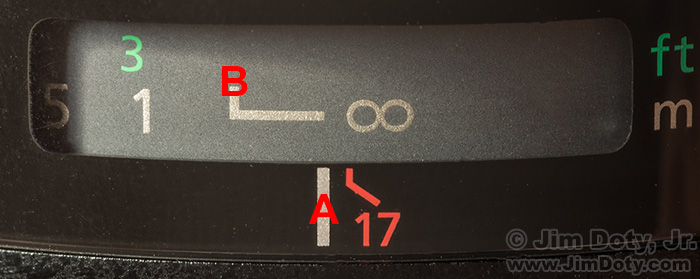
Unfortunately, unlike prime lenses, zoom lenses can focus beyond infinity. When focused beyond infinity everything in the photo will be blurry. The photo immediately above is the distance scale of a Canon 17-40mm zoom lens. The focusing ring was been turned manually until it stopped. The infinity symbol on a zoom lens, unlike a prime lens, does not mark infinity. You can see the infinity symbol with a horizontal line to the left which ends at a short vertical line. That short vertical line, marked with a red B, is where infinity is supposed to be in this lens, more or less. The distance index mark, indicated with a red A, is opposite the end of the horizontal line so this lens is focused well beyond infinity. All photos will be blurred at this setting.
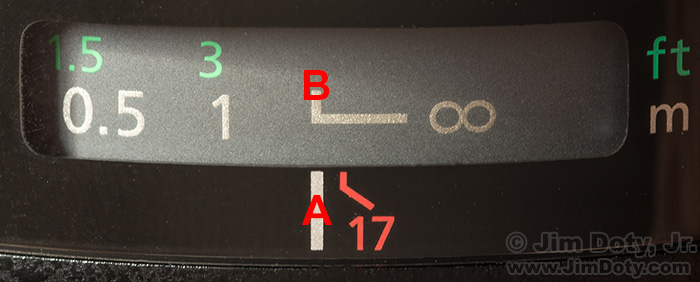
In this photo the lens is focused on infinity, at least theoretically. The vertical infinity line, marked with a red B, is directly above the distance index mark, indicated with a red A. That means this lens is supposed to be focused on infinity. However it may not be. The actual location of infinity varies with the temperature and the focal length you have chosen. That is why you can focus beyond infinity, to allow for differences in temperature and focal length. In the daytime this doesn’t matter because you can autofocus and you can see to focus manually. Neither option works at night. So what do you do?
You begin by photographing the horizon as described farther up in this article in the section for zoom lenses with no distance scale. Set your lens to its widest focal length. Focus on the horizon, turn off autofocus, take a picture of the horizon, then make sure the photo is sharp. Keep at it until you get a sharp image of the horizon. Then check the focusing scale and see where things line up. Remember how it looks. From now on you can line up the distance scale in the same way and be focused on infinity without having to do the photograph the horizon thing.
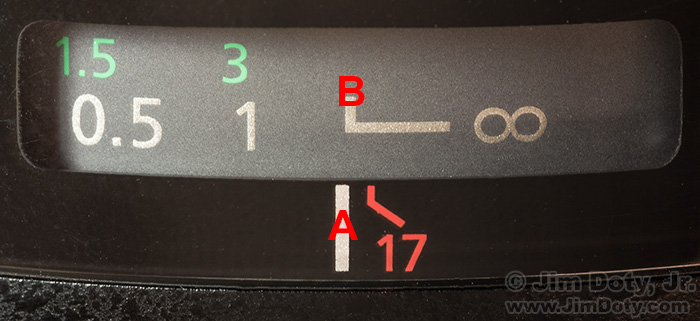
This photo is how my distance scale lines up when the lens is focused perfectly on the distant horizon, i.e., at infinity. Note how the infinity line (red B) is just to the right of the distance index mark (red A). If I want to take pictures of the night sky in normal temperatures, I have to line up the distance scale just like this. I always use this lens at 17mm for night sky photography. Why? At different focal lengths the distance scale lines up at a different place. I don’t want to keep track of multiple alignments for different focal lengths.
The distance scale alignment in the photo above only works when I am shooting around a temperature of 60-80° F. Infinity on the distance scale changes with the temperature. That is because lenses get smaller at colder temperatures so the distance scale alignment changes. At 35 degrees I line up the distance scale differently than at 80 degrees.
Every lens is different so you will have to figure out the right alignment for your lens. For night sky photography, use your lens at its widest focal length, figure out where infinity really is, then check where your distance scale lines up. Once you have that figured out you can set your lens that way every time – or at least unless the temperature drops by 50 degrees.
Keep in mind that focal length (17mm, 40mm, 50mm etc) is different than the focused distance (30 feet, 100 feet, infinity, beyond infinity). At some of my one-on-one sessions I have met new photographers who confuse “focal” length and “focus” point.
Magnified Focus in “Live View” Mode
If your camera can do this, this is the best way to find infinity. Most digital cameras don’t see well enough at night to use “live view” mode with a magnified focus. If yours does, use it. Point the camera at a bright star. Turn off autofocus. Turn on live view mode. Magnify the image to 10X magnification. Focus manually on the star. Switch back to a normal, non-magnified view. Now you are all set for the rest of the night. An example of magnified focus in live view mode is in this article.
Link
How To Get Critical Focus in “Live View†Mode with a Magnified Image

