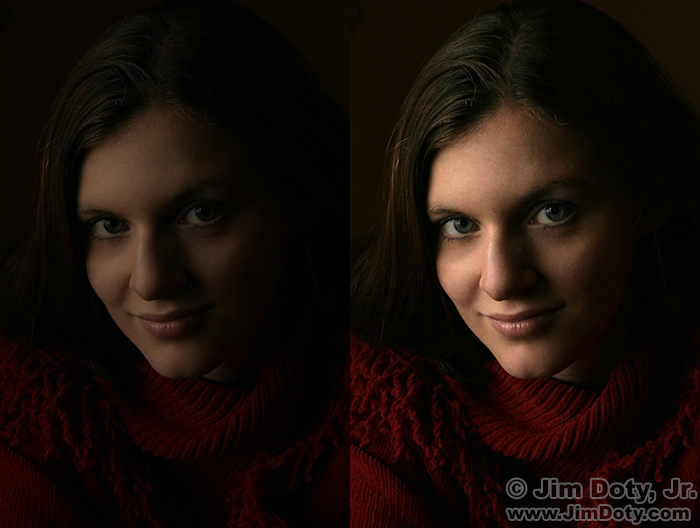
Levels is a powerful tool and relatively simple to learn. Levels provides a quick, simple, and effective way to correct basic exposure problems. This tutorial will show you how to adjust the exposure of your images with levels.
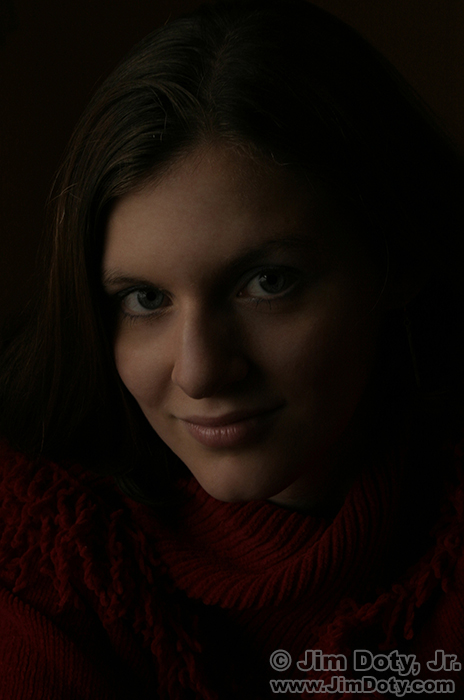
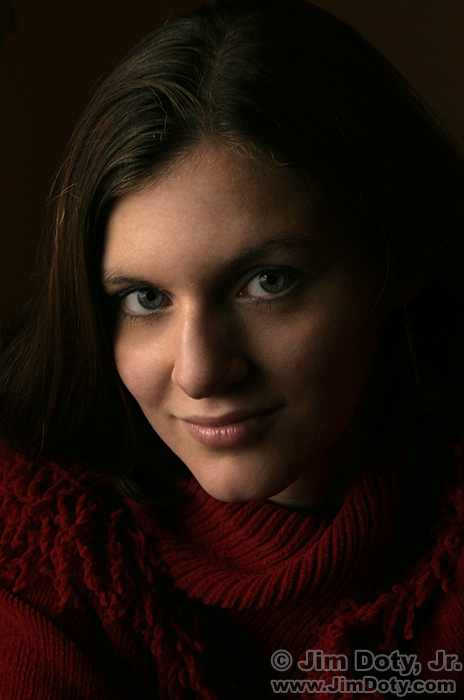
Some version of “Levels†can be found in most varieties of imaging editing software, including Adobe Photoshop and Adobe Photoshop Elements. It is a pretty universal tool. The photo of Rachel is seriously underexposed, so I used Levels to lighten the image. It took less than 30 seconds.
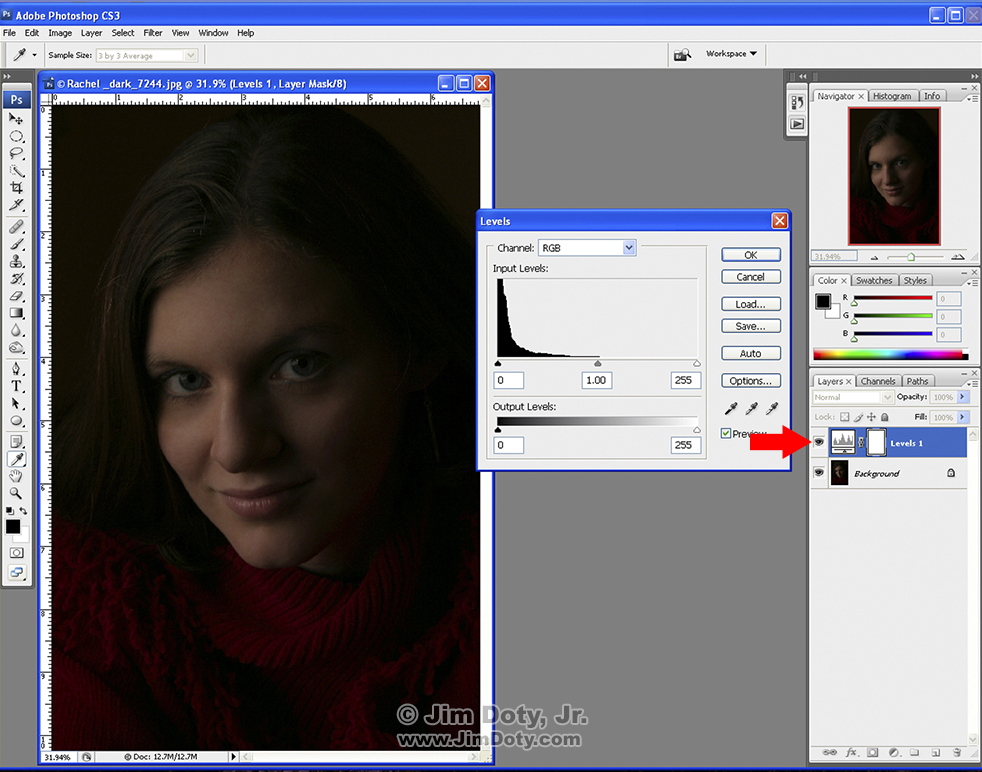
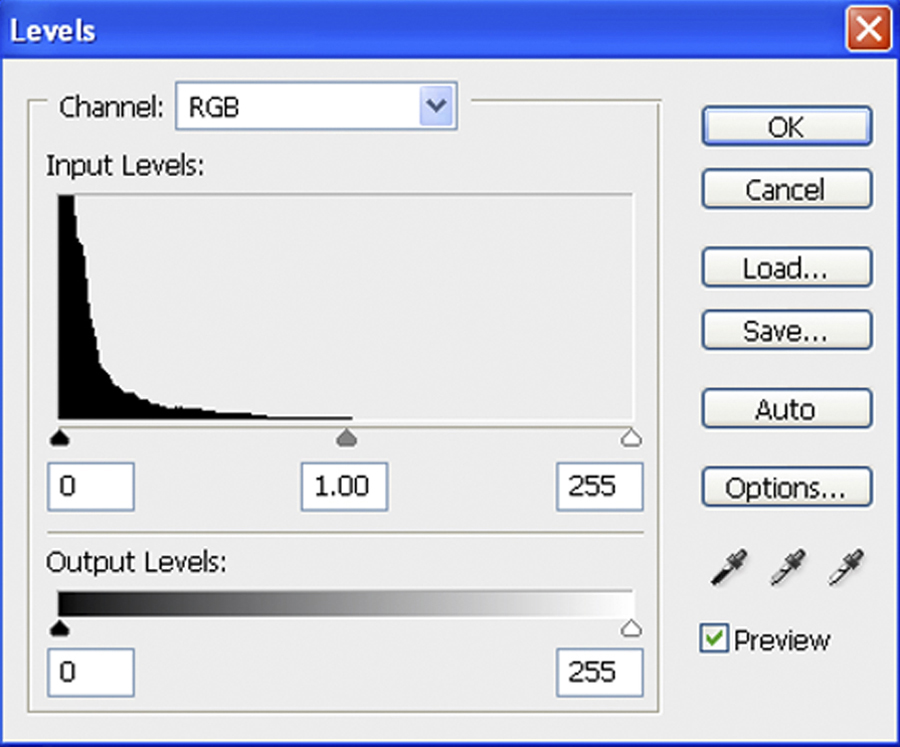
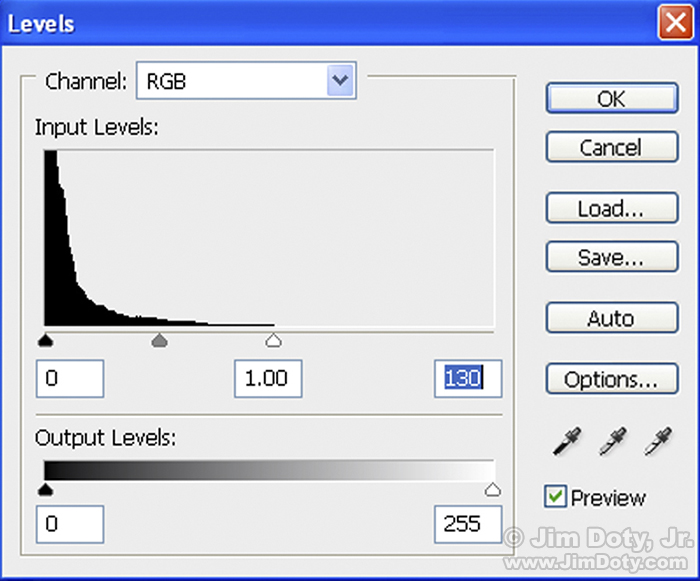
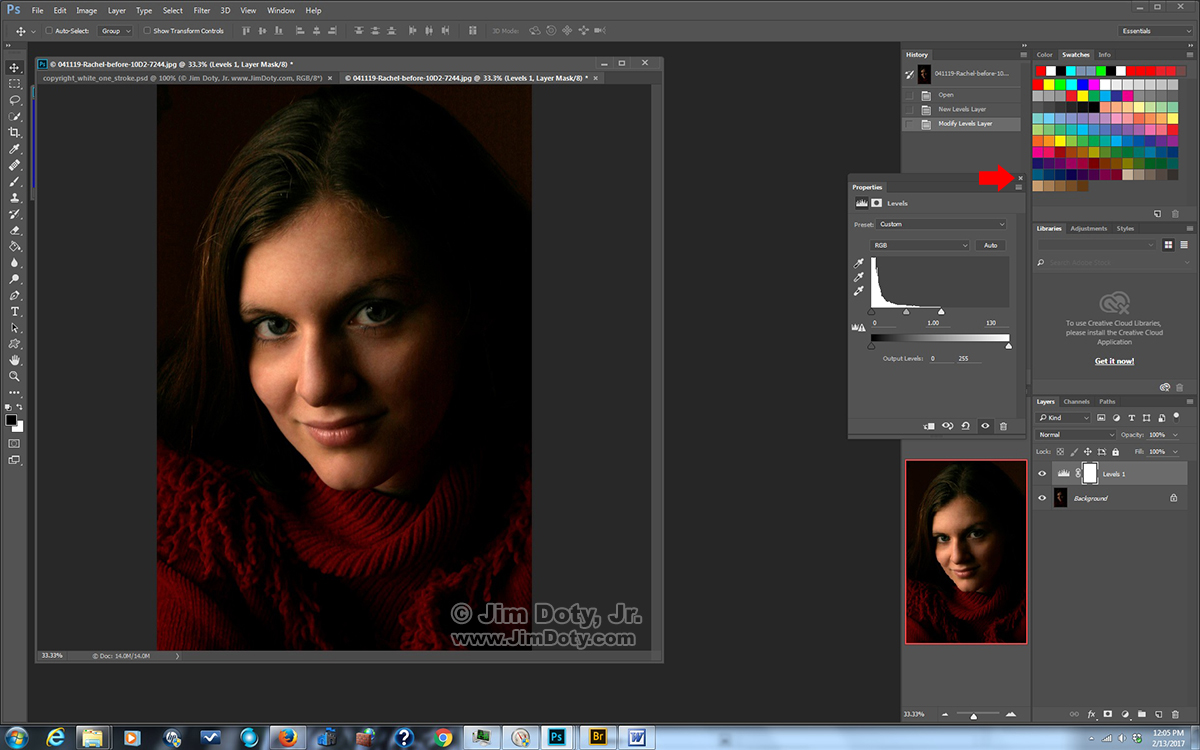
With Rachel’s image open in Photoshop, I created a Levels Adjustment Layer. “Non-destructive editing†allows you to alter the appearance of an image without changing the original image, so adjustment layers is the best way to go. In Photoshop’s menu, choose Layer > New Adjustment Layer > Levels. For other software you will find the Levels Adjustment Layer somewhere in the menu system. A dialog box will open like the one immediately above. On the right side you can see the new Levels layer (red arrow) just above the Background layer (the original image).
Before you make any exposure changes, make sure the Channels drop down menu at the top is set to RGB (not to one of the separate color channels: Red, Green, or Blue). Make sure the Preview box is checked so you can watch the changes as you make them. After you have made changes you can see the original image by unchecking the Preview box. Note the original values of the three sliders before you make any changes: 0, 1.0, and 255.
The histogram in the dialog box shows most of the pixels bunched to the left, which is what you would expect for a very dark image. Under the histogram there are three triangles. These are your primary tools. The black triangle or “slider†indicates the black point in the photo. Any pixels directly above and to the left of the black triangle will be black in the image. The white triangle indicates the white point in the image. Any pixels directly above or to the right of the white triangle will be white. The gray triangle or “gamma slider†represents a medium tone.
If you grab the white triangle and move it to the left (point at the triangle with your mouse, click and hold, then drag), you will lighten the image by resetting the white point. If you grab the black triangle and move it to the right, you will darken the image by resetting the black point. Moving the gamma (gray) triangle to the left or right will lighten or darken the pixels in the middle range of the image. The three sliders affect each other. If you grab the white triangle and move it to the left, the gamma slider will move to the left also.
I made one simple change in the dialog box to lighten the photo. I grabbed the white triangle and moved it to the left until it was just under the pixels in the histogram that were the farthest to the right, resetting the white point to match the lightest pixels in the image. The gray gamma slider moved to the left on its own. The value of the right slider changed from 255 to 130. The other values did not change because I did not manually move the sliders. This gave me the image I wanted so I clicked OK which closed the dialog box.
The one slider change I made was all that I needed to do, but sometimes you need to do more. Experiment by moving the black point slider and the gamma slider to get the look you are after in your image.
One of the advantages of non destructive imaging (the reason for creating an adjustment layer rather than applying Levels to the original image layer) is you can go back and start all over, or tweak the changes you already made.
This is Rachel after the change to the Levels Adjustment Layer (but using a different version of Photoshop). If you like what you did in the Levels dialog box click the X (red arrow) in the box to close the box. Save your image as a PSD file complete with the Levels Adjustment Layer. You can open it again any time and tweak the Levels Adjustment Layer. Don’t “Flatten” the image before you save it or the Levels change will be applied to the original image so you will no longer have your original image (and you will also lose the Levels layer).
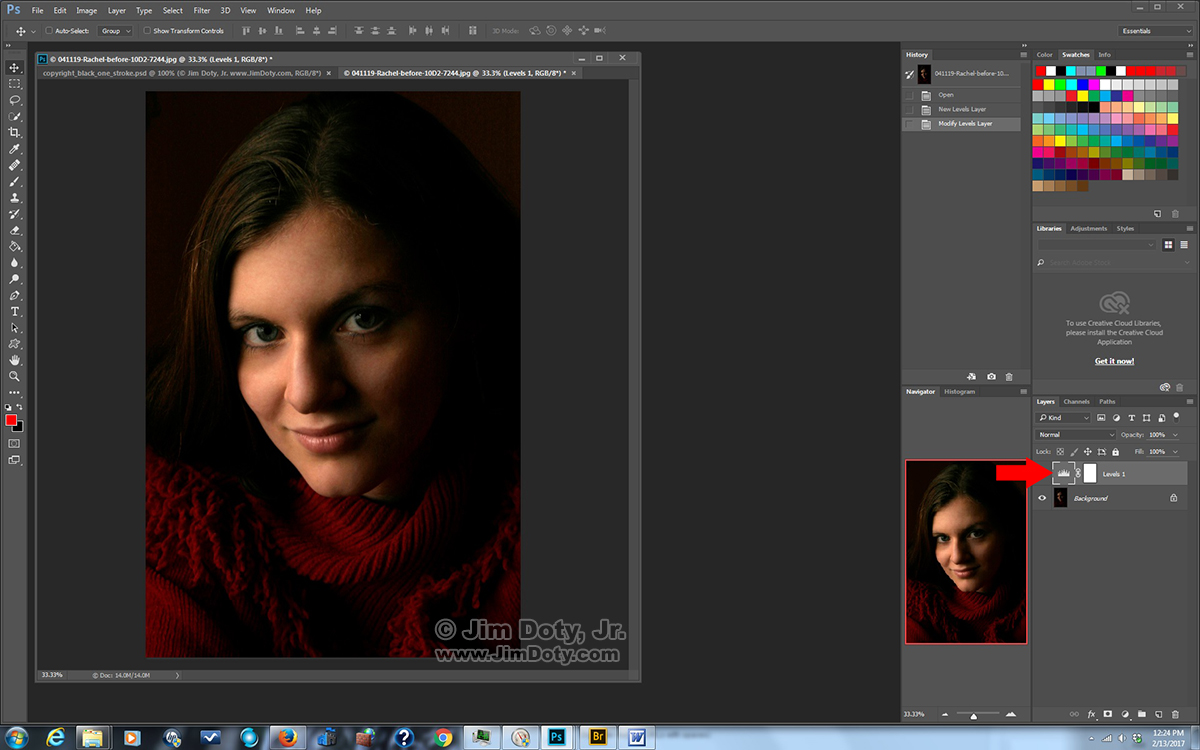 So what if you want to change what you did? Open the image again. Your original image will still be there (Background layer) along with the Levels Adjustment Layer (Levels 1). If you double click the tiny histogram icon (red arrow) in the Levels layer, the dialog box will re-open. You can then change the Levels sliders any way you want and re-save the image. Or you can drag the Levels layer to the trash can (lower right) and start all over.
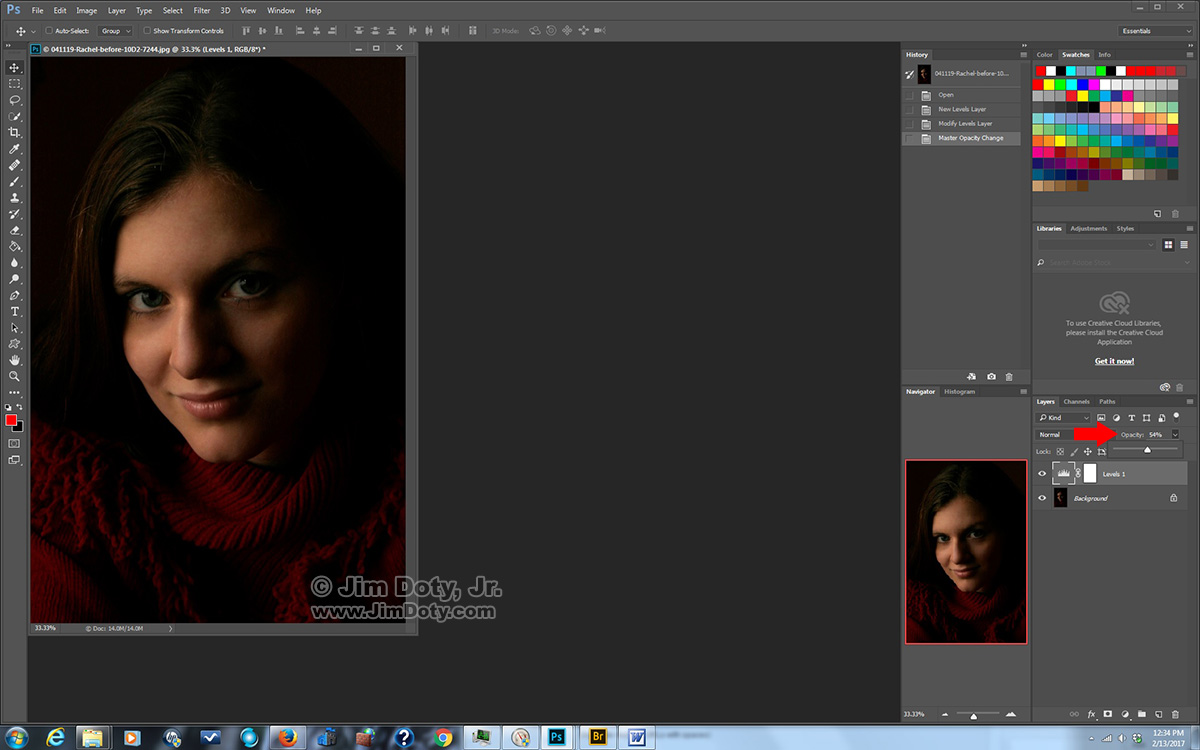
You have a third option if you like the effect (the Levels change) but want to tone it down a bit (or a lot). In this case let’s say you want Rachel to be lighter than the original image but darker than the corrected version. Click the Levels Adjustment Layer (called “Levels 1”) to make sure it is the active layer. Go to the Opacity box (red arrow) and click the down arrow to get the Opacity slider. Drag the white triangle to the left to reduce the opacity of the layer. You will see the percentage drop from 100% to wherever you decide to leave it. In effect you are weakening the strength of the layer. The farther to the left you go, the darker Rachel will get. If you go all the way to the left (0%), you have reduced the strength of the layer to nothing so you are back to the look of the original image.
This neat little trick works with any correction layer in the layers panel. By reducing the Opacity you reduce the strength of the layer.
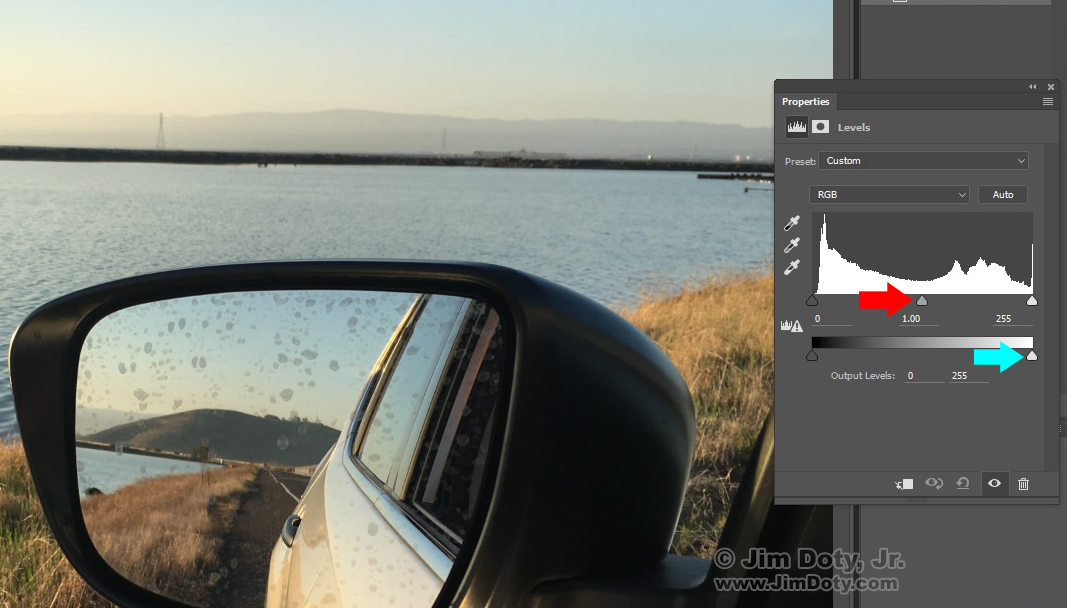
What do you do if a photo is too light? Open the photo in Photoshop (or your favorite image editing software) and create a Levels Adjustment Layer just like we did for the prior example. If the mid-tones in the image are too light, grab the gamma slider (red arrow) and drag it to the right. If the lightest tones in the image are too light, go to the output scale (which has a black to white gray scale and two sliders) and grab the white output slider on the far right (cyan arrow) and drag it to the left. That is all there is too it.
Not every photo can be saved by Levels.
If your image is too far overexposed, you will not be able to save it with a Levels Adjustment Layer. You have more of a chance of saving seriously over-exposed images if you shoot RAW files instead of JPEG files and process the RAW files with Adobe Camera Raw. While ACR can save overexposed RAW files that are beyond the reach of Levels, there are some photos that are so far gone they just can’t be saved. One of the best ways to protect against over exposed images when you are shooting is to turn on the blinkies in your camera.
On the other hand, if your images are too dark, Levels can lighten them up but they might have a lot of digital noise. The better your in-camera exposures are the less tweaking you will need to do in levels. And the more accurate your exposures the better the colors in your images will be.
Like any other tool, the more you use Levels the better you will get. Practice on a variety of images to get a feel for what Levels can do.
Originally posted Feb. 13, 2017. Updated Feb. 18, 2017.
Related Links
Exposure Warning: Turn On The Blinkies
The Best Colors Come From the Best Exposures
The RAW vs JPEG Exposure Advantage
ACR and RAW: Two of the Best Things You Can Do For Your Images

