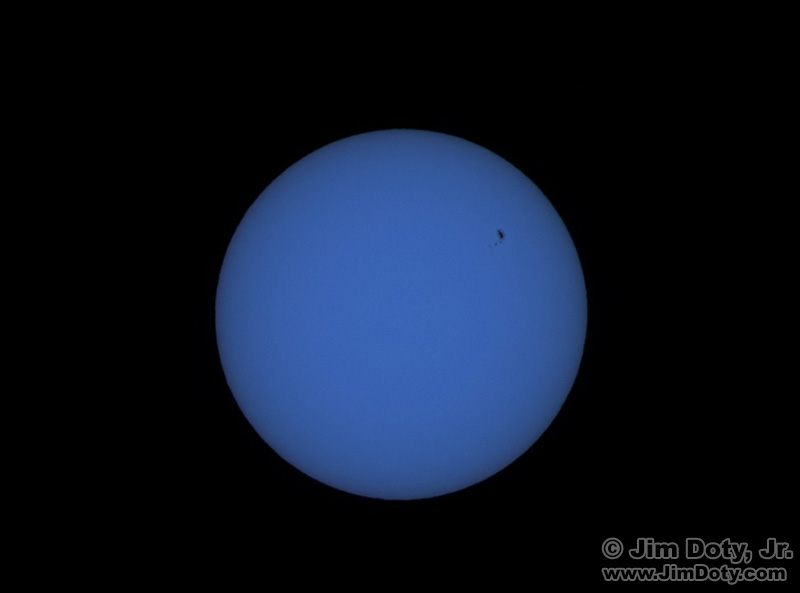
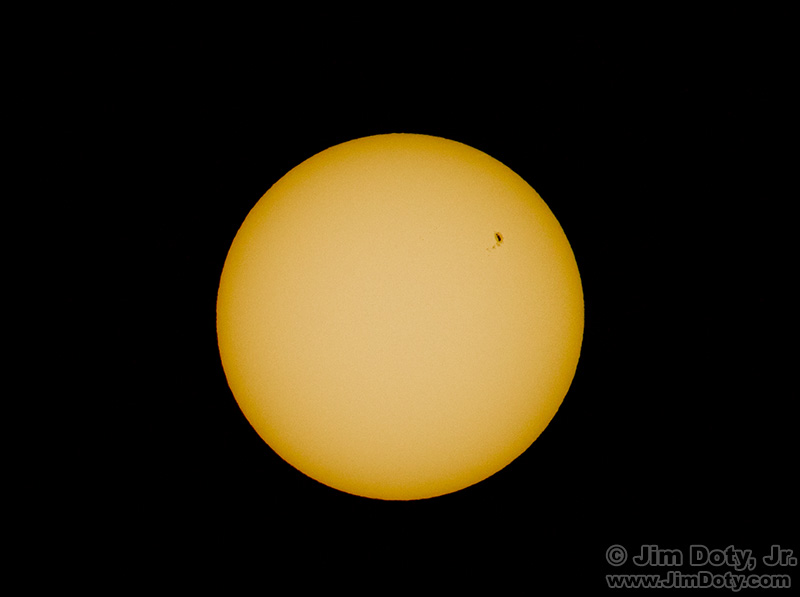
If you have been following my eclipse series all along, you ordered your solar filter from Thousand Oaks Optical long ago and you will get a yellow sun in your images. If you didn’t, my second choice is a Lee Solar Filter which is optically excellent but turns the sun blue. So how do you process a blue sun to get a yellow sun?
If You Need Eclipse Supplies, Order Now Before It is too Late
First, a brief side excursion. If you haven’t ordered a solar filter and you want one, do it now while you can still get one. As of July 9, Thousand Oaks Optical (my first choice) no longer promises delivery of a solar filters in time for the eclipse August 21. The last time I checked, you could still get a Lee Solar Filter (my second choice) from Adorama. You will also need a filter holder and an adapter to match the filter holder to the front of your lens. Everything you need to know, with links, is in this article: Solar Eclipse Filters – Order Today Before It is Too Late.
If you want to watch the eclipse, now is the time to order eclipse glasses, goggles, or binoculars before you can no longer get what you want from a reliable manufacturer. Go here: Order eclipse glasses, goggles and binoculars at my Amazon powered photography store.
Processing a Blue Sun – The ACR Steps
The first step is to set your camera to shoot RAW files at the highest resolution. You will get better results.
Open the RAW file in Adobe Camera Raw (ACR). This is the secret sauce for all kinds of photography. ACR comes with Photoshop Elements, Adobe Photoshop, and Adobe Lightroom. The interface may look a little different, but the basic sliders are the same, and the processing engine is the same.
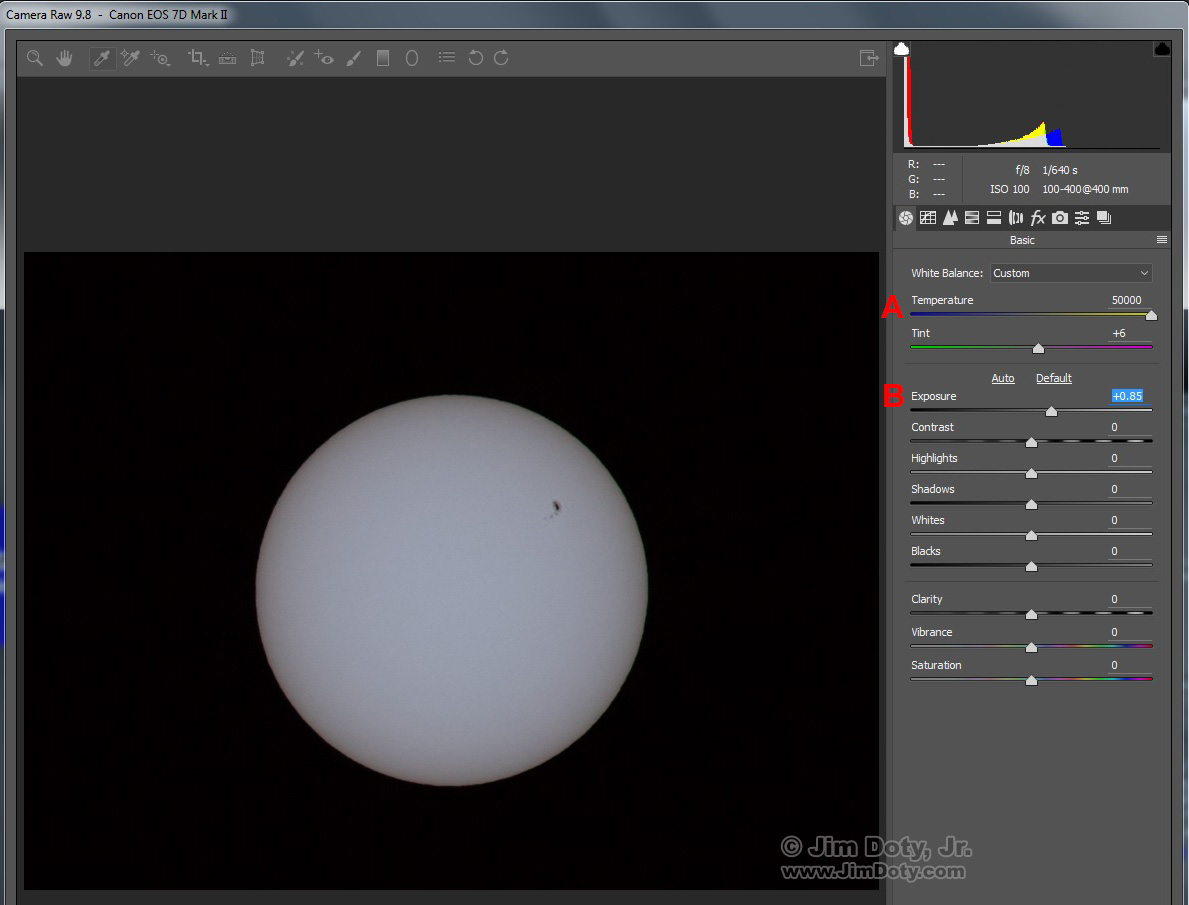
When the image is open in ACR, drag the Temperature Slider (red A) all the way to the right. This will neutralize most or all of the blue color. The Temperature slider changes the blue-yellow color balance.
You will not need to do anything to the Tint slider (green-magneta color balance).
If your image looks a little dark, drag the Exposure slider (red B, above) to the right. If the image looks a little light, drag the Exposure slider to the left.
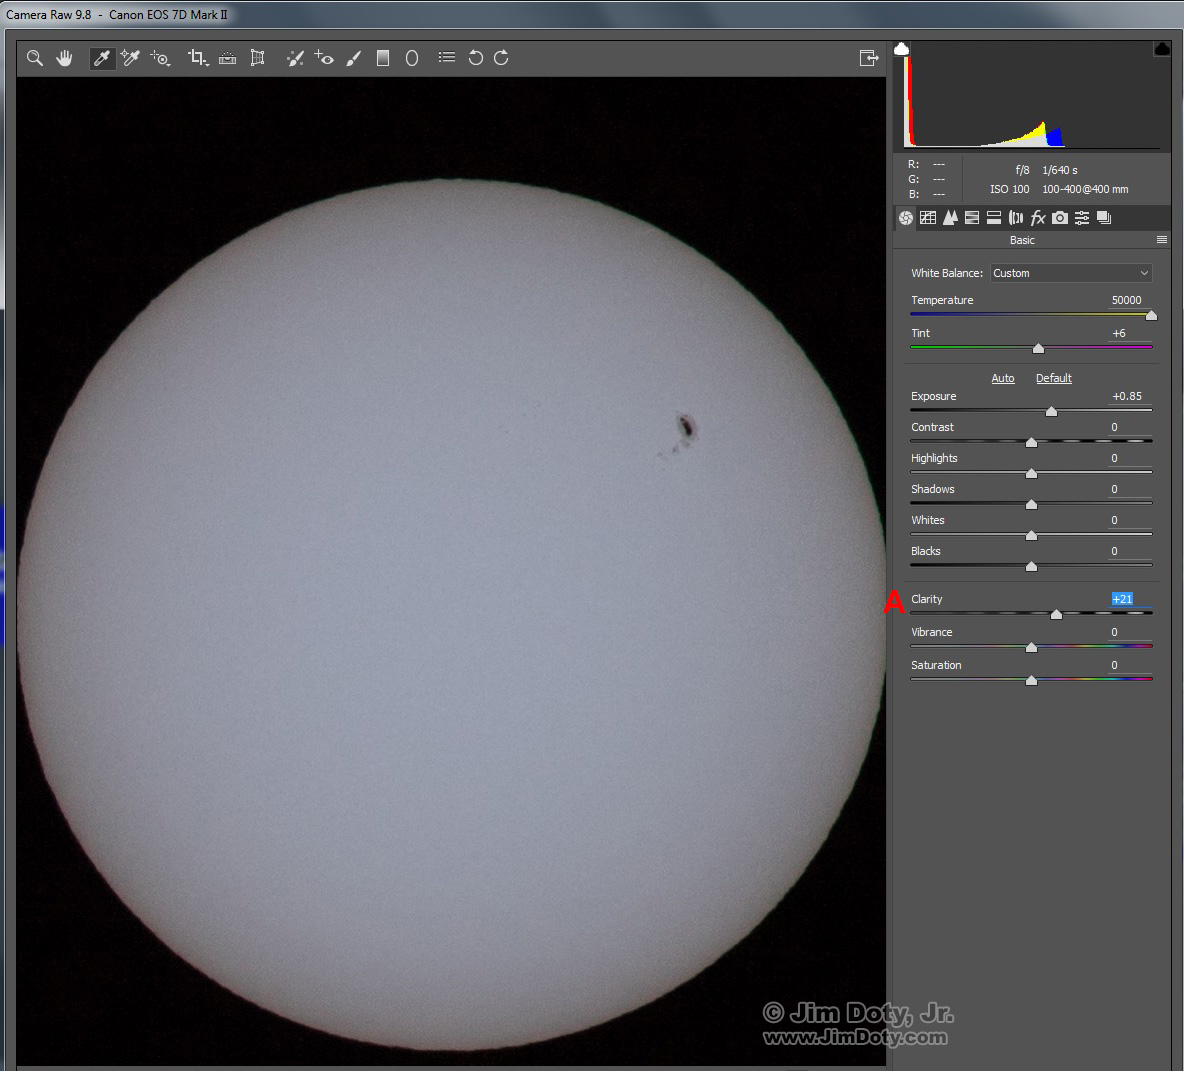
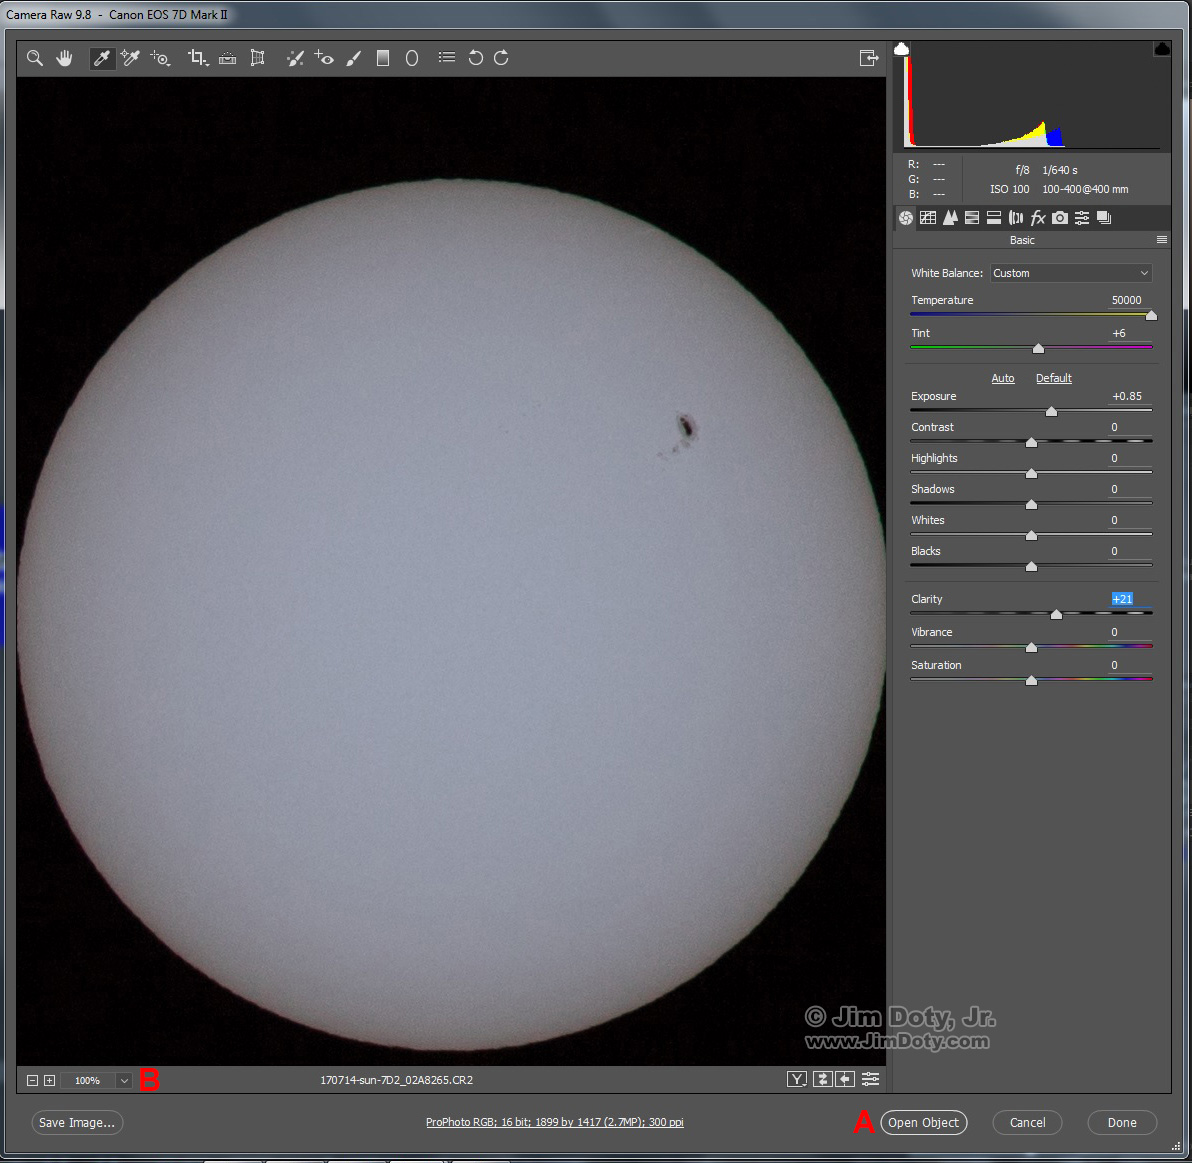
Most landscape images look better with a boost in Clarity. How much is a matter of individual taste. At the lower left of the ACR panel is a magnification drop down menu (red B in the image below). Change the magnification to 100%. Then drag the Clarity slider (red A in the image above) to the right to add a bit of crispness to the sunspots.
When the image looks just the way you want it, click Open Object (red A, image above) to send the image to Photoshop or Photoshop Elements.
Processing a Blue Sun – The Photoshop Steps
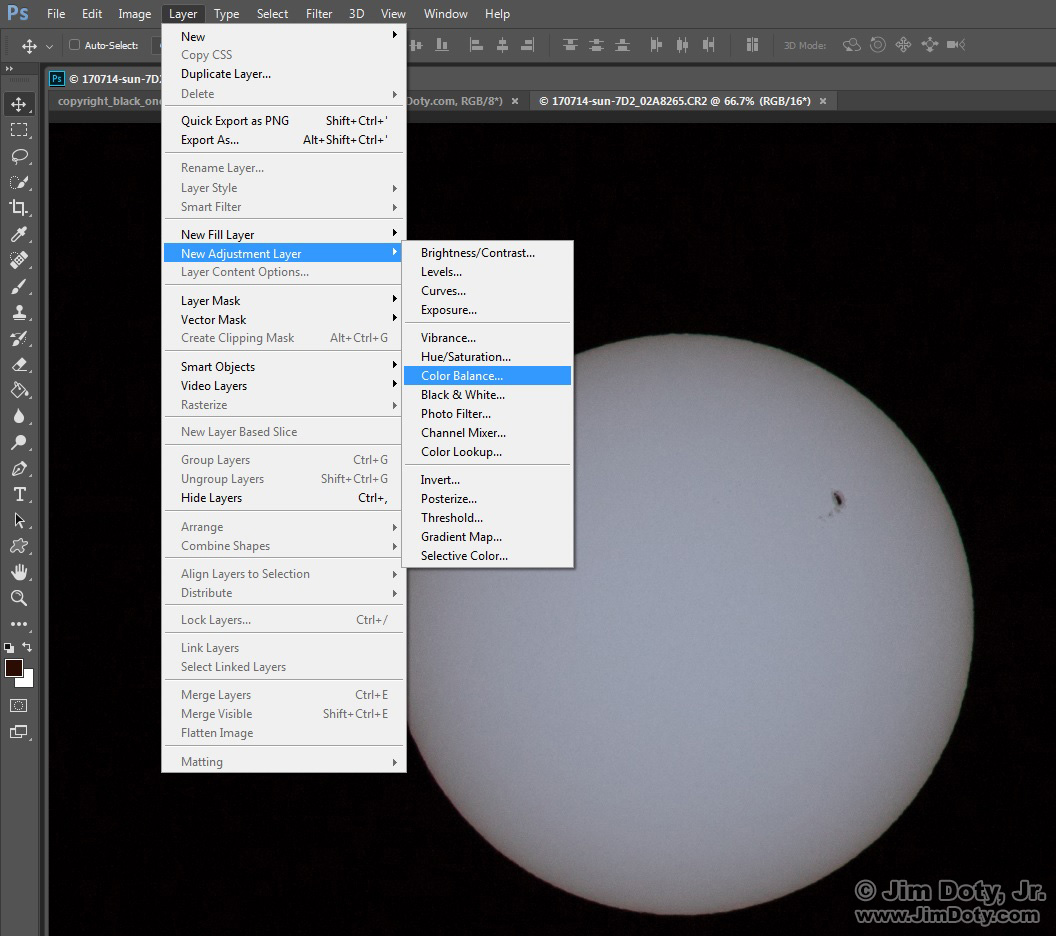
With the image open in Photoshop, create a Color Balance Adjustment Layer. Go to the menu at the upper left and choose Layer > New Adjustment Layer > Color Balance.
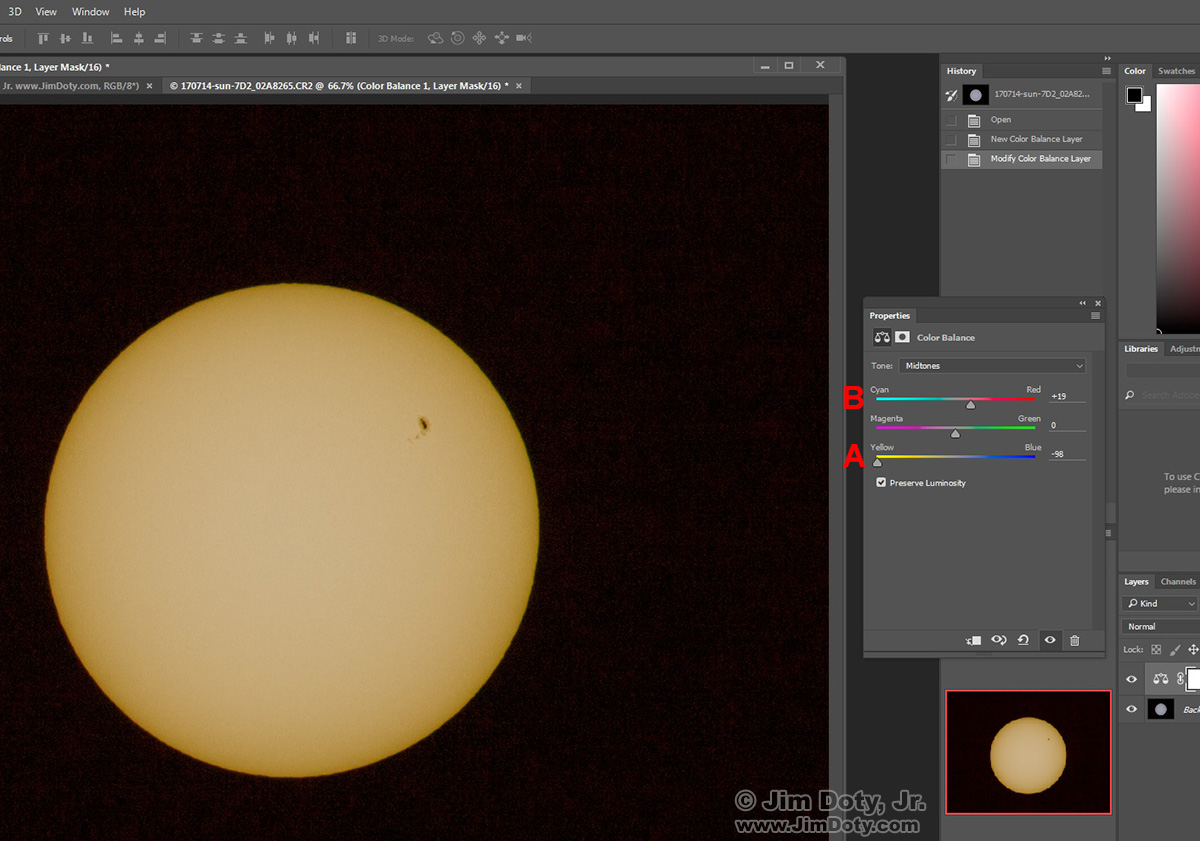
When the Color Balance Panel opens, drag the Yellow-Blue slider all the way to the left. Drag the Cyan-Red slider part way to the right. Color is a matter of personal taste so play with the sliders until you end up with the color you like. Click the small x at the top right corner of the panel to close it. Don’t worry, you can re-open the panel any time you want.
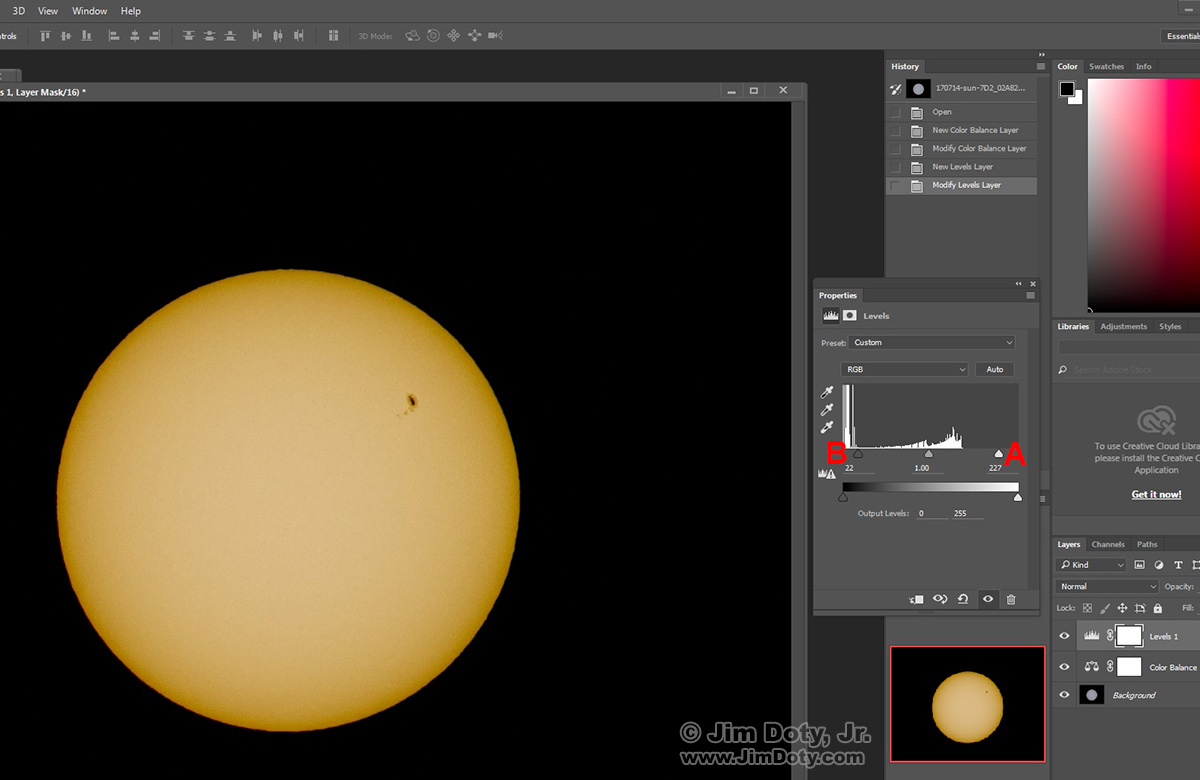
This image is still a bit dark so create a Levels Adjustment Layer. To do this go to the menu at the upper left and choose Layer > New Adjustment Layer > Levels.
When the Levels Panel opens, you will see a histogram in the middle with three triangle shaped sliders. Drag the white point slider (red A) to the left to lighten up the sun. Drag the black point slider (red B) to the right to darken the sun spots. You may not need to use the middle gray point slider. Play with the sliders until the image looks just the way you want.
Click the small x at the top right corner of the panel to close it. Don’t worry, you can re-open it.
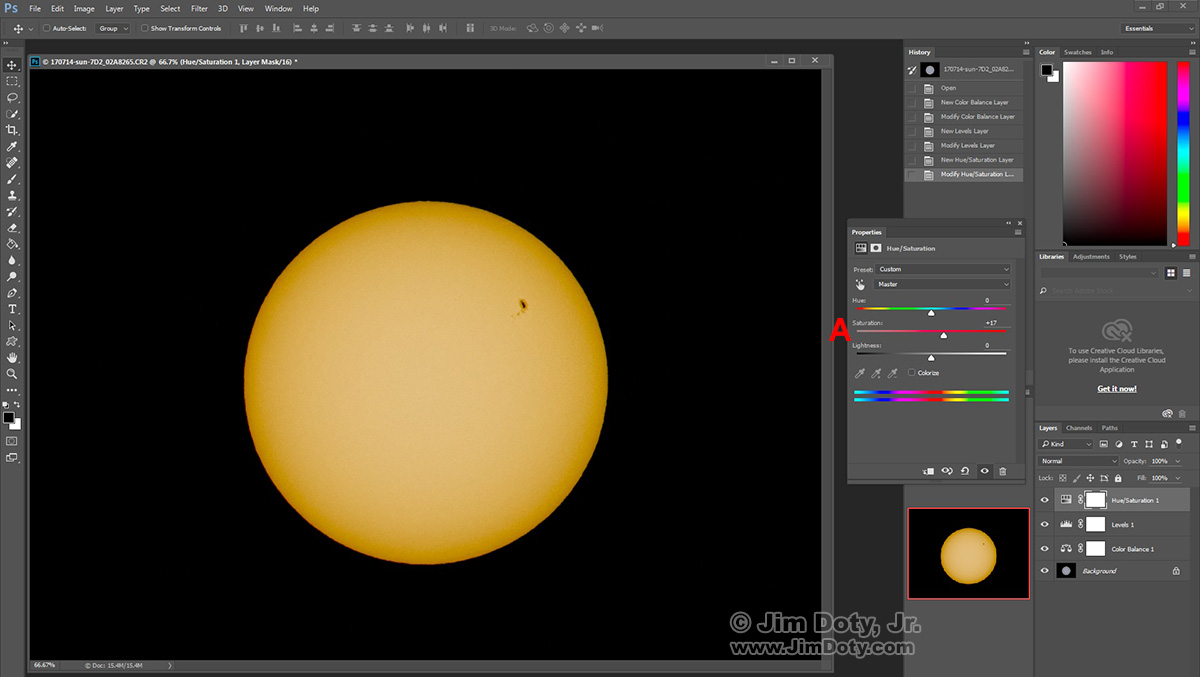
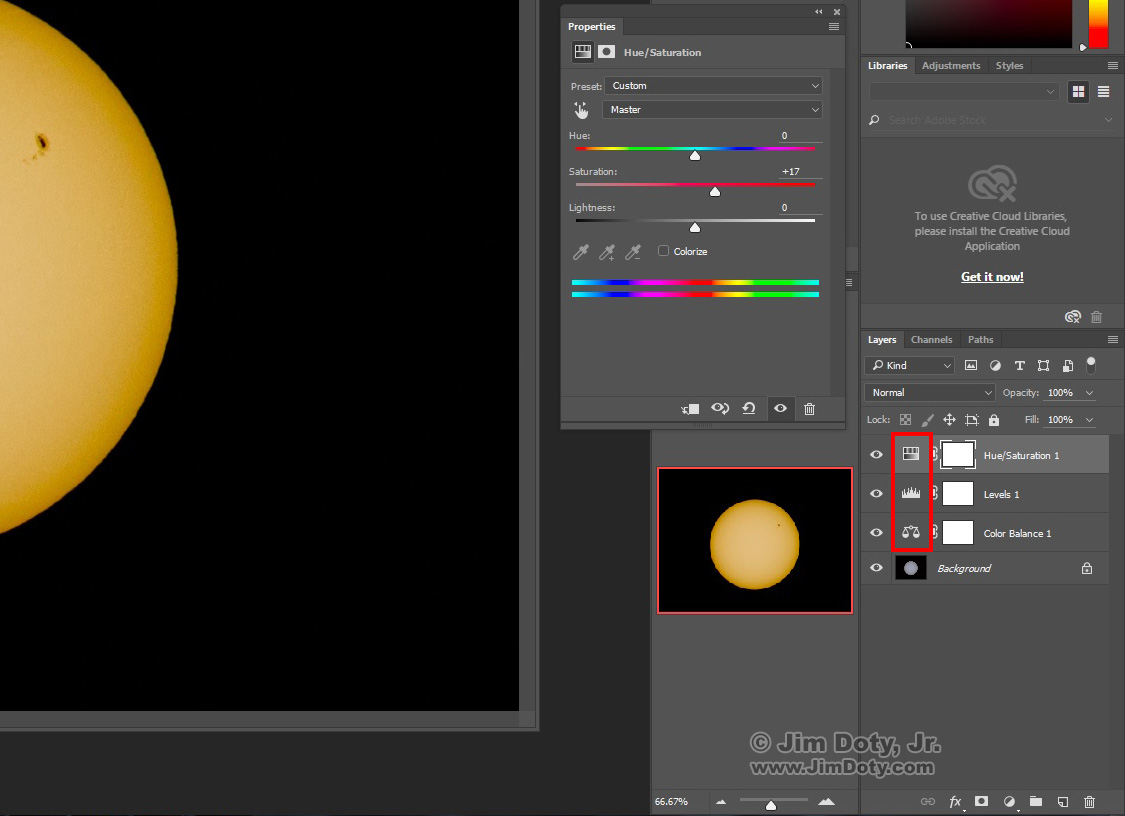
The image needs a color boost so create a Hue/Saturation Adjustment Layer. Go to the menu at the upper left and choose Layer > New Adjustment Layer > Hue-Saturation.
When the Hue/Saturation Panel opens you will see three sliders. Drag the Saturation slide (red A) to the right to boost the color. If you want to tweak the color, drag the Hue slider left or right. When everything is like you want it, click the small x at the top right corner of the panel to close it.
You can see all three of your adjustment layers in the Layers Panel at the lower right corner of Photoshop. You can go back and change them. There is a small icon in front of the name of each adjustment layer. They are marked with a red box. To re-open the panel for an adjustment layer just double click the small icon. To close the panel click on the small x. So you can go back and tweak any of the adjustment layers as much as you want.
When the image is just the way you want it, save the image as a PSD (Photoshop) file with all of the adjustment layers intact. That way you can go back and change the image in the future without starting all over. This is your master file.
You can flatten the image to send to a lab for printing, or resize for the internet. When you flatten the image and save it, change the name so you don’t write over your master file.
I created this image yesterday. I was curious to see yesterday’s solar image from NASA so I went to the SpaceWeatherLive site.
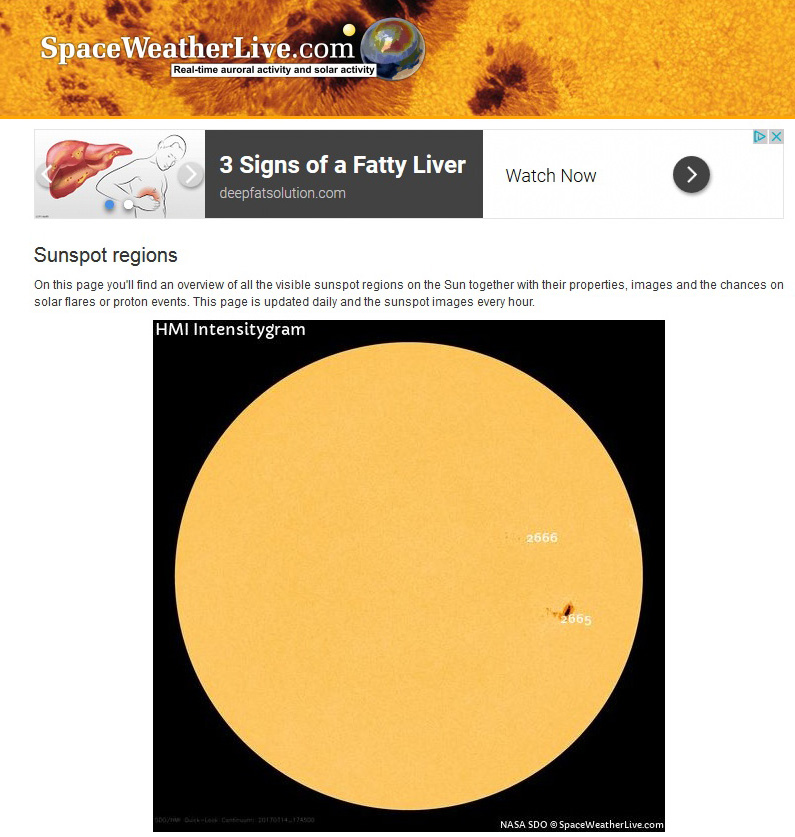 I did this screen capture and downloaded the NASA file.
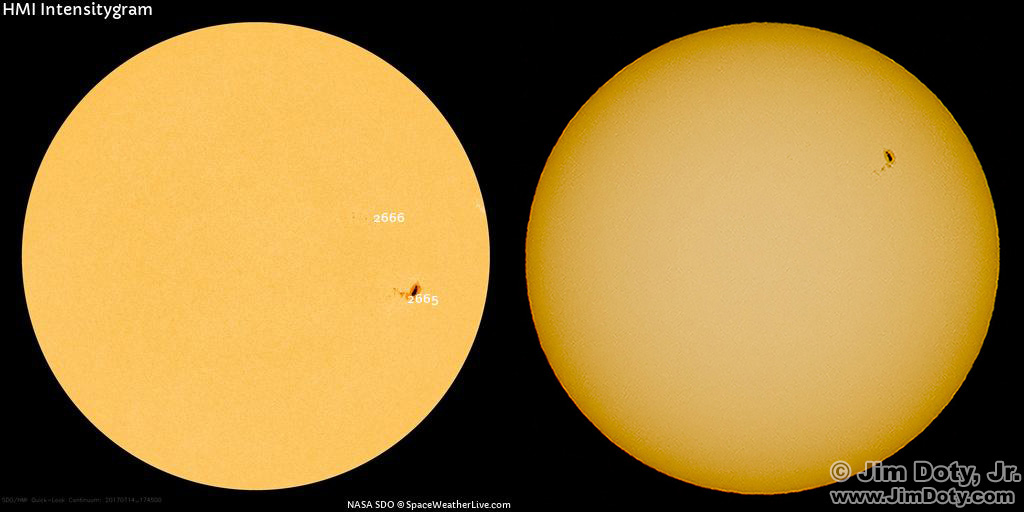
I had to do a side by side comparison, NASA’s image made with millions of dollars of equipment, and mine with standard photography gear.
The sunspots are the same but the images are at a different angle. When I did my image the camera was parallel to Earth’s horizon. When NASA did their image it was parallel to the ecliptic, the angled path of the sun across the sky.
The Great American Eclipse Series
The Great American Eclipse Series  – All of my eclipse articles are listed at this link. Check back for new articles as they appear.
More Links
Solar Eclipse Filters – Order Today Before It is Too Late
Order eclipse glasses, goggles and binoculars at my Amazon powered photography store

