Setting a “Custom White Balance” at the beginning of a photo shoot will save you a lot of time. It will only take a minute or so and can save you a lot of work later on. Think how long it would take you to color correct 250 images.
I was shooting the photo exhibit and auction at Stivers School for the Arts in Dayton Ohio. I knew I would take a lot of photos so I did one test shot and then did a custom white balance. Simply put, setting a custom white balance matches the color temperature of your camera to the color temperature of the light source shining on your subject.
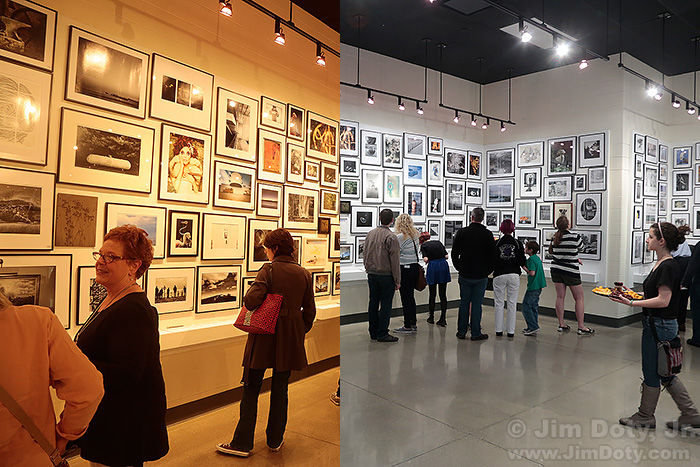
This is my first photo of the evening. The walls are white and the mats around the photos are white but in this photo they look yellow-amber. The primary light sources are the small tungsten lights arranged in rows across the ceiling. Tungsten lights are yellow-amber in color which explains the color in this photo.
Our brains auto-compensate for the color shift, so everyone standing in the room saw white walls and mats. But the camera picked up the real color of the lights. I didn’t want all my photos to have a color shift so I did a custom white balance.
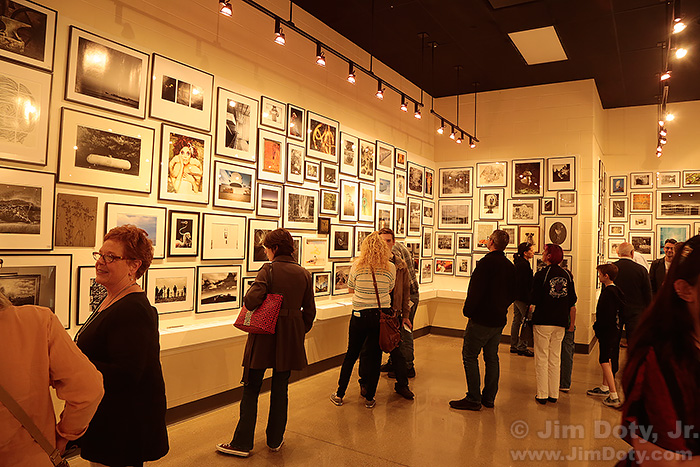
I walked up to a white wall and took a picture of a small section of white wall (my second photo of the evening), being careful not to include anything but white. Because of the tungsten lights, the photo still looks yellow-amber in color. Now for the magic. I told my camera to use this photo to set a custom white balance. Every camera does this a little differently in the menu system so sit down with your camera and the manual to figure out how to do this with your camera. The key is to take a photo of something truly neutral (white, gray, or black with no hint of a color cast). If there is any color in your photo it will throw off the custom white balance. If the walls weren’t white I would have photographed my 18% gray card to have gray image for my camera to use. Then follow the right steps in your camera’s menu system to use that photo to set a custom white balance. You will probably need to change the setting on your white balance dial.
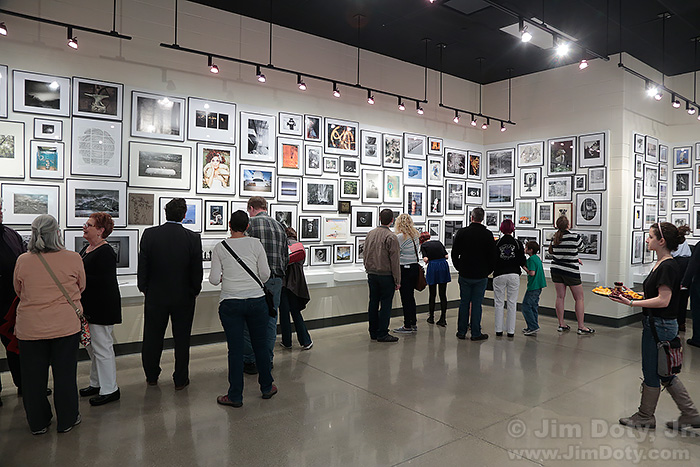
After setting a custom white balance and setting the white balance dial accordingly, I took my third photo of the evening. Ah! Much better. The walls and mats are now white. This is what I wanted.
Setting a custom white balance will change the white balance for all of your JPEG photos. It won’t change the white balance for your RAW files but it will change how your RAW file converter opens your RAW files. Either way, it way save you a lot of time that wold be spent on color correcting all of your photos later on.
I took about 250 photos that evening and most of them came out just like I wanted. However, part of the exhibit was in a hallway and the color temperature of the lights was different. The vast majority of my photos were taken in the main gallery and I wanted them to be as close as possible to spot on. The few photos that I took in the hallway were off, so I color corrected them with Adobe Camera Raw (see my next article). I could have changed the custom white balance every time I saw something interesting out in the hall, but then I would have had to change it again when I went back into the main exhibit room. That would cost me precious time and I might have missed an important photo. So I left the custom white balance set for the exhibit room since only about 10% of my photos were taken in the hallway.
If you take a bunch of photos in one place with one lighting condition, and them move somewhere else to take a bunch of photos in a different lighting condition, it would then be well worth your while to reset the custom white balance.
In case your are wondering, setting your camera on Auto White Balance will rarely match the color accuracy of a custom white balance.
RAW vs JPEG
All three of these photos are JPEG files straight out of the camera and resized for the web. I did that for all of you that mostly shoot JPEG files so you can see how a custom white balance will save you tons of work correcting your JPEG files.
But all the images at Stivers were shot with my camera set to capture RAW plus JPEG files. When I went throught them to select my favorite images of the evening I opened the RAW files with Adobe Camera Raw (ACR) so I could tweak any photos that needed it. RAW files also have a lot more information in them than JPEG files so when a photo does need some color work (like the ones in the hallway), there is more overhead to make the changes to the image without problems creeping in like banding/pixelization. Opening RAW files with ACR allowed me to tone down highlights and pull up shadow areas in high contrast images in a way that wouldn’t be possible with JPEG files. RAW really is better when you need to make changes to an image.
Links
My article about the Stivers exhibit and auction
A gallery of photos of the evening


