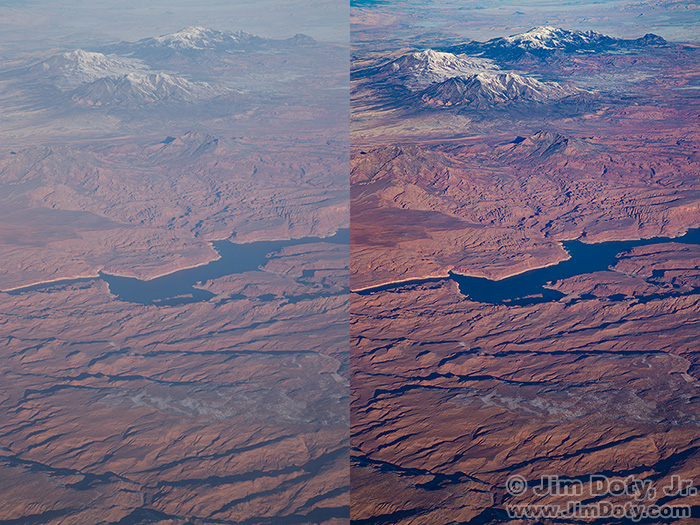
Photos from a commercial jet don’t look very good right out of the camera because you are seven miles off the ground. You are usually shooting through seven miles of atmospheric haze, even on a relatively clear day. If you are flying on a hazy day it is going to be even worse. Fortunately, you can save many of your aerial photos with a quick fix in Adobe Camera Raw (ACR).
Originally posted Feb. 12, 2017. Updated Feb. 17, 2017.
Note: If you are using the version of ACR that comes with Adobe Photoshop Elements, read this article first.
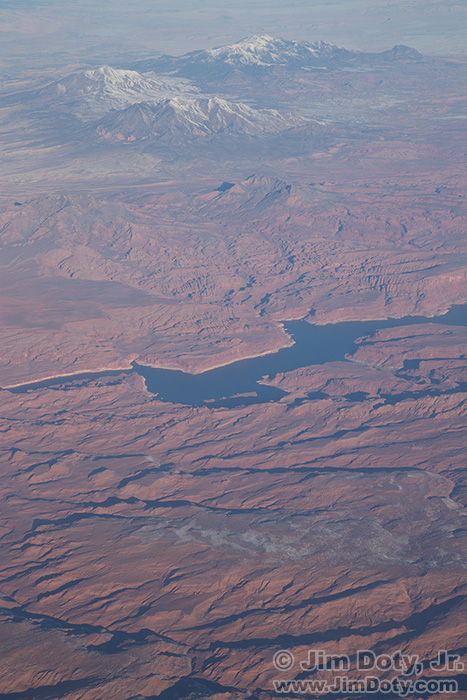
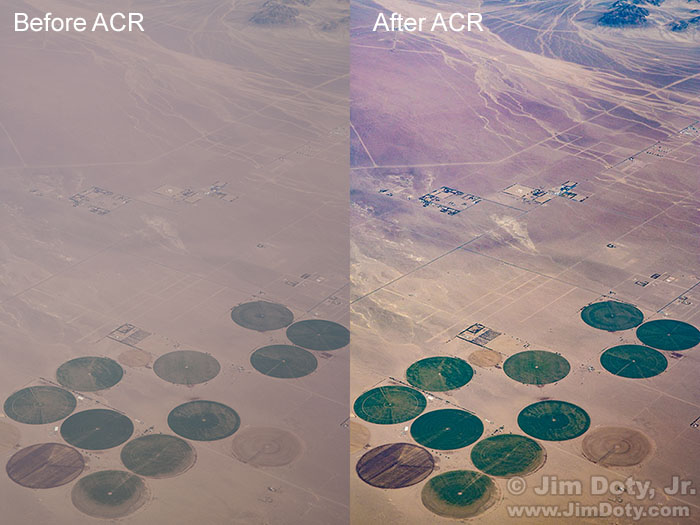
This is the original image right out of the camera. The potential is there but the whole image has been softened by atmospheric haze, and this photo was taken on a flying day that was clearer than most.
The first key is to start with a RAW file. RAW files have a lot more information than JPEG files so you have more to work with. If your camera isn’t already set up to capture RAW or RAW+JPEG files I suggest you start doing that now. It is the simplest, biggest favor you can do for the quality of your images.
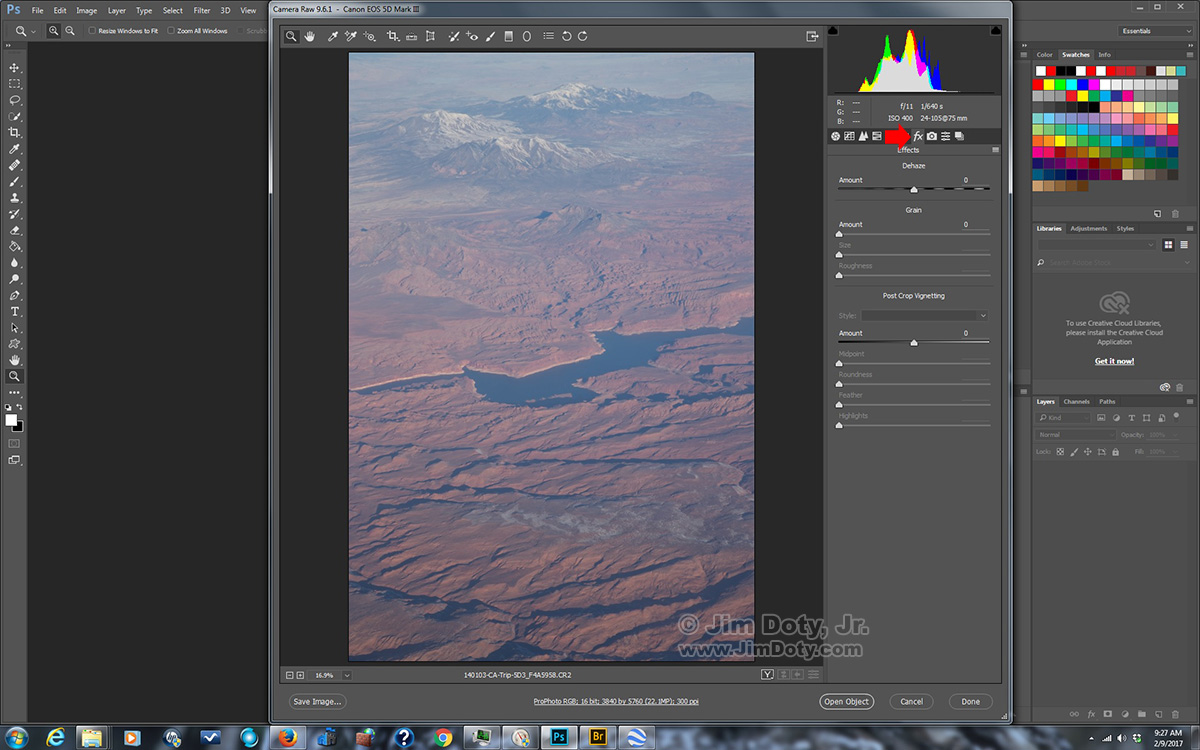
Open your RAW file with ACR. ACR comes “free” (sort of) with Adobe Photoshop, Adobe Lightroom, and Adobe Photoshop Elements. (It was a $100 add on from Adobe when it first came out. Then Adobe started adding it to their software without any increase in the price of the software.)
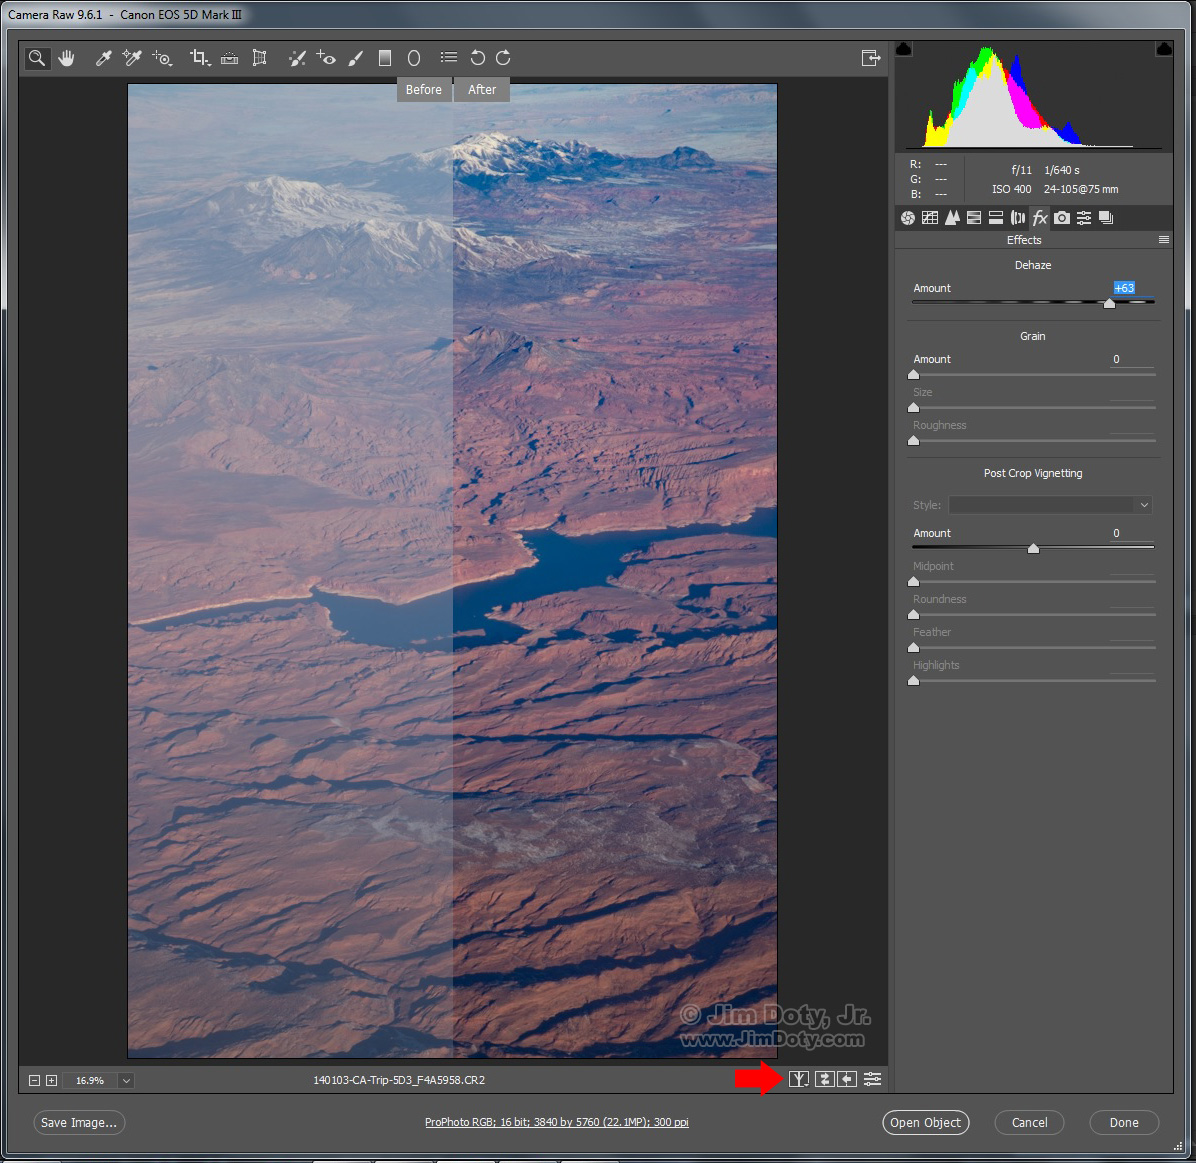
On the right you can choose from several processing panels. Choose the “Effects” panel, labeled “fx” (red arrow). Adobe Photoshop Elements doesn’t have this panel. If you are using Elements read this article.
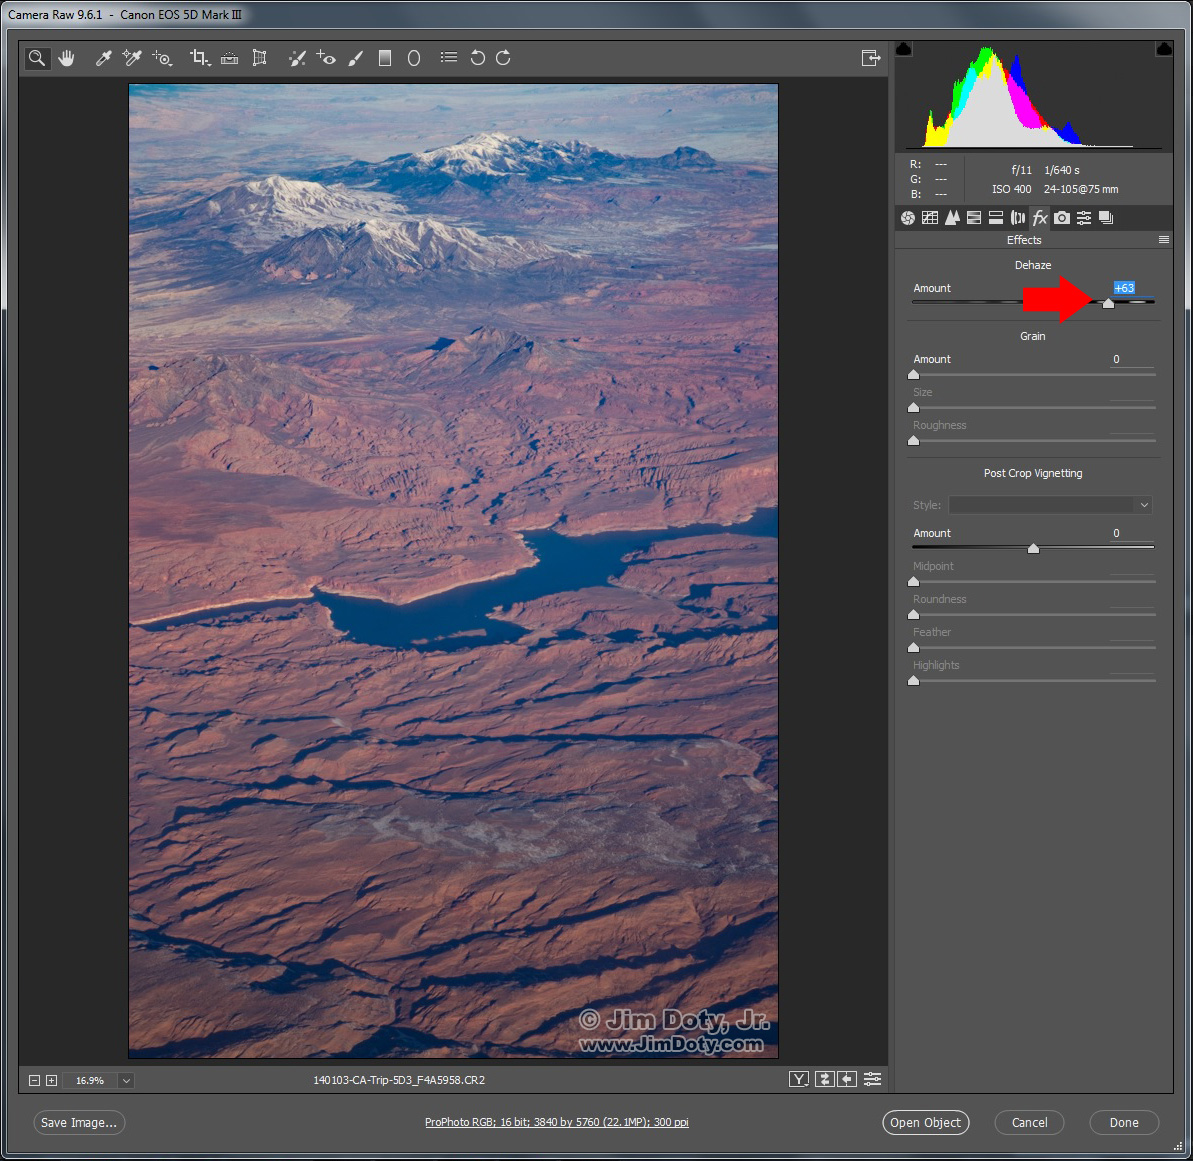
Grab the Dehaze slider and drag it to the right. You should see a dramatic difference in your image. Most or all of the atmospheric haze should be gone.
How far to the right should you drag the slider? Until you think your image looks like it should. Be careful not to overdo it. Click the % drop down menu (bottom left corner) and view your image at “100%” to make sure you haven’t over done things. Then go back to “Fit In View”.
At the bottom right corner of the image you have several viewing options. Click the first square to the left to cycle through various options.
Your dehazing work is pretty much done, but we will look at two more tweaks. Plus we will look at some help for Elements users who don’t have the Effects panel.
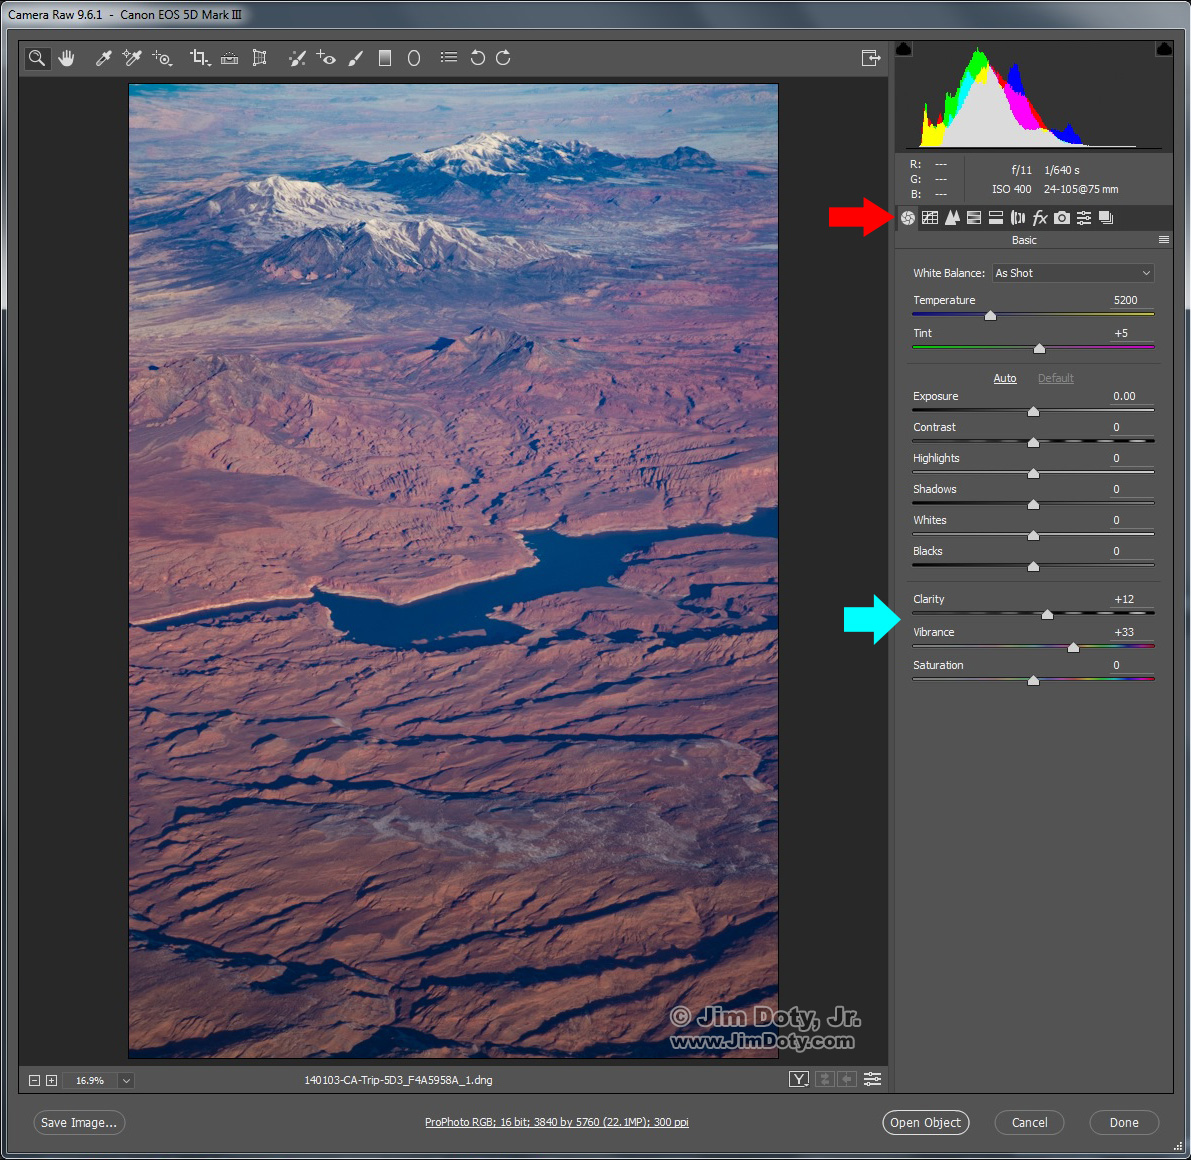
Choose the Basics panel which is indicated by the small aperture symbol (red arrow). Then tweak the image by dragging the Clarity slider to the right and the Vibrance slider to the right (cyan arrow). How far you drag them is again a matter of taste. Drag the Contrast slider to the right. Then open the image in Photoshop for any necessary final adjustments using a Levels adjustment layer and a Curves adjustment layer.
What do you do if you have Elements and don’t have the Effects panel? Drag the Contrast slider to the right. Increasing the contrast will help cut the haze. Then experiment by using the Highlights, Shadows, Whites and Blacks sliders, moving them to the left or to the right to improve the overall look of the image. Next try the Clarity slider and the Vibrance slider. Using all of these sliders is not quite as effective as having the Dehaze slider in the Effects panel, but it will help. Then open the image in Photoshop Elements and tweak it using a Levels adjustment layer and a Curves adjustment layer.
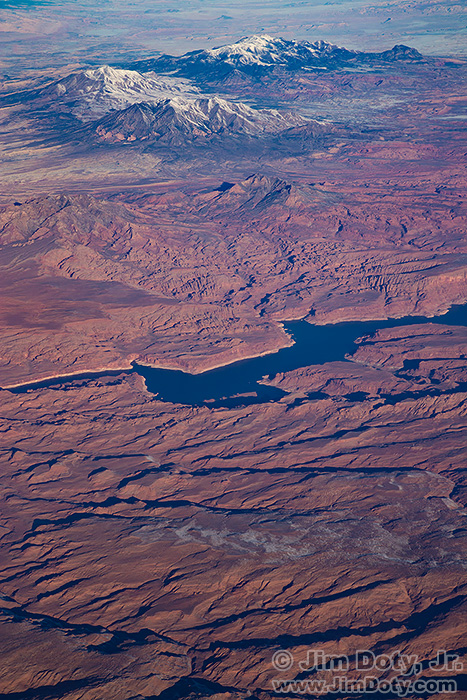
The whole process will only take one to three minutes, depending on how much you decided to do. When you are done your image will thank you because it looks so much better.
Links
How to Process Aerial Photos with Your Favorite Image Editing Software - If you aren’t using Adobe Photoshop or Adobe Lightroom, this is the article to read.
Geotagging Aerial Photos: The Joys and Frustrations of Using GPS on an Airplane – another article based on the same images.
ACR and RAW: Two of the Best Things You Can Do For Your Images

