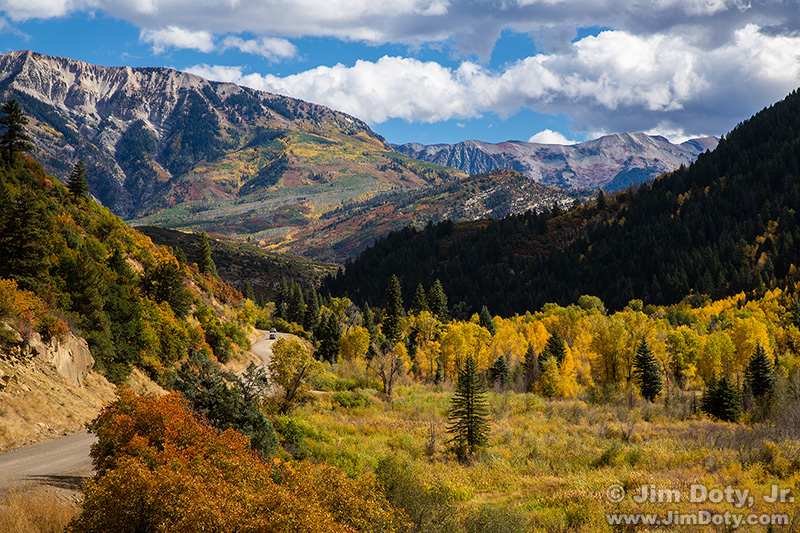
You are on a road you have never been on before. You to stop to take a picture which includes a prominent mountain. How do you find out its name?
Why Would You Want to Know the Name?
Maybe you are just curious. Or someone asked you the name. Or a photo editor won’t publish your photo without knowing the name. Whatever your reason, it’s not that hard to find the name. You probably already have the one piece of equipment you need (a GPS equipped camera or a smart phone) and the two software applications you need are free.
Just take the GPS data from your photo, drop it into Google Earth Pro, find your mountain in Google Earth Pro and look up its name. I will take you through an example, step by step. It may be a bit complicated the first time, but it gets simpler each time you do this.
Feel free to grab the GPS coordinates from this example and drop them into Google Earth Pro to follow along in this example.
Capture the GPS Coordinates with Your Camera or Smartphone
First, capture the GPS coordinates while you are at the scene. If your camera has a built in GPS receiver, that makes things much simpler. Just turn it on to encode the GPS coordinates of your locations as you take pictures. If your camera can’t record GPS data, just take a picture from the same spot with your smartphone. Most smartphones can record the GPS coordinates of the pictures they take. Just turn that feature on if it isn’t already on.
Software
You will need Google Earth Pro. It is a free download. You will also need software that will show you the GPS metadata in your photos. I recommend Adobe Bridge which is a free download from Adobe, or you can use other software. Adobe Lightroom is very similar to Adobe Bridge for looking at metadata. Adobe Photoshop, Adobe Photoshop Elements, and other software can also show you the metadata from your camera or smartphone.
Get the GPS Coordinates for Your Photo into Google Earth Pro
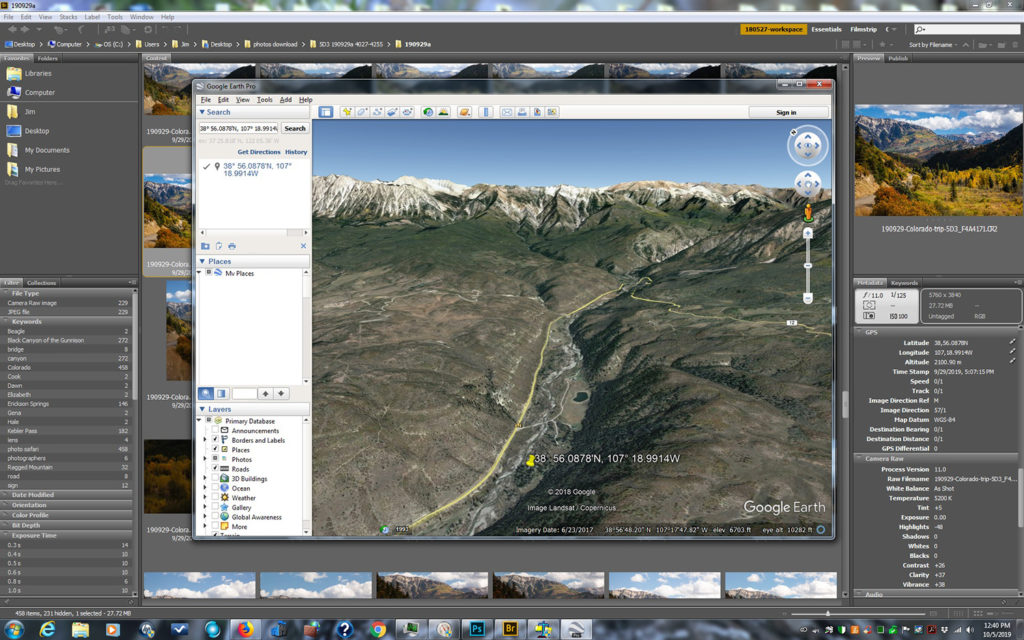
Use Adobe Bridge to navigate to the folder that has your mountain photo. Click the photo to select it. It will show up in the upper right corner of Adobe Bridge. Now open Google Earth Pro. I put the Google Earth Pro app right on top of Adobe Bridge. By clicking the icons on the bottom of your computer screen you can jump back and forth between the two apps and put either one on top.
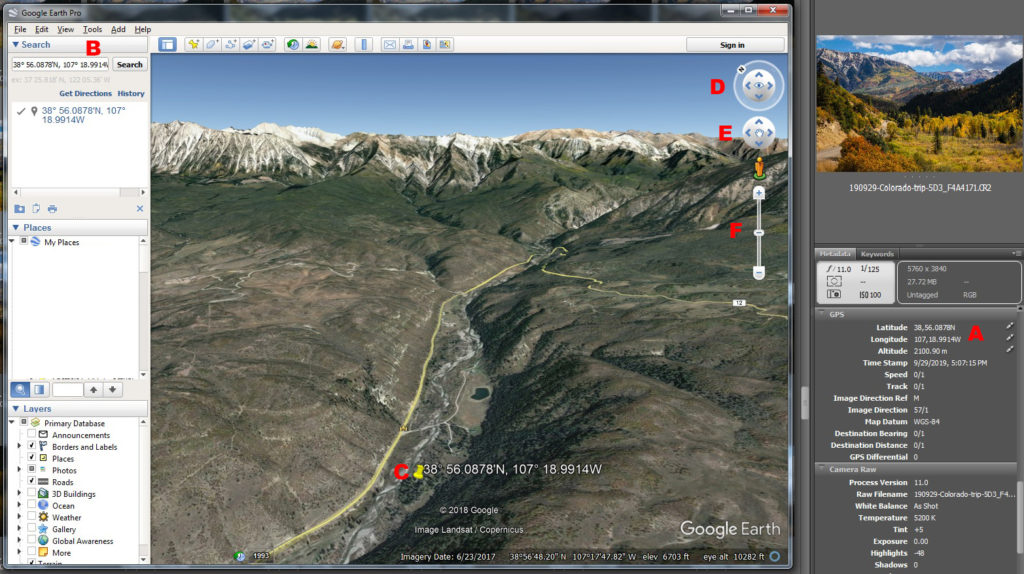
On the right side panel of Adobe Bridge (which is on the right in this screen capture) scroll down and find the GPS coordinates of your photo (red A). Copy the latitude (North) GPS coordinates in Adobe Bridge, then go to Google Earth Pro and drop them into the search box (red B). Then copy the Longitude (West) GPS coordinates and paste them into the search box of Google Earth Pro. Put them right after the North coordinates with a space in between. In this example they will look like this:
Camera Coordinates: 38,56.0878N 107,18.9914W
Convert the GPS Coordinates
Next you will need to convert the coordinates into a version Google Earth Pro understands. I do this right in the search box for Google Earth Pro before I click the SEARCH button.
Replace the comma after the degrees North and West (in this case 38 and 107) with a degree symbol “°”. To create a degree symbol on a Windows computer hold down the ALT key and type the numbers 0176. On a Mac computer use Option + Shift + 8.
Put an apostrophe (‘) after the minutes numbers (right in front of the N and W).
Put a comma between the North and West coordinates (right after the letter N). Compare the camera GPS coordinates (red A) to the converted coordinates (red B) to see how I did this. Here’s the before and after:
Camera Coordinates: 38,56.0878N 107,18.9914W
Converted for Google Earth Pro: 38° 56.0878’N, 107° 18.9914’W
Then click SEARCH button (red B) and Google Earth Pro will take you to the spot where you took the photos (yellow pin, red C).
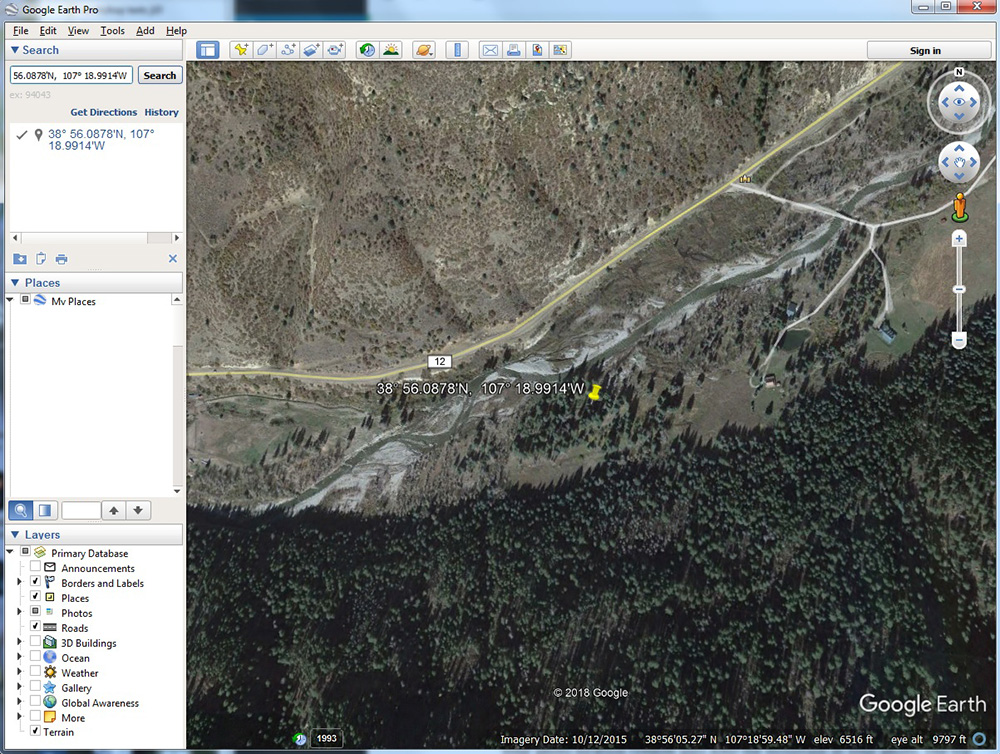
You will probably be looking straight down at your photo location and the mountain won’t even be visible. You will need to change that. The yellow pin marks the location of your camera when you took the photo, not the location of the mountain in your photo.

Play with the settings in Google Earth Pro (red D, E, and F) until you can see your photo location (yellow pin) AND the mountain in your photo. The top control (red D) changes the direction you are looking (north, south, east, west, or in between) and the angle you are looking (from looking straight down at the ground to looking at an angle across the landscape). In this example you want to be looking Northeast. The middle control (red E) moves you around over the landscape. The third control (red F) changes your elevation above the ground. The best way to learn how to do all of this in Google Earth Pro is to just experiment with the controls. The more you do this the better you will get.
Once the controls are set so you can see the yellow pin and your mountain, compare the mountain in your photo to the mountain in Google Earth Pro to make sure they are the same. If you get the right mountain it should be pretty obvious. It is easiest to do this if have Google Earth Pro lined up right next to the photo on the right in Adobe Bridge.
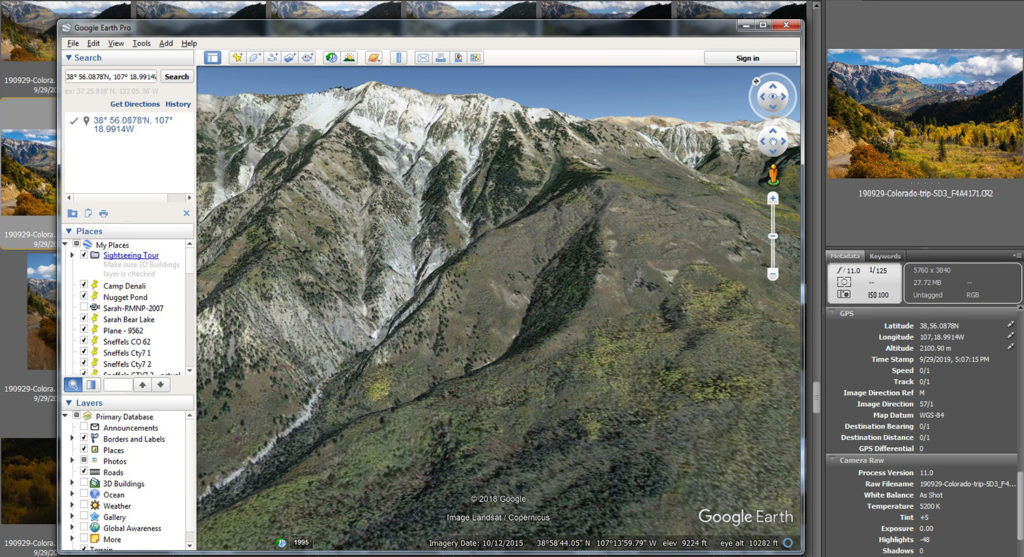
Sometimes it is helpful to zoom in on the mountain just to be sure the details of the mountain in Google Earth Pro match the details in your mountain.
Find the Name of Your Mountain
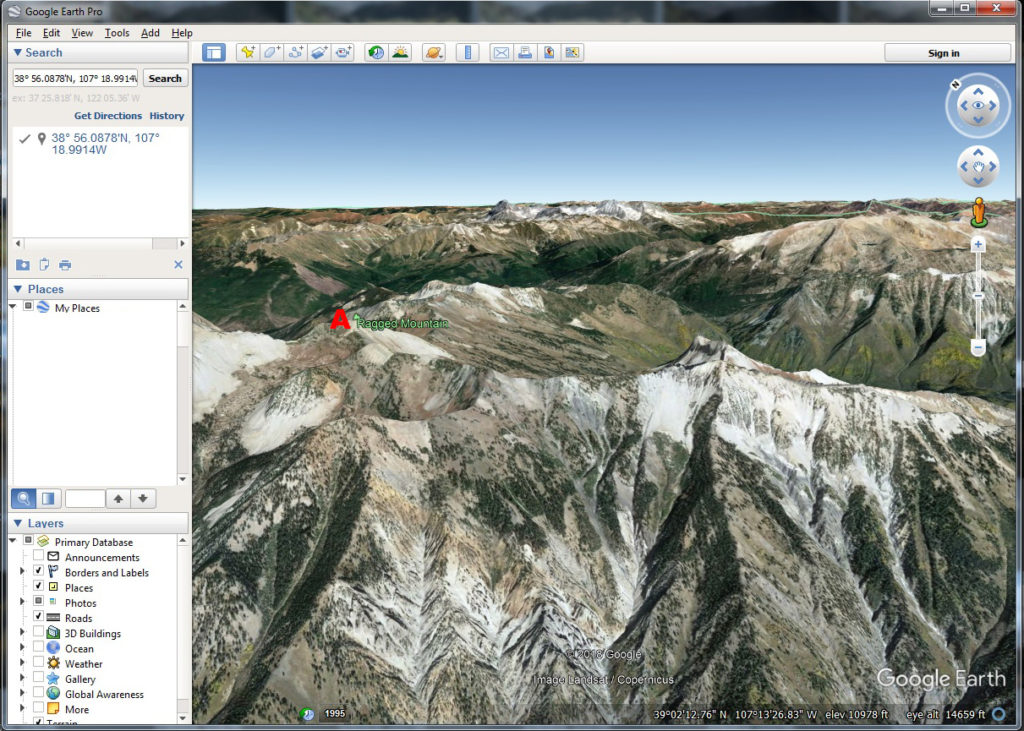
When you have the right mountain, use the controls in Google Earth Pro to “fly up” to the top of the mountain. Look for the little green mountain icon which indicates the name of the mountain. Cursor over to the green symbol and the name of the mountain will pop up in green letters.
Once you get used to doing this it is simpler than it sounds and way faster to do than the time it takes to read this article. It won’t be long and you will be flying over the landscape like a – (wait for it) – Google Earth pro!
Google Earth Pro does not name every mountain, and you may have found a secondary peak next to a primary peak. If it is really important, you can always start with the named peak in Google Earth Pro and look for a USGS topographic map. You can start with the online topographic map of the entire USA here.
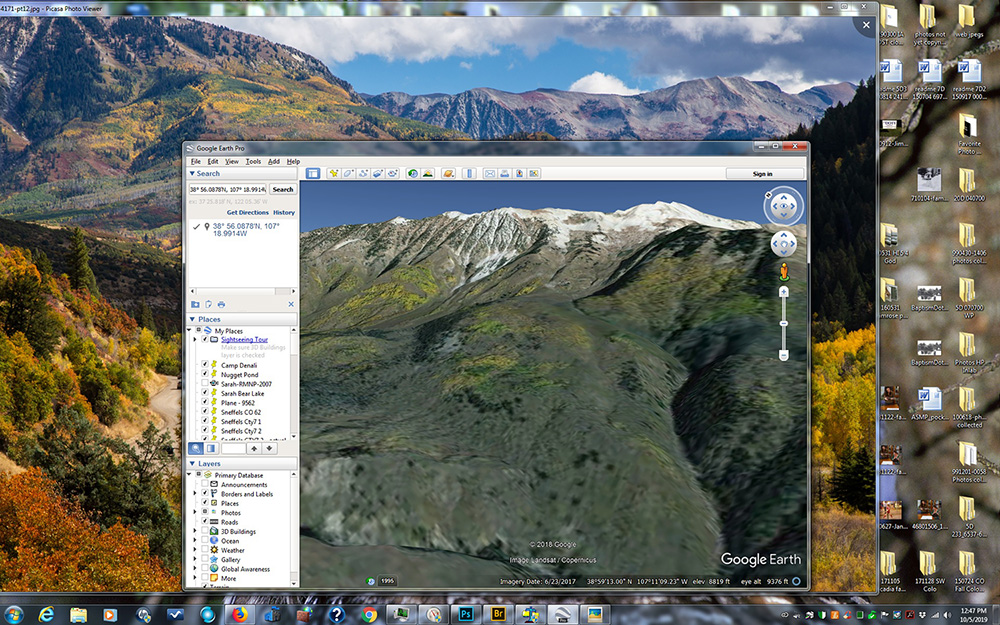
After finding the name of Ragged Mountain I used the same process in Google Earth Pro to find the name of the more distant mountain on the right side of the photo.
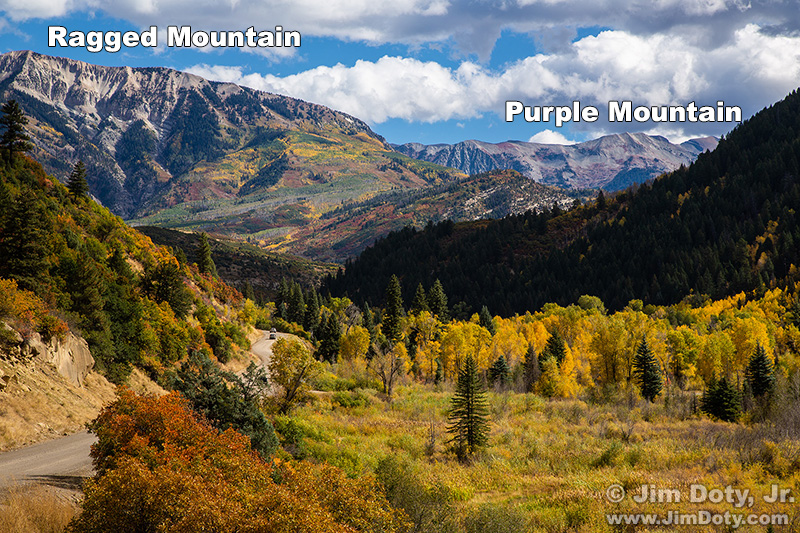
There are more GPS tips in the GPS Series linked below.
Links
