The exposure compensation scale on your camera is one of the keys to mastering exposures, getting better images, and ending up with professional quality colors. This means taking your camera off of full auto mode and taking control of your own exposures.
Mastering exposure is one of the professional secrets of great color. If you miss the ideal exposure by more than about 1/2 stop, the colors in your image will degrade and shift in different directions, and no amount of work in Photoshop will ever bring them the right colors back. In autoexposure mode your camera meter is designed to give you average exposures, not the best exposure. If you want the best exposures, and therefore the best colors your camera is capable of producing, you need to take over the exposure process. The exposure compensation dial is one of your best tools.
To get acquainted with this tool, turn your camera on and find the exposure compensation scale in the camera’s menu system (check your camera’s manual if you need help finding it). Turn it on so you can see it on the back of your camera. It should look something like the exposure compensation scales in the photos that follow.
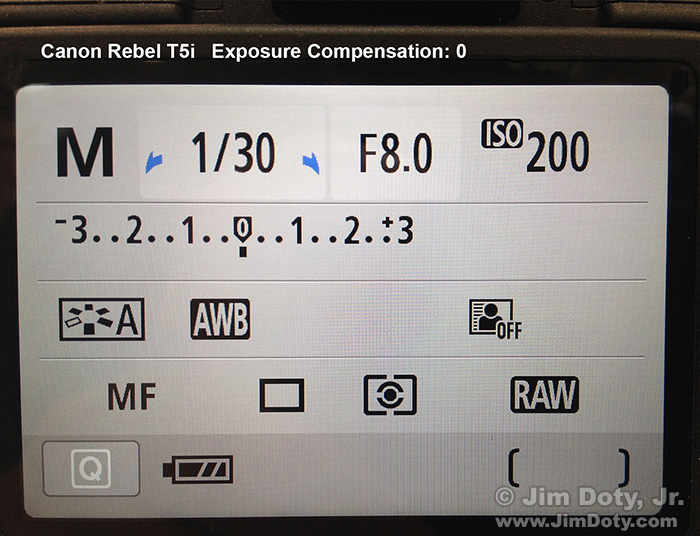
This is a typical exposure compensation scale on the back of a Canon T5i. The exposure compensation is set to zero. This scale goes as high as plus 3 and as low as minus 3 in 1/3 stop increments.
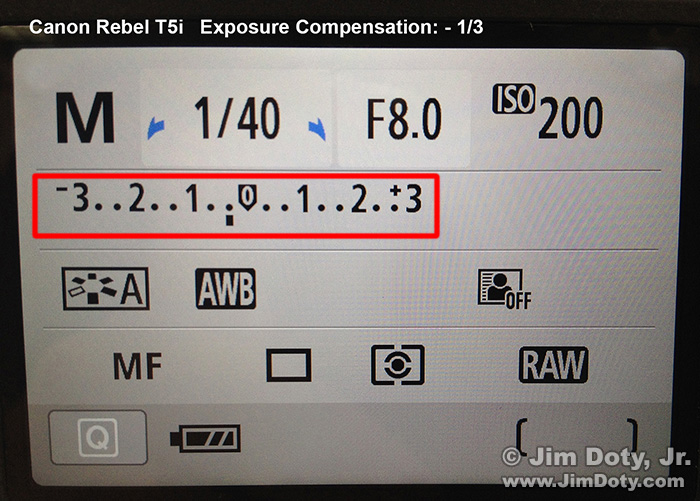
This is the same camera with the exposure compensation scale (marked in red) set to minus 1/3.
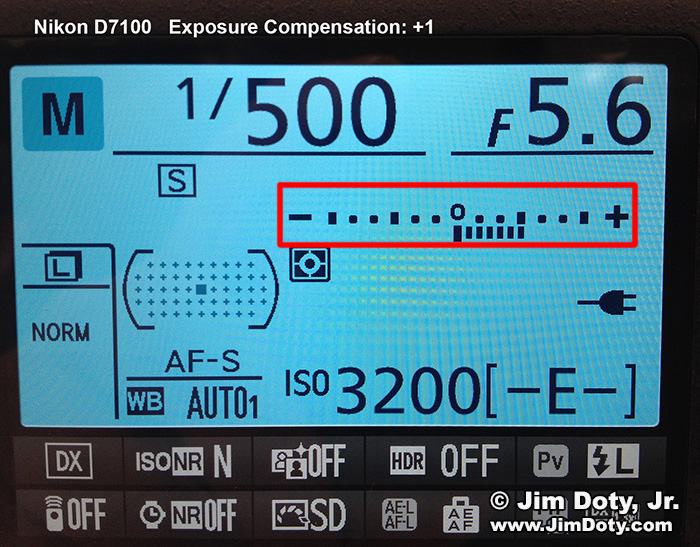
This is a Nikon D7100 with the exposure compensation set to plus 1. This scale goes as high as plus 2 and as low as minus 2 in 1/3 stop increments.
Now that you know what you are looking for, put your camera in manual exposure mode, set the ISO to 800, set the lens aperture to f/4, point your camera at a big subject like the nearest wall so the meter has something to look at. Turn the shutter speed dial until you see things happen under your exposure compensation scale. If you don’t see anything going on, your shutter speed is to fast or too slow and you are off the scale.
Keeping turning your shutter speed dial higher or lower until something registers on the scale. Once that happens, each click of the shutter wheel one way or the other will change your exposure compensation reading by 1/3 or 1/2 stop (depending on how things are set in your camera’s menu system). Some camera’s give you 1/3 stop increments, some give you 1/2 stop increments, and some give you both and you can choose whichever one you want in the menu system.
Turn your shutter speed dial until the scale reads zero. Then go up the scale to plus 2 and down the scale to minus 2.
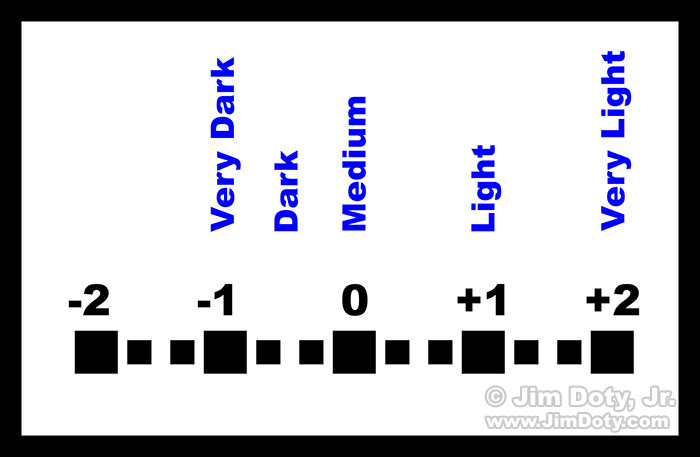
What the exposure compensation scale does is allow you to make light subjects light (like snow) and dark subjects dark (like a gorilla). The higher up the plus scale you go, the lighter your subject will be in your photograph. Go too high up the plus scale and your subject will be washed out. The farther down the minus scale you go, the darker your subject will be in the photograph. Go too far down the minus scale and your subject will be lost in inky darkness.
How far up and down the scale should you go? Imagine you have the above recommended subject settings written over your exposure compensation scale.
If your subject is very light, like white snow, dial in plus 2. If your subject is light, like wheat ready to harvest, dial in plus 1. If your subject is very dark, like a gorilla, dial in minus 1.
I rarely go above +2 or below -1 when metering my primary subject.
Zero is for medium toned subjects. Zero is the setting your camera is calibrated to in autoexposure modes unless you tell it otherwise. Your camera is designed to make everything it meters a medium tone (or “middle gray” in black and white terms) unless you take over. That is why you see so many winter photos with gray snow. In autoexposure mode the camera did exactly what it was designed to do, make the snow medium toned rather than white.
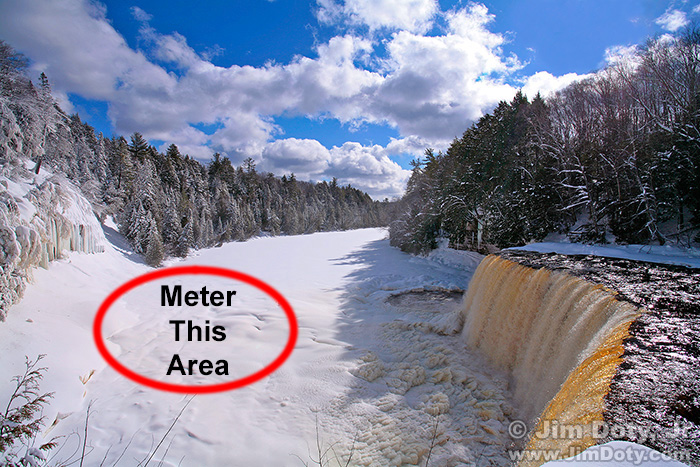
Upper Tahquamenon Falls, Winter. Meter just the white snow and dial in +2 on your exposure compensation scale.
When you meter it is important that you camera meter sees only the most important subject in the scene you are photographing. That usually means zooming in on the subject you want to meter (like the white snow in a winter scene), and then zooming back out to photograph the whole scene.
The reason for doing this in manual mode is your camera meter is locked in to what you tell it to do and the settings won’t change when you zoom back out to take the picture. If you meter the white snow and dial in plus 2 in autoexposure mode, when you zoom back out the camera will re-meter the whole scene and change your settings.
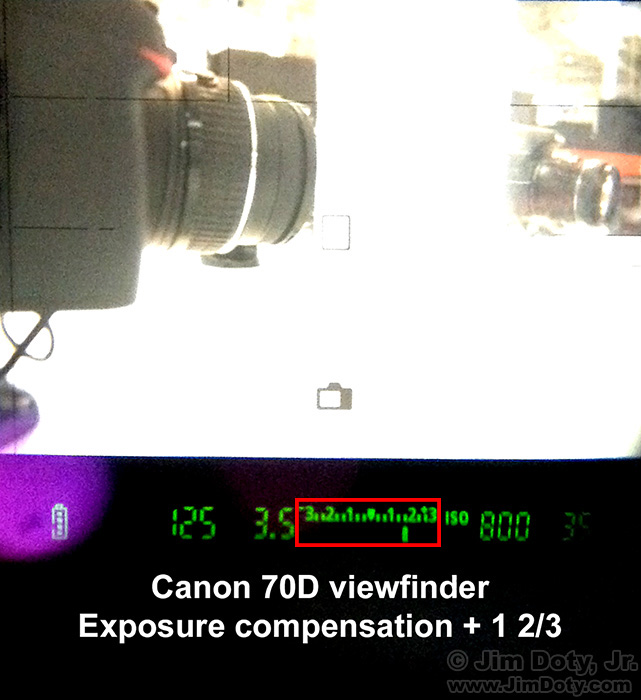
To really do this quickly and accurately, you need to watch the exposure compensation scale inside the viewfinder, not on the back of your camera. The problem with taking your eye away from the viewfinder to look at the back of the camera is the camera may no longer be pointing at the same subject. I’ve watched numerous photographers get bad exposures because the camera was moving while they were setting the exposure compensation scale on the back of the camera. The exposure compensation scale is usually below or to the side of the main image in the viewfinder. I check several different camera models the last time I had a chance and most of them had the exposure compensation scale at the bottom of the viewfinder.
Just for fun, the last time I was at Costco I put my iPhone up to the eyepiece of a Canon 70D and snapped a photo of the viewfinder image and the exposure compensation scale which is set to plus 1 2/3. (Yes, it is an ugly image.)
The more you use exposure compensation, the better you will get at estimating how light or dark your subjects are, and how much exposure compensation you will need to use. Your exposures will get better, the colors will get better, and the quality of your images will improve dramatically.
Originally posted September 12, 2015. Revised and re-posted January 18, 2022.
Links
The best colors come from the best exposures
Your camera loves middle gray – and why that is important
Why exposure is so important (with links to a series of exposure articles).
If you want to master exposure, read my book, Digital Photography Exposures for Dummies is one of the highest rated photography books at Amazon.com. Magazine reviews describe it as one of the most complete, detailed, and comprehensive books on exposure. It covers intermediate and advanced exposures skills that are barely mentioned or not covered at all in other exposure books. When you master the basic skills you don’t need to buy another book to move on to advanced skills, so you are getting two books in one. More information here. Order it here.

