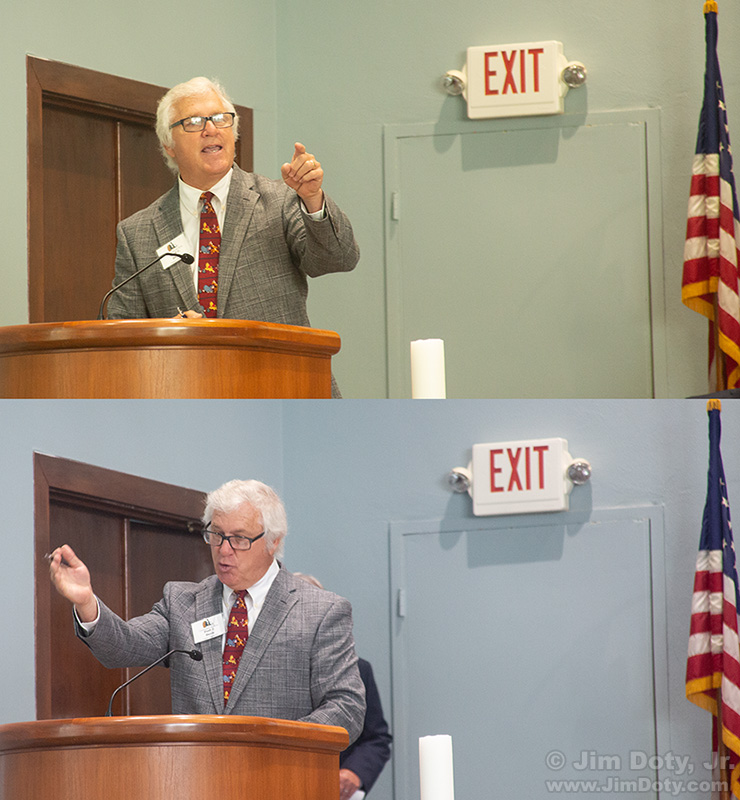
30 seconds of your time can make the difference between disappointing colors and great colors. That is the difference between these two photos. The top image is skewed toward yellow and green tones. It is most obvious in the white part of the EXIT sign, the white stripes of the U.S. flag and the white candle next to the speaker’s podium. The speaker has yellow-ish skin and and the blue walls are greenish in the top photo. In the bottom image all of that has been fixed. The flag looks much better, the candle is pure white, and the blue walls are actually blue. Most important, the skin tones (my primary goal) are so much better. The yellow skin is gone.
The Source of the Color Problem
The room had a mixture of daylight coming through large windows plus artificial lights in the room. The artificial lights were the source of the yellow-green color cast, which showed up in the photo taken with the “daylight” white balance setting on my camera. I could have used one of the other pre-set white balance settings on the camera, but none of them would do a good job of fixing the yellow-green color problem. They would just give me different but still annoying color casts. The best solution was ridiculously simple and took only 30 seconds of my time
The Solution: Setting a Custom White Balance
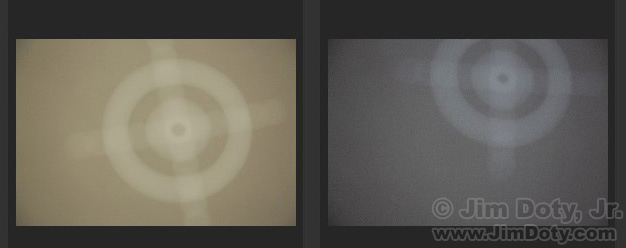
Before the meeting started, I walked up to the podium and put an 18% gray card next to the podium. With autofocus on the lens turned off, I photographed the gray card while my camera’s white balance was set to daylight. You can see that image on the left. Note the color cast.
Now for the camera magic. I told the camera to take the first gray card image and use it to create a “custom white balance”. What that means is the camera is going to use the gray card image to remove the yellow-green color cast so the gray card actually looks gray when I take another picture. Then I set the white balance setting on the camera to the custom white balance icon and took another image of the gray card which you can see on the right. Thanks to the custom white balance setting, the gray card is now a pure neutral gray with no color cast. These two images were taken 27 seconds apart, the total time it took me to set a custom white balance.
Just to be sure I did everything correctly, I did one photo of Paul Davis, the presider, using the original “daylight” white balance setting (the top, “before” image), and another with the “custom white balance” setting (the bottom, “after” image). The difference is dramatic.

With the yellow-green color cast gone, all of the colors in all of my photos would look right for the rest of the morning. I would have great, accurate colors. Once you do a custom white balance for the existing light conditions, you don’t have to mess with the custom white balance again as long as the light doesn’t change. 30 seconds doing a custom white balance at the beginning gave me great colors for the rest of the morning. Such a deal!
When Robin Linkhart, the featured speaker of the hour, came up to the podium, I knew that the custom white balance setting meant my camera would give me great colors.
So how do you set a custom white balance with your camera? Read How To Set A Custom White Balance On Your Digital Camera. It lays out the basic process, step by step. I used a Canon camera for the illustrations in the article but other camera brands should have a very similar process. Every camera is a little bit different so refer to your camera’s manual. Be sure to check out the other articles linked below for more information.
RAW files and ACR
One more added wrinkle. No digital camera is perfect. Every digital camera deals with colors in a slightly different way. No digital camera, no matter how expensive, can accurately reproduce every color in the rainbow with perfect accuracy. That means no camera can give you exactly what your eyes were seeing when you clicked the shutter. That is why so many professional photographers capture RAW images with their cameras (or both RAW and JPEG images) and tweak their RAW images after the fact in their computers using software like Adobe Camera Raw (ACR). That is the best way to get as close as you can get to what your eyes were looking at when you clicked the shutter. The photos above are an illustration of the difference.
I did not tweak the two images of Paul with ACR so you could see the images exactly as they came out of the camera. I did tweak the image of Robin with ACR. Note the added richness in the colors. It is most obvious in the skin tones and the wood of the podium.
Much of the time a custom white balance can take your images most of the way to great, more accurate colors. ACR is a tool that can take your photos up another notch. In really difficult lighting situations, ACR can be a real photo saver.
As a photographer, you have remarkable tools you can use to create the kind of images you want!
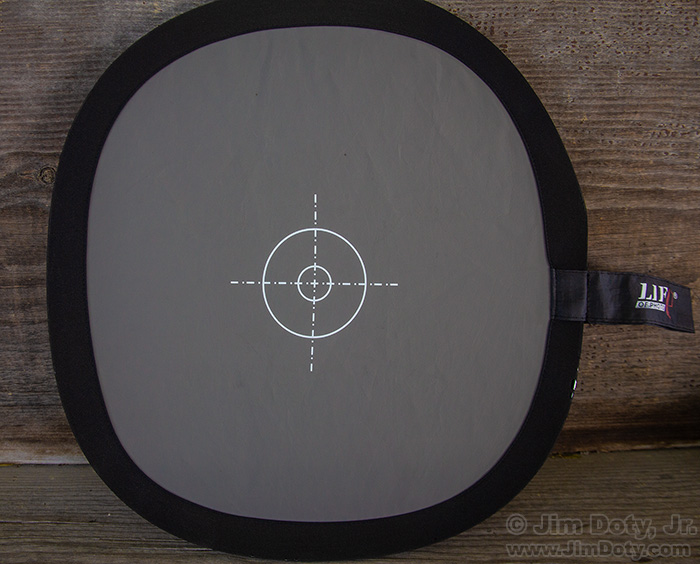
My favorite, go anywhere, collapsible fabric 18% gray card. Info in the links section.
Links
The “Custom White Balance” Series
Why and When To Set A Custom White Balance
How To Set A Custom White Balance On Your Digital Camera
Setting a Custom White Balance Will Save You a Lot of Time
ACR and RAW: Two of the Best Things You Can Do For Your Images

