
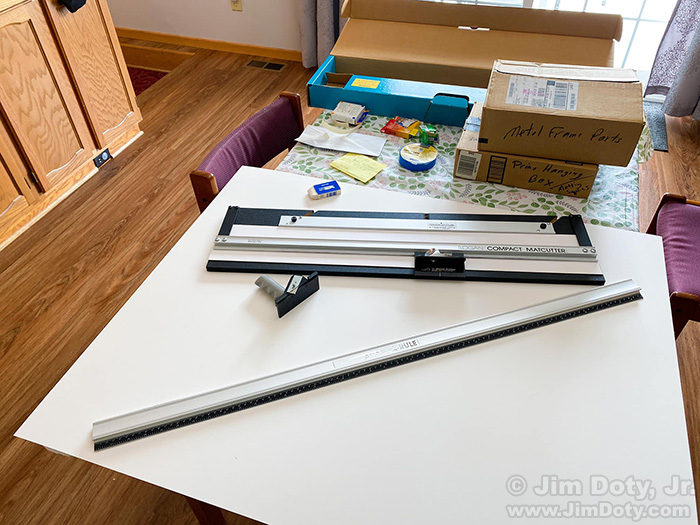
Today is a matting and framing kind of day so I brought everything up from the basement that I will need. I figured out long ago it was way too expensive to have someone else do matting and framing for me, so I bought a mat cutter and I do everything myself. If you are thinking about doing your own matting and framing, I cover some of the basics.
Should you do it yourself?
That depends. How often do your frame your work? Do you want to save money? Do you like the satisfaction of doing it yourself?
If you are only framing one or two pieces per year, you might as well pay a custom frame shop and suck it up when it comes to the prices you will pay. If you are doing several pieces per year, and you enjoy (or don’t mind) doing it yourself, you might as well invest in the tools you need and do it yourself.
Should you standardize on one mat color and frame style?
If this is just for your own walls, that depends on whether or not you like a uniform look. Long ago I matched each mat color to some related color in the photograph. It worked for me. But when I was asked to exhibit my work, I had to go with an industry standard look with the same mat color and frame style for every piece. Some galleries prefer all photos have white mats and black frames, so I have standardized on a specific shade of white mat and one style of black aluminum frame so I meet the typical gallery standards for an art exhibit. I discovered I liked the uniform look. And it is nice to know that the work I frame today will match the work I framed years ago.
My preferred choices.

Stef visits one of my art exhibits.
The preferred shade of white mat that that I have been using for years is Crescent #3297, “Arctic White”. It is a bright white mat. With so many shades of white mats, sticking to one shade means the mat I used today will be exact same shade as mats I have used for years. I can mix and match any of my framed images in an exhibit and the mats and frames will match.

Frame closeup.
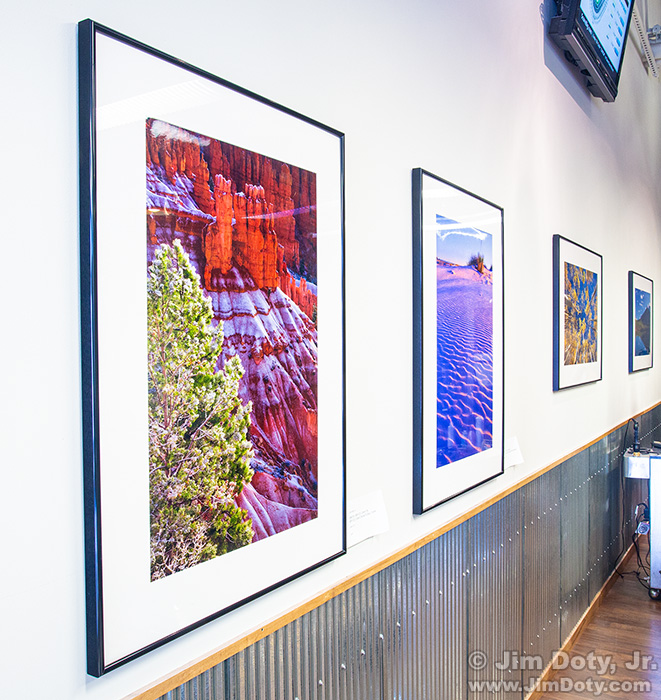
Some of the framed images in one of my exhibits.
What does it cost?
How much does it cost to mat and frame your own photographic art? A fraction of the cost of going to a custom frame shop.
Here’s the breakdown on the cost of the 16×24 inch photo in a 22×30 inch frame with mat and glass that I just framed.
Why 22×30 inches? It gives me a 3 inch mat width around the photo. With smaller prints like an 8×12 inch print, I use a 2 inch mat width so the frame size would be 12×16 inches. With larger prints, like a 20×30 inch print, I use a 4 inch mat width around the image so the frame size would be 28×38 inches. In the exhibit photo immediately above you are looking at 20×30 prints in 28×38 frames.
The 16×24 inch print was $25 for the print from Mpix (one of my favorite online labs) plus $10 and change for the shipping. A total of $35.24.
I ordered a 22×30 inch “222MBLK” frame which cost $37.57 plus $20.95 in shipping and $2.63 in tax for a total of $61.15. Had a I ordered a Nielsen frame, the frame itself was $180, not including shipping.
I got the 22×30 inch photo glass from the closest local frame shop for $38.52. I buy my glass cut to the dimensions I need so I don’t have to mess with cutting the glass myself.
The last time I got mats, I ordered 10 Crescent mat boards (#3297, Arctic White), measuring 32×40 inches each for a total of $77.02 from Walmart. It was the best price I could find online at the time. I used two sheets of mat board (one for the front mat and one for the back board) for a total cost of $15.40.
So the print, frame, glass, and two sheets of mat board cost a grand total of $150.31. That is a whole lot less than going to a custom frame shop.
What tools will you need?
To do your own matting and framing you will need to be able to cut mats. The simplest and least expensive way to do this is to get a 40 inch long Logan 540 Adapt-A-Rule and two Logan mat cutters to use with the Adapt-A-Rule.
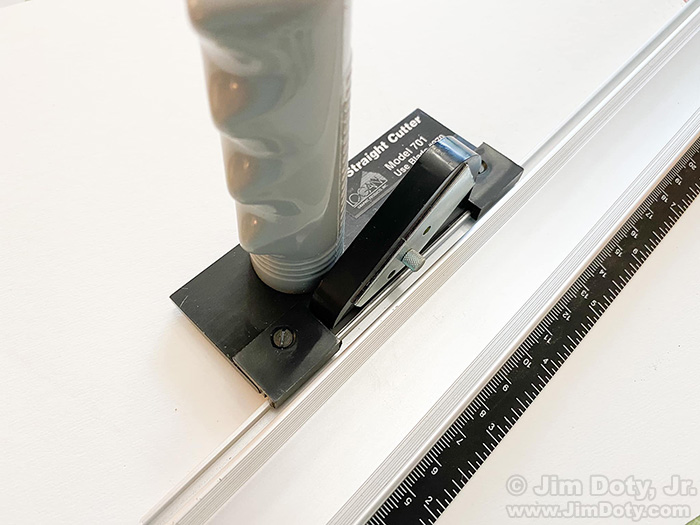
One edge of the Adapt-A-Rule is a 40 inch metal ruler. On the other edge there is a grooved slot that the Logan mat cutters ride in to get smooth accurate cuts. In the photo above a Logan 701 straight cutter is in the groove of the Adapt-A-Rule. The Logan 701 makes straight cuts for the outside edges of the mat. The current model is the Logan 701-1.
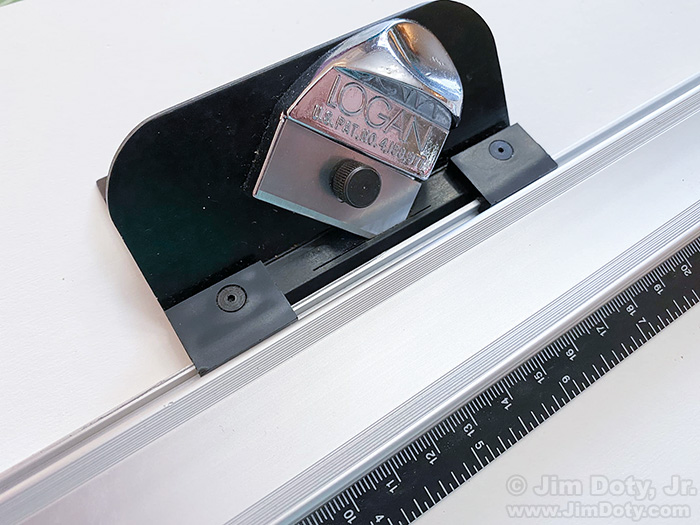
You will need a Logan 2000 bevel cutter which makes the nice angle cuts for the “window” in the mat that reveals your photo.
Both mat cutters cut all the way through the mat so you will need a couple of layers of cardboard under the mat so you don’t cut into your floor, dining room table, or other work surface.
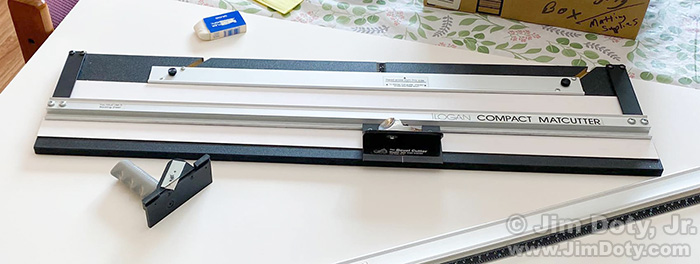
To make your life a lot simpler, get a Logan 301-1 Compact Mat Cutter (the latest and slightly larger version which will accommodate a 32×40 inch mat board). It has a groove that the Logan 2000 and 701-1 mat cutters ride in, and it makes marking and cutting the window in the mat much simpler and faster. It has a recessed slot underneath the cutting area so you don’t need any cardboard underneath to protect your work surface. If you get the Logan 301-1, you will not need the Logan 540 (40 inch) Adapt-A-Rule unless you want to have a metal 40 inch ruler.
Approximate prices as of today (August 16, 2022) at Dick Blick and Amazon:
Logan 301-1 Compact Mat Cutter – $106.
Logan 2000 bevel cutter – $27.
Logan 701-1 straight cutter – $26.
Logan 540 (40 inch) Adapt-A-Rule – $50.
LINKS
Frames
American Frame
Radius Plus Nielsen 25 frame from American Frame
BLKBLL frame from PictureFrames.com
222MBLK frame from PictureFrames.com
Mat Cutters
Logan Mat Cutters – Information only. Logan does not sell directly to the customer.
Logan 301-1 Mat Cutter at Dick Blick. This is slightly larger than my 301-S.
Logan 701-1 straight mat cutter at Dick Blick
Logan 2000 bevel cutter at Dick Blick