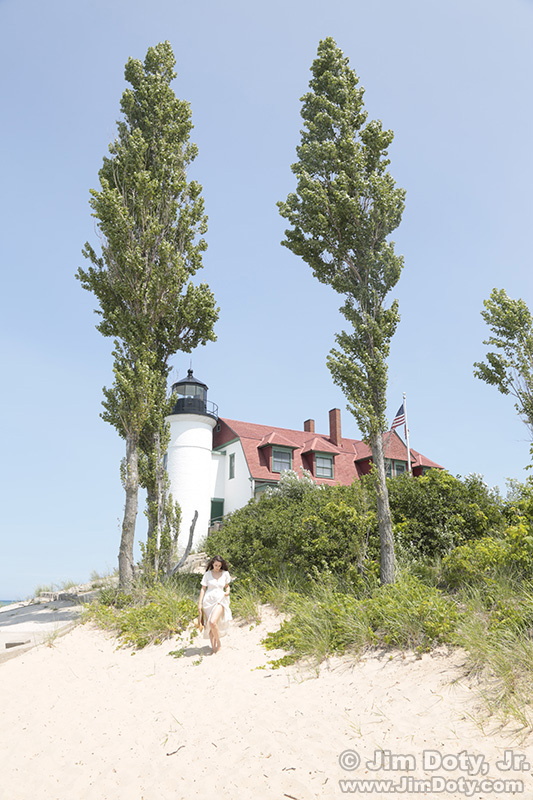
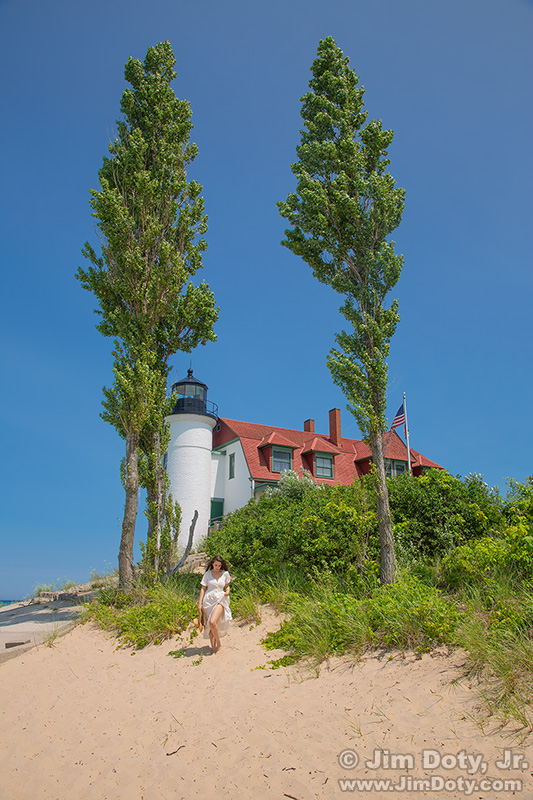
Anoush, Point Betsie Lighthouse – Overexposed JPEG
On this photo shoot I made a dumb mistake. (It can happen to any of us.) My first few clicks of the shutter were overexposed. When I checked the first few images on the back of the camera I immediately saw the mistake. The overexposed images were shot at f/9, 1/100 second, and ISO 100. They were 1 2/3 stops over Basic Daylight Exposure (BDE). I changed my settings to f/11, 1/200 second, and ISO 100 which is equivalent to BDE. After that my images had good exposures. The first lesson from this mishap is: Don’t get so wrapped up in the energy of a photo shoot that you forget to stop periodically to check your images. To learn more about BDE, see the article linked below.
Fortunately for me, I was shooting RAW plus JPEG files. RAW files have a lot more information.
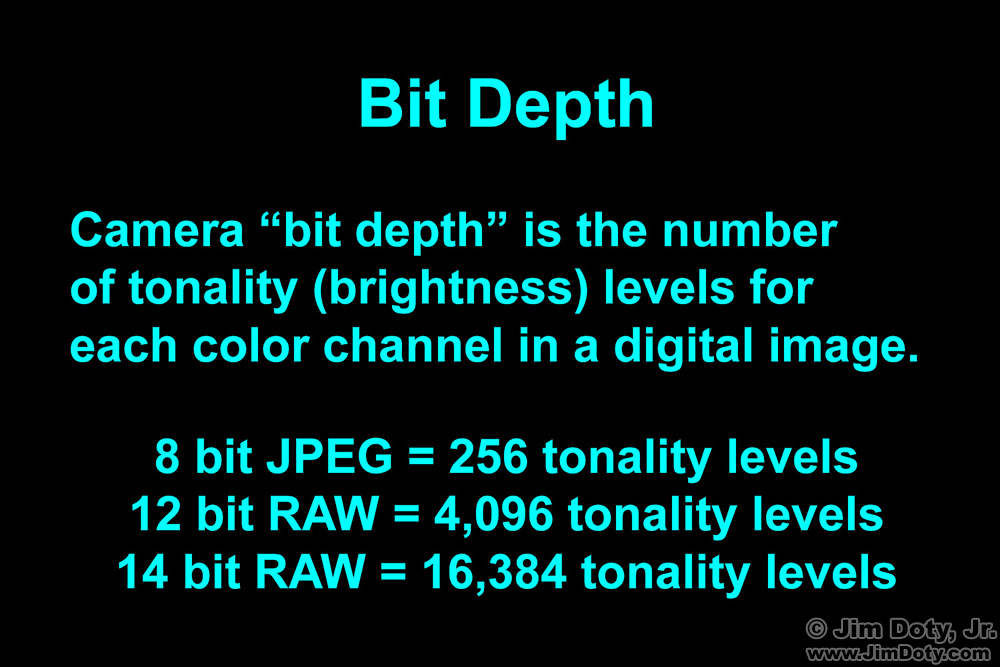
Bit Depth
JPEG files are 8 bit images. They have only 256 tonality levels (shades of brightness) per color channel. Most digital cameras create 12 bit or 14 bit RAW files which have 4,096 or 16,384 tonality levels per color channel. If you are only shooting JPEG files you are throwing away thousands of tonality levels of information.
And that is not all.
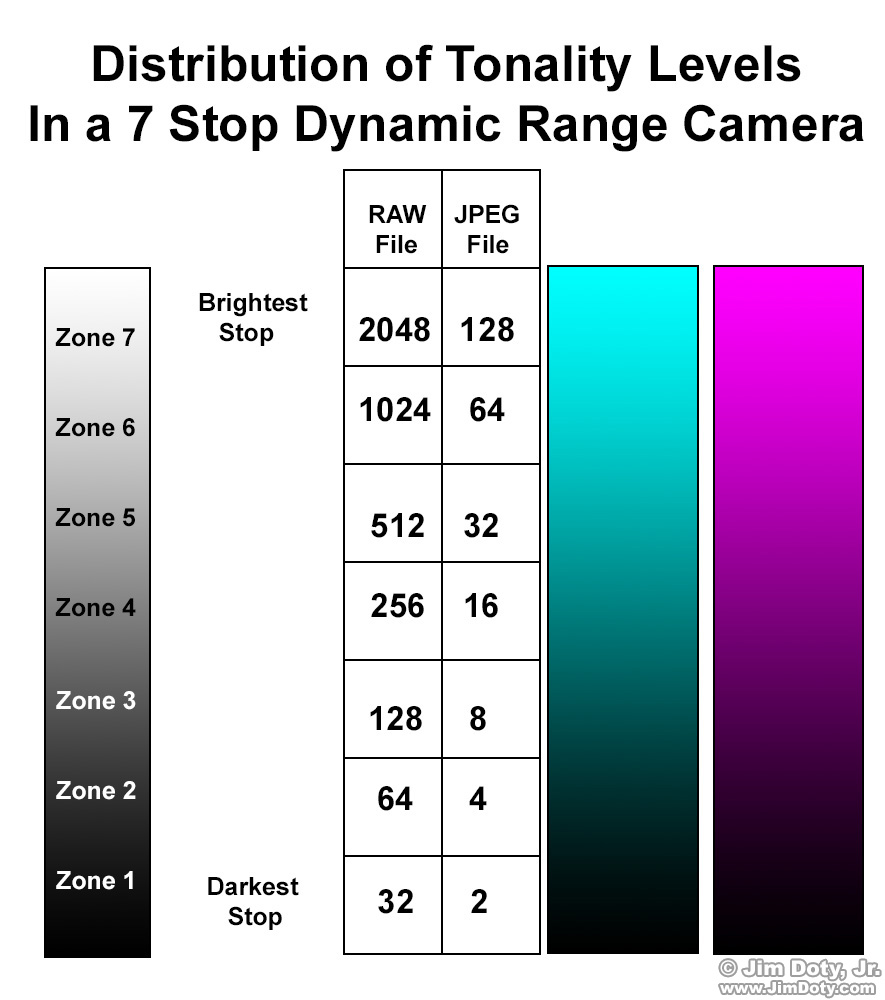
Tonality Level Distribution
The tonality levels are not distributed evenly throughout the image. The brightest parts of the image get the most tonality levels and the darkest get the least. That is why the darker parts of the image can fall apart, especially if you are only shooting JPEGs. If something goes wrong when you are shooting JPEGs, you have very little tonality information to work with when you try to correct the image.
Anoush, Point Betsie Lighthouse – RAW file corrected with ACR.
Back home at my computer I opened the RAW file of this image using Adobe Camera Raw (ACR). I used the various ACR sliders to recover the blown out areas of the image and restore the color quality. Despite the serious overexposure, thanks to ACR I ended up with a pretty good image. To get an idea how I used ACR to work on this image, read: How to Optimize a Photo with Adobe Camera Raw.
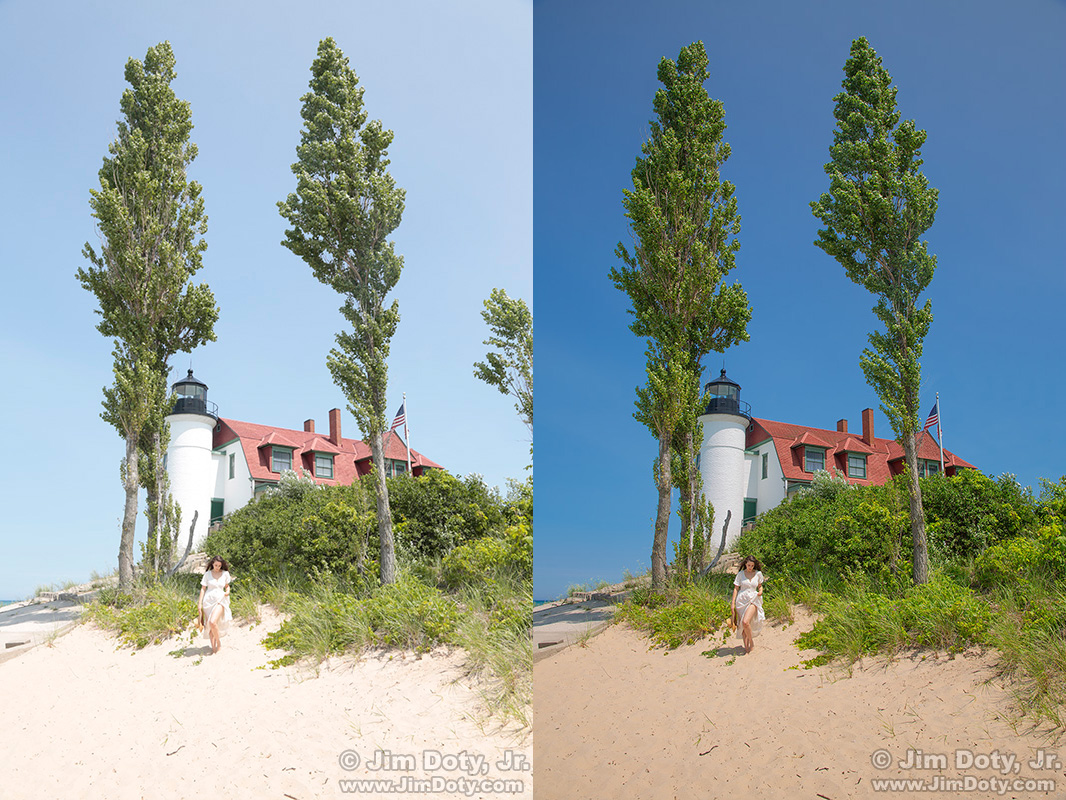
Anoush, Point Betsie Lighthouse – before and after ACR. Click the image to see a larger version.
Here they are side by side, the RAW file before and after using the sliders in ACR. You will notice I digitally removed the distracting part of a tree on the right side of the image.
I was curious what would happen if I used ACR to try and restore the JPEG file. I used the exact same ACR slider settings on the JPEG file that I had used on the RAW file. The results were not pretty.
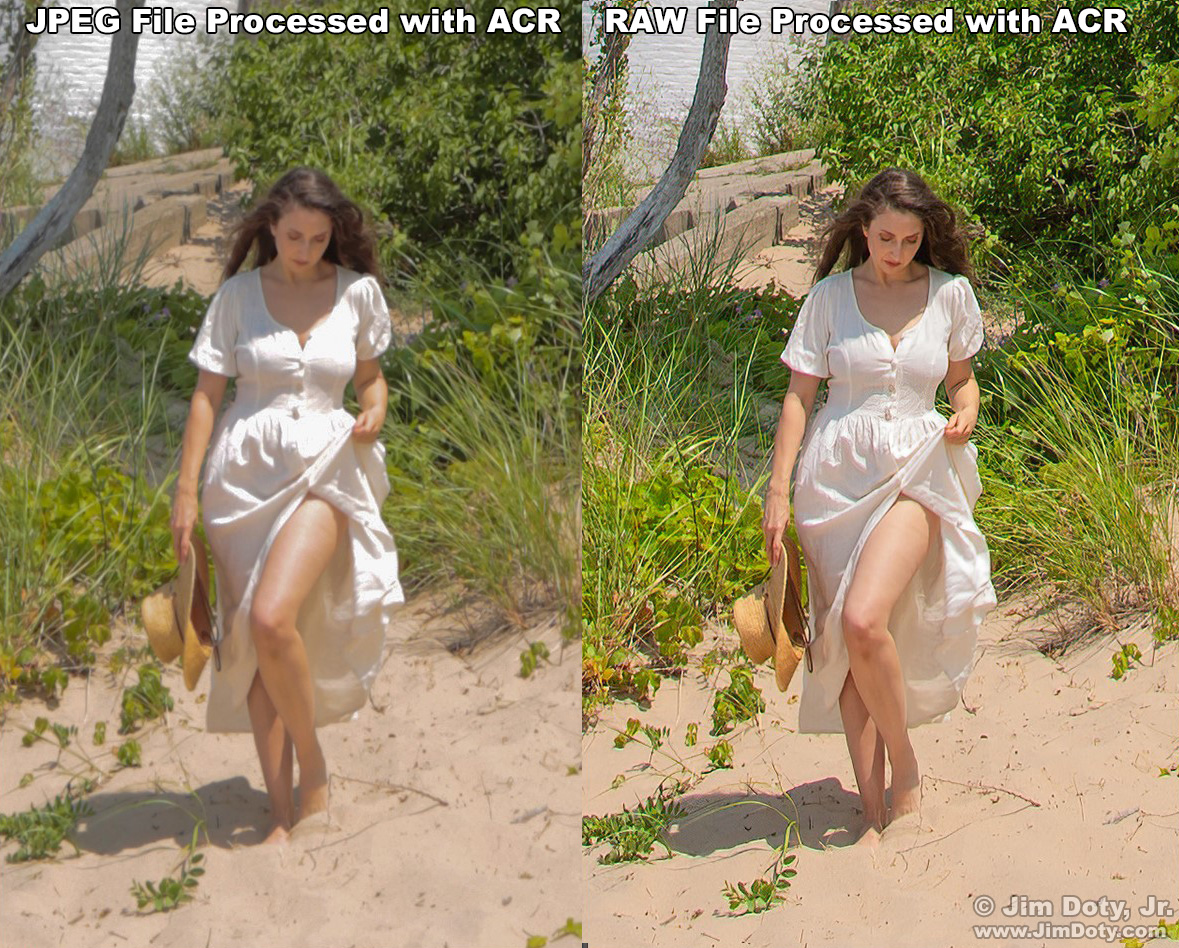
JPEG vs RAW file after using ACR. Click to see a larger version.
This is a side by side comparison of Anoush at 100% “actual pixels” magnification. You will need to click on this cropped comparison to see it at full size. The ACR processed JPEG just doesn’t hold up to the ACR processed RAW file. I was not able to recover the washed out highlights on her dress and the colors aren’t as good.
The lesson is obvious. RAW files are clearly better. If you do everything perfectly right every time you pick up your camera. you can probably get just fine shooting JPEGs. But if you are like the rest of us and make mistakes, a RAW file can save an image when no amount of computer work can save the JPEG file. And in high contrast lighting situations, you can recover highlights and lost shadows in a RAW file that you can’t recover in a JPEG file.
To see a more dramatic example of the RAW vs JPEG Exposure Advantage, go here.
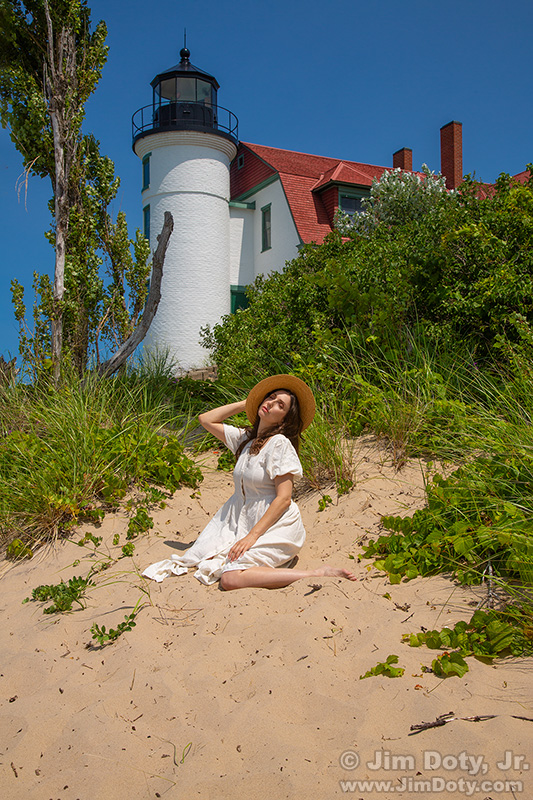
Anoush, Point Betsie Lighthouse
Another photo of Anoush. For this one the initial exposure was correct. I used ACR to tweak the colors of this RAW file and pull up some of the shadow areas. To my eye, this properly exposed image has a slight quality edge over the overexposed and corrected RAW file from the beginning of the shoot.
Links
The Sunny f/16 Rule: Basic Daylight Exposure (BDE)
The RAW vs JPEG Exposure Advantage
How to Optimize a Photo with Adobe Camera Raw
ACR and RAW: Two of the Best Things You Can Do For Your Images
The Best Colors Come From the Best Exposures