This article is about why you should optimize your digital images, with a brief example as to how to do it.
No camera, no matter how expensive, can capture the full range of light and dark tonalities that your incredible eyes can see. No camera, no matter how expensive, can capture the full range of colors that your eyes can see. But you can make up for some of the differences by optimizing your images using Adobe Camera Raw (ACR).
Your eyes can capture a full range of tones in sunshine and shade, but a camera cannot do that. With your camera you can expose for the sunlit area of a photo and the shadow areas will fall apart, or you can expose for the shadow areas and the sunlit areas will be washed out. Or you can split the difference and lose some of the highlights and some of the shadows. It is even better if your whole image is all sunlit or all in shade but that isn’t always possible. This image is an example.
Back at your computer you can optimize your digital image with ACR to bring it closer to what your eyes saw when you clicked the shutter.
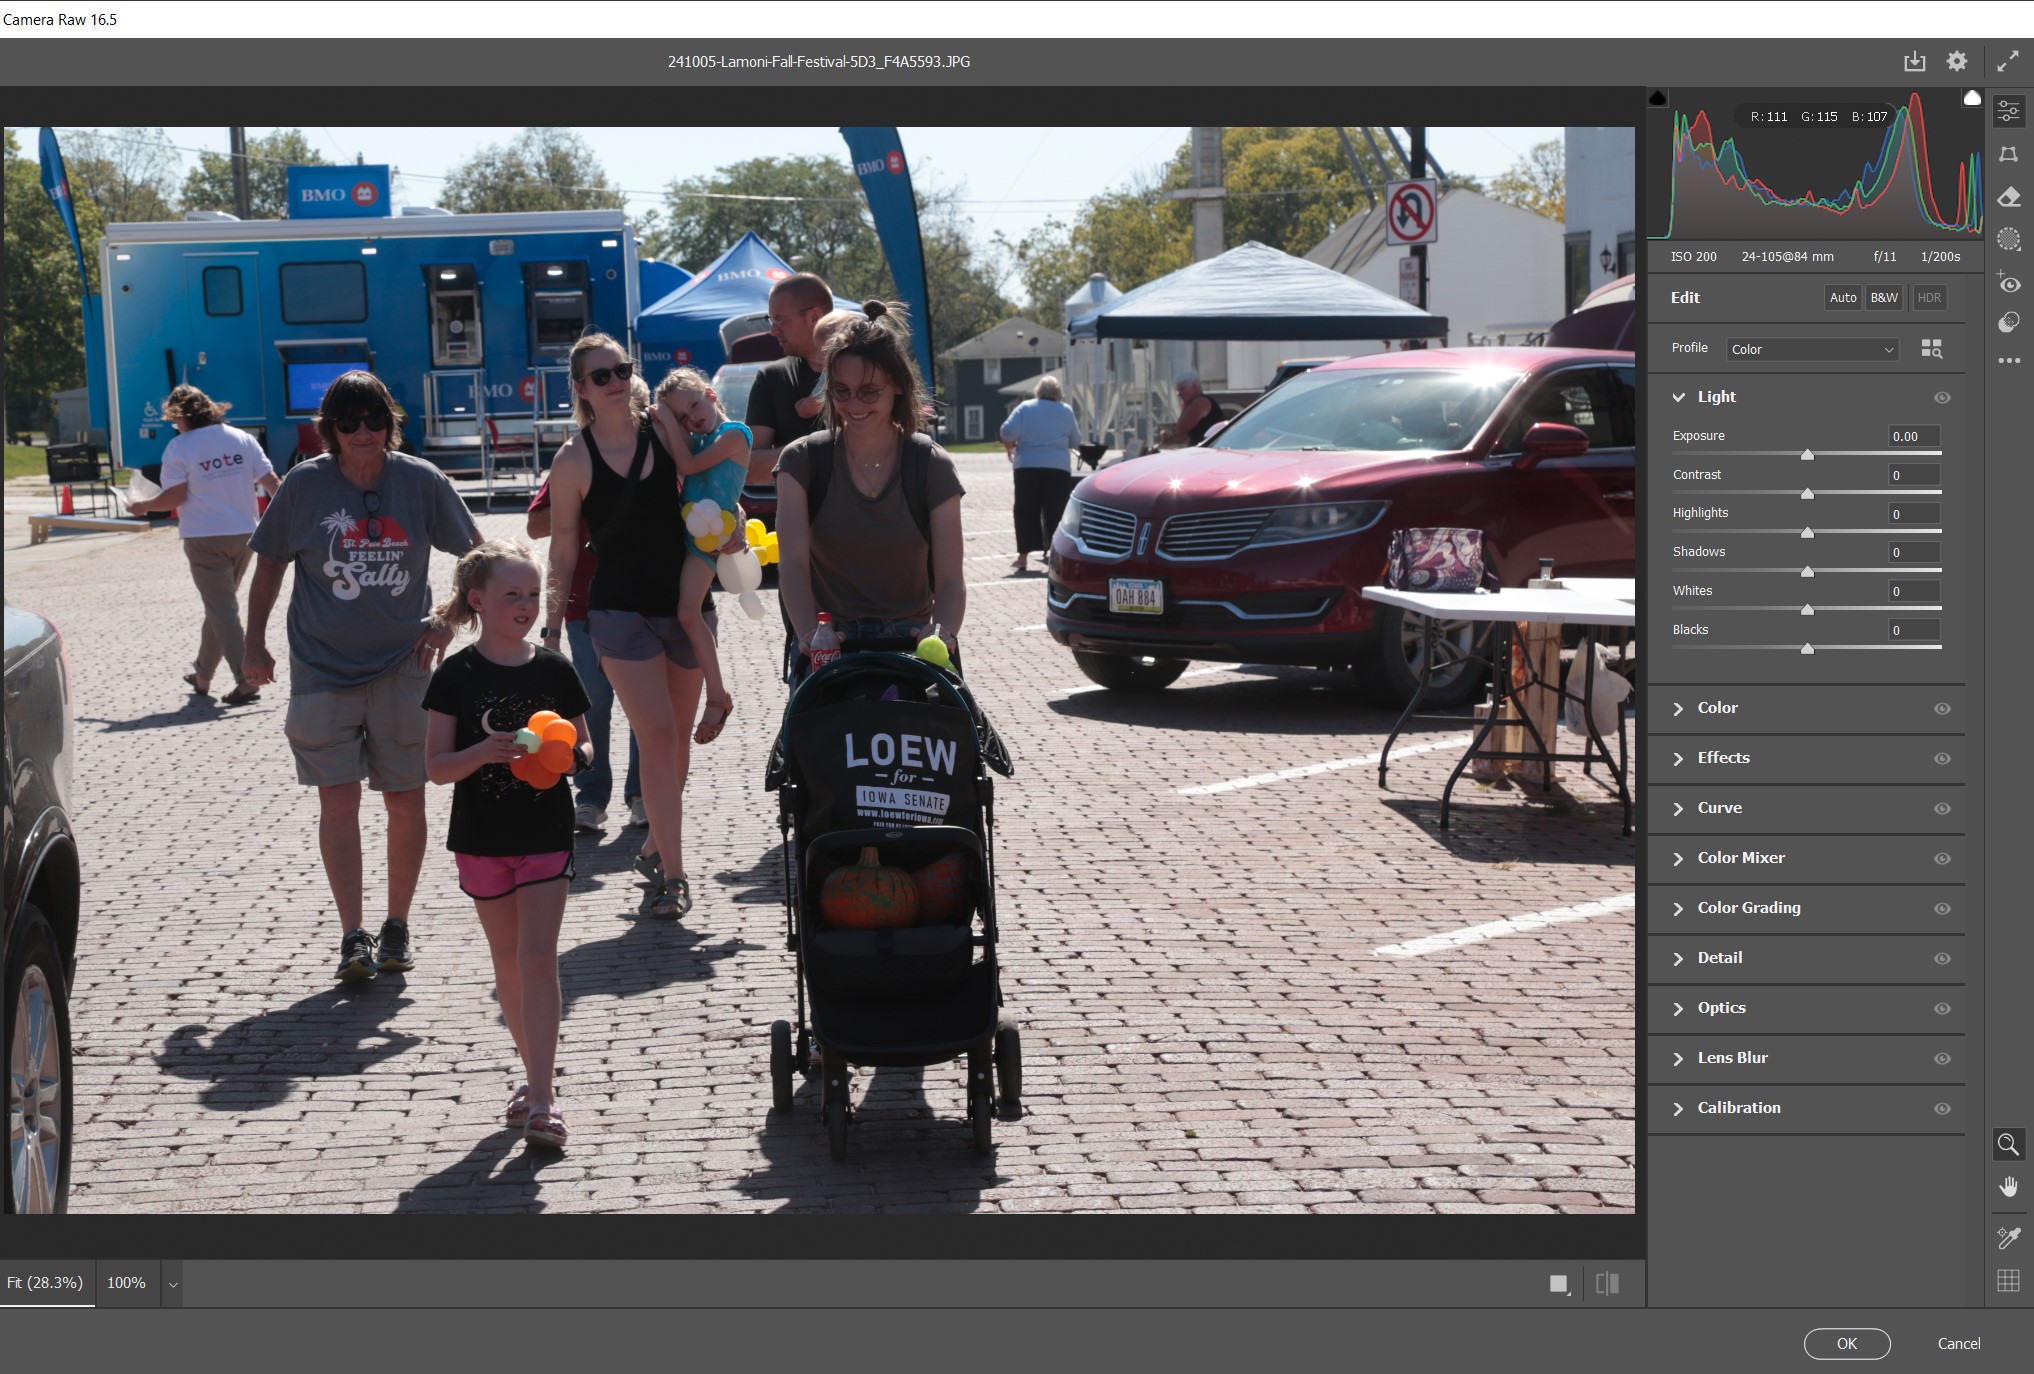
This is the original, uncropped image, right out of the camera. The highlights are overexposed and the shadow areas are underexposed. There is a loss of color quality in the overly bright and overly dark areas.
I opened the photo in Adobe Camera Raw (ACR). On the right is a correction panel with several choices. I will use Light, Color, and Effects.
In the Light section with my mouse I dragged the Highlights slider to the left (-100) to tone down the overexposed highlights as much as possible. I also reduced the Whites (-35). I dragged the Shadows slider to the right (+100) to brighten up the darker areas of the image as much as possible. The amounts you drag these sliders will vary with every image.
Next I went to the Color section and dragged the Vibrance slider to the right (+59) to bring the washed out, faded colors up to a normal value. The amount of Vibrance you use will vary with every image.
Next I went to the Effects section and boosted the Clarity (+58) and Dehaze (+28) settings. These amounts will vary with every image.
It only took a couple of minutes to adjust the sliders in ACR. Don’t be afraid to experiment with ACR sliders. Every image is different and will require different amounts of correction.
This is the cropped version of the original photo.
This is the cropped final version of the photo after adjusting the sliders in ACR.
Just a couple of minutes with Adobe Camer Raw can make a big difference in the quality of your images. There is another example at the article in the link section.
Link:


