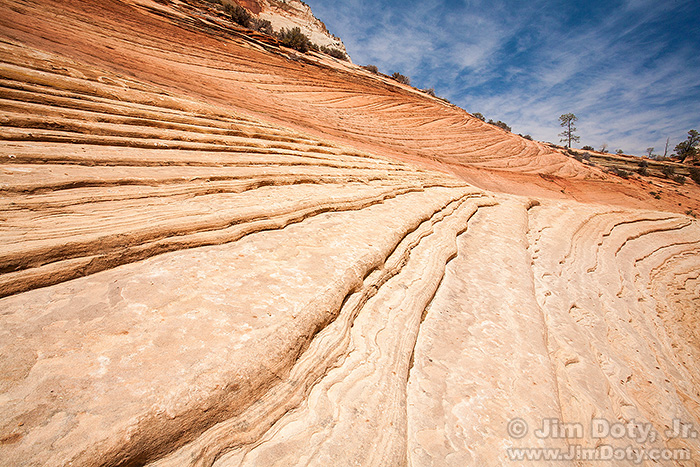
Zion National Park is well know for its towering sandstone cliffs, but it has other treasures for the photographer willing to look, like these petrified dunes.
I found this location while looking for a place to capture a different scene. My initial goal was to photograph a large mesa with the “crossbedding and jointing” pattern that is typical of Checkerboard Mesa (one of the classic landmarks in Zion). In my search to find a nice foreground that would obscure the road, I came across these intriguing petrified dunes.
In terms of composition, I wanted to emphasize the ridges and use them as leading lines to draw the eye into the frame. To make them as dramatic as possible, I carefully picked my location and put my tripod mounted camera very low to the ground. I used a wide angle lens at 17 mm focal length and a small aperture of f/22 for maximum depth of field with the lens focused at or close to the hyperfocal distance.
It was a bright sunny day so metering was simple. I used BDE (basic daylight exposure), also known as the “Sunny f-16 rule”. For a frontlit subject at ISO 100 with an aperture of f/22, the shutter speed should be around 1/60 or 1/50 second (depending on how your camera’s sensor responds to the light), but I was using a polarizing filter which brought the shutter speed down to 1/20 second. You can learn more about BDE toward the bottom of this Exposure Lite article
I was there in the afternoon which is not the best light, but I had no choice. I was at Bryce Canyon in the morning and had to be in California in the evening, so I was there when I was there and wanted to make the most of it. I wold love to see this location early or late in the day with warm light and long dramatic shadows. I made note of the location in my Photo Trip Log so I can find the same location again if I am back here again. According to my photo trip log I was about one mile past the east entrance to the park, just past the bridge, and then head to the right.
Photo Information: Canon 5D. Canon EF17-40mm f/4L lens at 17mm. 1/20 sec, f/22, ISO 100.
Links
To master depth of field, read the two detailed chapters on controlling depth of field in Digital Photography Exposure for Dummies. You will find more information about depth of field, and ways to control it than in almost any other book currently on the market. There are also several chapters on mastering exposure and a chapter on making the most of your landscape photography. Learn more here and you can order it Amazon.com.
Depth of field articles:
Depth of Field for 35mm film and full frame digital cameras
Hyperfocal Distance Chart for full frame digital cameras and 35mm film cameras
Depth of Field for digital SLRs with a 1.5x or 1.6x field of view crop
Hyperfocal Distance Chart for digital SLRs with a 1.5x or 1.6x filed of view crop
Adjusting for Depth of Field by Harold Merklinger
Depth of Field for Smart Phones and PDAs
Exposure articles:
Speaking Your Camera’s Language: Aperture, Shutter Speed, and ISO
Using Reflected Light Meters, Part One
Using Reflected Light Meters, Part Two
Simplify Your Life with an Incident Light Meter
Turn Your Camera Meter Into An Incident Light Meter: Using an ExpoDisc
Using a Gray Card, Incident Light Metering on the Cheap

