The snow in a winter scene will often fool a camera meter into underexposing a photo, so here are the steps to take to get the right exposure. I throw in a few portrait suggestions too.
Metering People in the Snow
Metering people in the snow is a lot like Metering Wildlife in the Snow. Just like a wildlife closeup, you bias the exposure for the person, not the snow. But it is simpler because you can walk right up to the person and you can’t usually walk up to the wildlife.
The first step is to walk up to the person and meter just the skin of their face. This is easier if you have a zoom lens and zoom out to a longer focal length. That way the camera meter isn’t fooled by the snow, or by tonality of the clothes the person is wearing, or by the tonality of their hair.
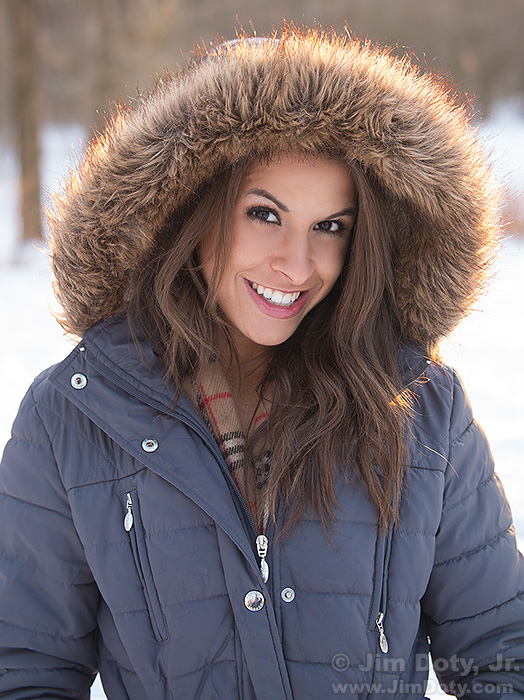
Second, use exposure compensation (which is part of this Reflected Light Meter article) to allow for the tonality of their skin. For a person with light toned skin (like in the photo above), add one half to one stop of light to the camera meter reading (+1/2 or +1 exposure compensation). For a person with medium toned skin, go with the meter reading provided by the camera. For a person with dark toned skin, subtract one half to one stop of light from the camera meter reading (-1/2 or -1 exposure compensation).
Once you have arrived at the right exposure setting, “lock in” that setting on your camera so it doesn’t change when you back up to take the picture. Different cameras have different ways of locking in an exposure setting so check your camera manual. I usually prefer to shoot in manual mode so the setting is locked in until I choose to change it.
With the exposure locked in, back up, compose your photo, and take the picture. The snow will probably be “burned out) (a washed out, featureless white) but that doesn’t matter when your subject fills most of the frame.
Portrait Suggestions
Doing portraits in the winter works best when you have the soft light (and soft shadows) of an overcast day. Soft light makes for great looking skin.
There was a little bit of light from the setting sun peeking through the clouds when I took this photo, so I had my subject turn away from the sun to keep the light soft on her face. I also had her stand in a location where there was no sunlight on the background snow and trees but still allow some sunlight to back light the hood of her jacket. That gave the hood some “pop” against the background. Sometimes moving your subject just a few feet makes a big difference in the quality of the image.
The lower light levels of an overcast day usually means boosting the ISO to 200, 400, or higher so you can set your chosen aperture and still have a reasonably fast shutter speed. Use the lowest ISO setting that will give you the shutter speed you need.
For the photo above I used a 100-300mm zoom lens at a focal length of 95 mm. This focal length gave me a pleasing perspective for her face. Backing up and using longer focal lengths (80mm and longer) gives a natural look to the face. Longer lenses are also useful for softening the background. Getting close to someone with a wide angle lens distorts the features of the face.
I used an aperture of f/5.6 to soften the background but still have enough depth of field for the features of her face and the hood of her jacket. A smaller aperture would make the background sharper than I preferred for this photo. I wanted the trees to look soft and blurry.
When I zoomed in on her face to meter, the camera recommended a shutter speed around 1/100 second at an aperture of f/5.6. I added a stop of light by changing the shutter speed to 1/50 second. This is normally too slow a shutter speed for a lens of this focal length, but the lens has an image stabilization (IS) feature for hand holding the camera and lens at longer shutter speeds. Without the IS feature on the lens, I would need a shutter speed at 1/100 with an ISO of 800 or 1/200 second with an ISO of 1600. The slower ISO of 400 gives me a cleaner, less noisy image..
Photo Info: Canon EOS 5D Mark III. Canon EF 100-300mm IS DO lens at 95 mm. 1/50 sec, f/5.6, ISO 400.
Links
Understanding apertures, shutter speeds and ISO settings.
Using exposure compensation with your camera’s light meter.
For more information on metering, exposure compensation, depth of field, focal lengths for various kinds of portraits, and a lot more information on creating better portraits, read Digital Photography Exposure for Dummies. Highly recommended by pros and amateurs alike, it has a 5 star rating at Amazon.com. More information about how it will improve your photography is in this article, and you can buy it at Amazon.com.

