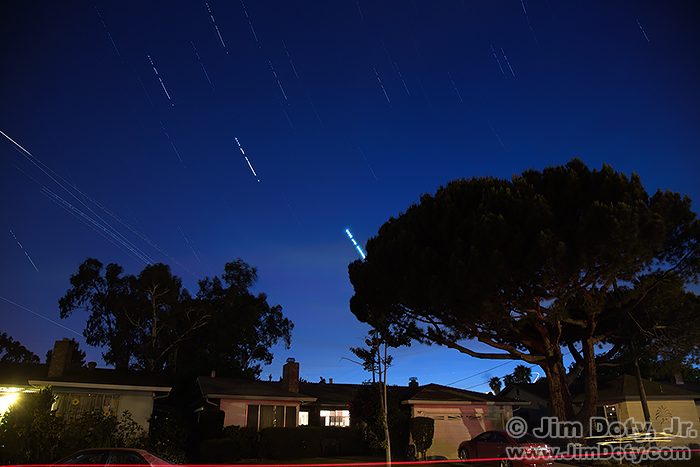
Venus, Jupiter, stars, and airplane lights. Fremont, California. 27 separate images stacked together. Click to see a larger version.
It is a handy thing to know how to stack multiple night sky images into one photo. It allows you to create one stacked image covering a long period of time (using multiple photos) when it is not possible to make one long exposure of the night sky. What is a stacked image? Several images taken over a period of time which are combined to create one image fro the whole time period. This tutorial will show you how to create one.
I was visiting family in Fremont California and noticed the airplanes flying overhead on their way to the San Francisco airport. Venus and Jupiter were also shining brightly in the western sky, so I got out a camera and tripod and started taking pictures. Generally, bright city lights aren’t conducive to night sky photography, but if you keep the individual photos reasonably short and color correct the images, some interesting photos are possible.
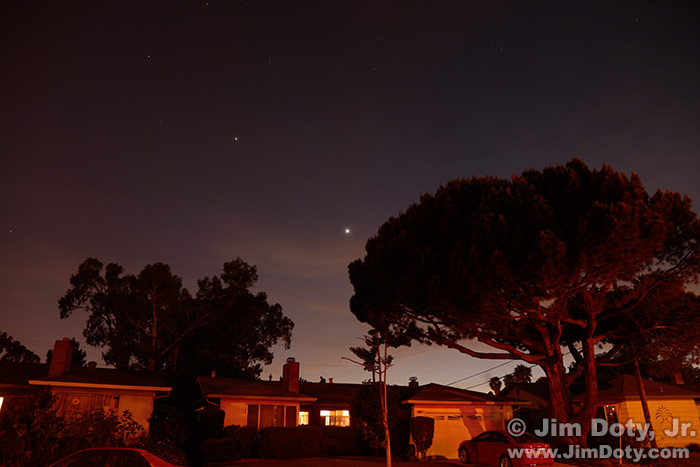
Jupiter and Venus over Fremont, California. This original image has not been color corrected for the color cast from city lights shining in the night sky.
I had been taking pictures for a while when it occurred to me that it would be nice to take a really long photo of the lights from several airplanes coming in to San Francisco, but an exposure that long would totally burn out the night sky thanks to millions of city lights in the Bay Area. But I could stack several shorter images. That would also allow me to capture the motion of the stars and the planets Jupiter and Venus. I had read about stacking images, but never tried it. It was time to try.
Shooting Stacked Images
The key to stacking images in the shooting stage is not to move the tripod mounted camera in between the individual photos so you have a nice set of aligned images.
I had several images where I hadn’t moved the camera before making the decision to stack the images, so I just kept on taking photos without moving the camera. I had already used several different exposures around f/5.6 and 30 seconds at ISO 200, but when I made the decision to stack the images, I standardized on f/8 and 30 seconds at ISO 400 for the rest of the photos. It isn’t always critical to use the same exposure when stacking images, but it is generally a good idea to do that.
By the time I wrapped up for the night I had 27 aligned images taken over 23 minutes.
Color Correcting All the RAW Files
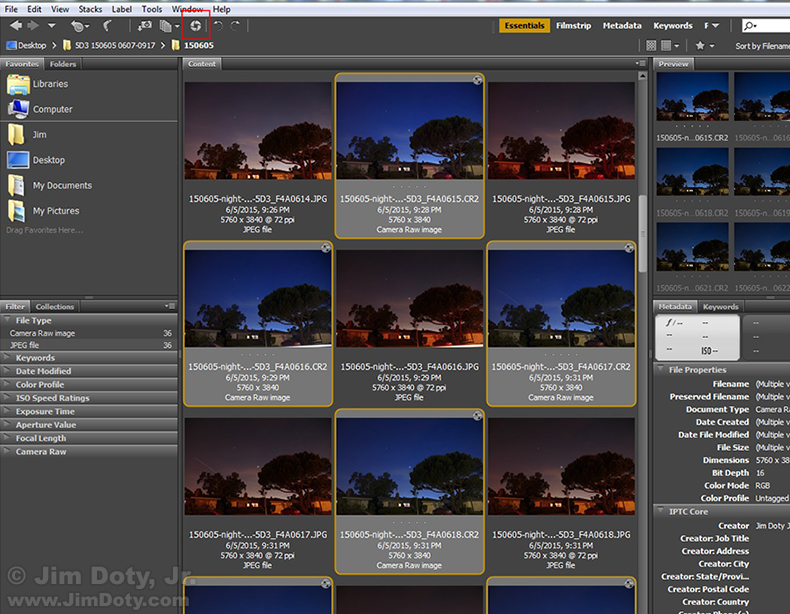
In Adobe Bridge I opened the folder with all the images and selected the aligned RAW files that I wanted to use. Before stacking the RAW files I wanted to process the images with Adobe Camera Raw (ACR) to correct the unnatural color of the sky due to all the city lights. To get them into ACR I clicked the aperture shaped icon (marked with a red box) at the upper left.
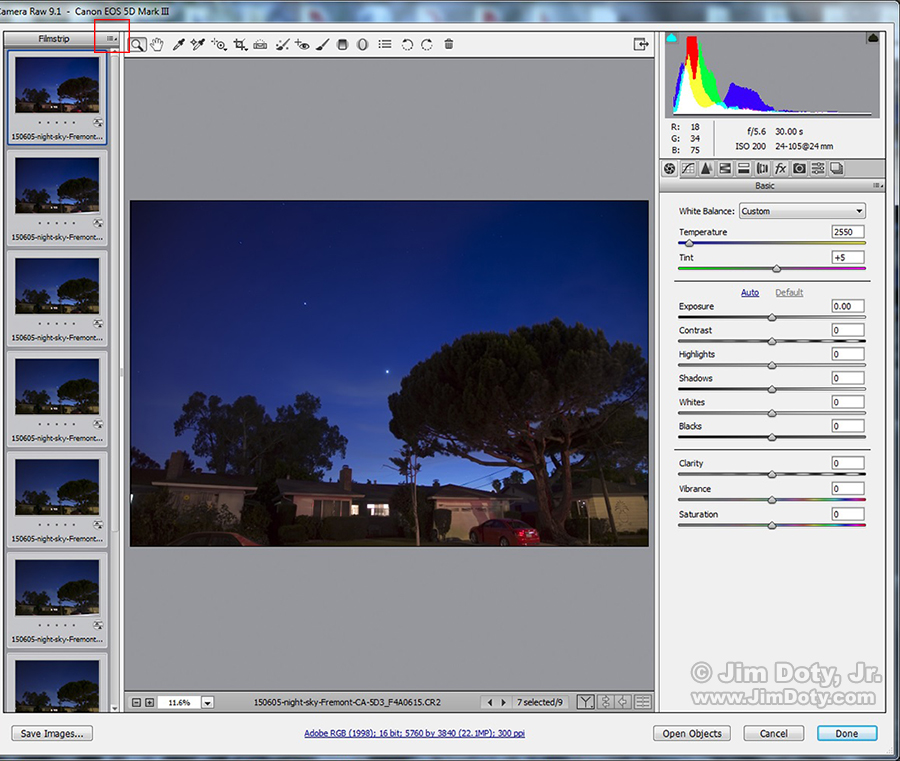
With all the RAW files showing in the Filmstrip on the left side of ACR, I clicked the drop down menu (marked with a red box at the upper left) and chose Select All. That allows me to color correct all the files at once rather than one at a time. With all the RAW files selected, I removed the unnatural color cast in the sky by dragging the Temperature slider quite a ways to the left and the Tint slider a little to the right. That gave me a nice blue sky. The corrected files are now ready to export. I clicked Save Images (bottom left) and sent all the RAW files to a folder on my desktop. They were exported as DNG files (Adobe’s universal digital negative).
Stacking the Images with Bridge and Photoshop
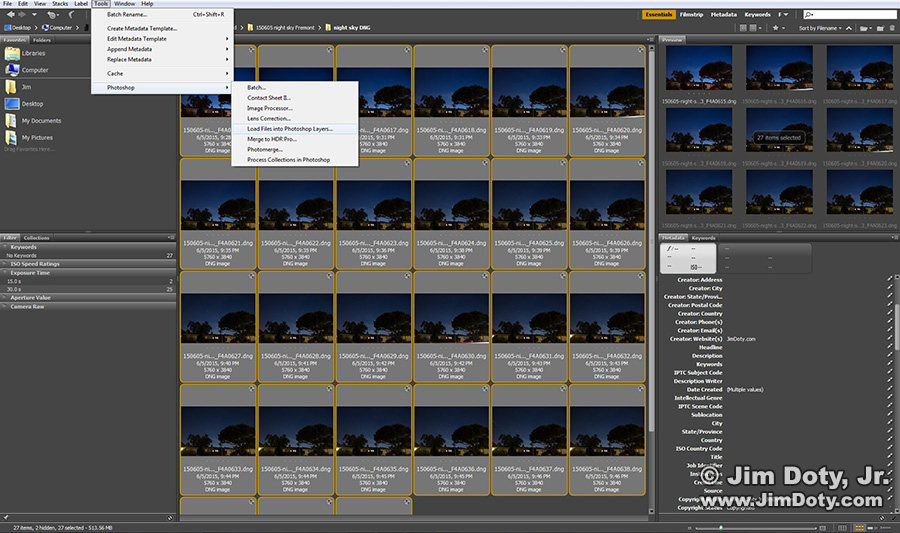
Now I am ready to stack the images. I opened the folder of DNG files with Bridge and selected all the files (Edit > Select All).
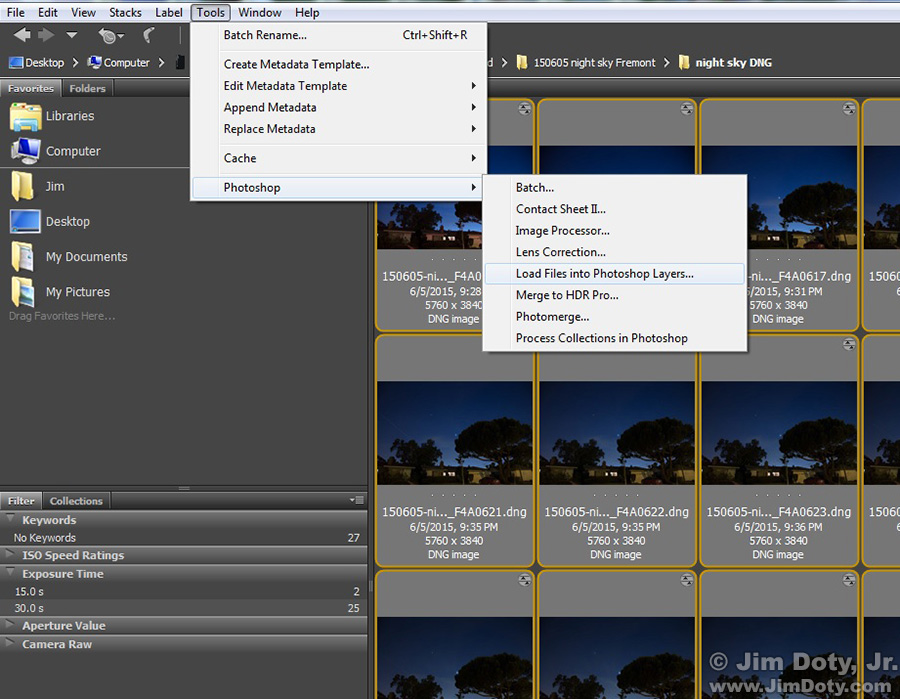
The next step is to send all the RAW files to Photoshop. Photoshop will create one “stacked image” in which each of the individual images becomes one layer in the new combined image. From the Bridge menu, choose Tools > Photoshop > Load Files into Photoshop Layers….
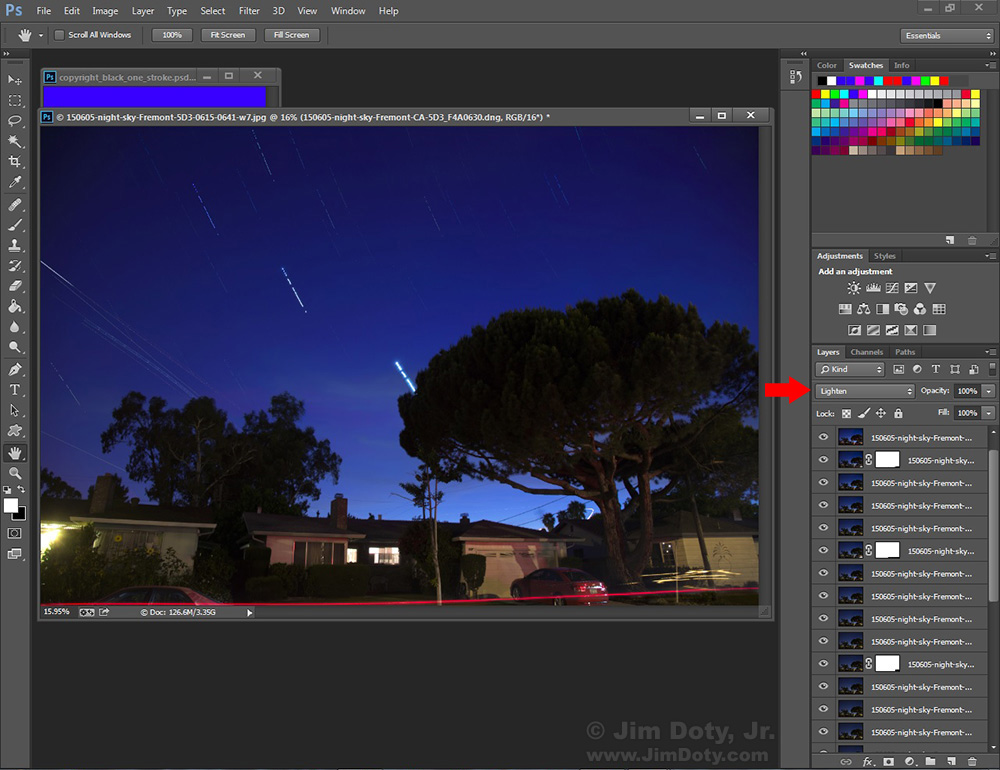
When Photoshop opens, all of your individual images will show up as layers in the Layers Panel at the lower right. All of those stacked up layers is where the name “stacked image” comes from.
Now the magic happens. Select all the layers. To do this, click the top layer and then shift click the bottom layer. Then change the blending mode (indicated by the red arrow) for all the layers to Lighten. If all goes well, you will end up with a great looking image that combines all the individual layers.
Fixing Problem Layers
If there are problems with the image, go through and turn each individual layer off and on one at a time by clicking the eye icon in front of each layer. This will help you will find any problem layers. Leaving a layer turned off (invisible) may solve the problem with that layer. Or you may want to keep the problem layer, but create a “layer mask” and mask out (erase) the problem area of that particular layer. I had one layer with car headlights that were a problem. Turning off the layer eliminated one set of airplane lights across the sky and I didn’t want to do that. So I left the layer on (visible) and masked out the car headlights (making them invisible) at the bottom of the layer. Problem solved.
Finalizing and Saving the Image
Once any problem layers are fixed you may want to do some final tweaking of the image with a Levels or Hue/Saturation adjustment layer. Then save the image with all of the layers intact. If a lot of images went into your stacked image, you may exceed Photoshop’s 2 GB limit for a PSD (Photoshop) file. That happened to me for the first time when I was processing this image. My file in Photoshop was 3.35 GB. Just save your image as a PSB file (Photoshop’s file format for very large files).
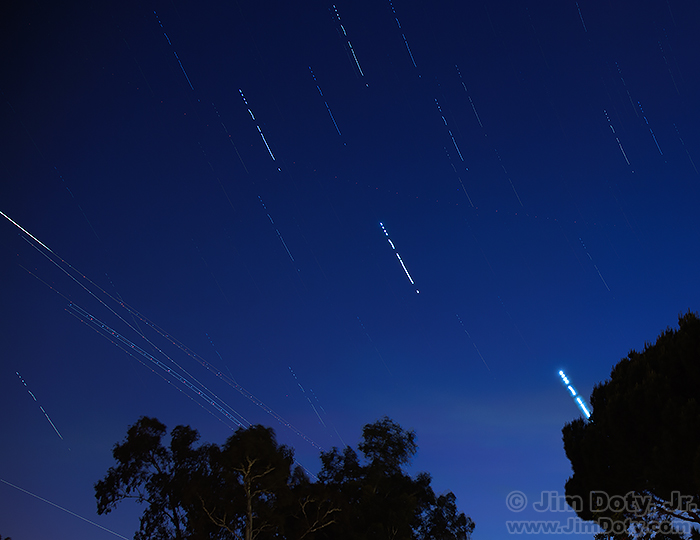
A closer look at the airplane lights, stars, and planets. The planet Venus is the bright object that drops out of sight behind the large tree. Jupiter is the bright object above and to the left of Venus. Click to see a larger version.
Gaps in Your Star Trails
I wasn’t continuously taking images, so there are gaps in the star and planet trails. I timed the beginning of several of the photos to the appearance of a plane at the edge of my viewfinder. Had I decided from the start that I wanted continuous start trails with no gaps, as soon as the shutter closed after one 30 second exposure I would have immediately started the next 30 second exposure.
Photo Data: Canon 5D Mark III. Canon EF 24-105mm f/4 lens at 24mm. 27 individual images stacked into one photo. Most of the images: 30 seconds, f/8, ISO 400. The first image began at 9:28:37 PM PDT. The last image ended at 9:51:45 pm PDT.
Link
Stars Over El Capitan - Several months after creating the above image, I created my second stacked image in Yosemite National Park.

