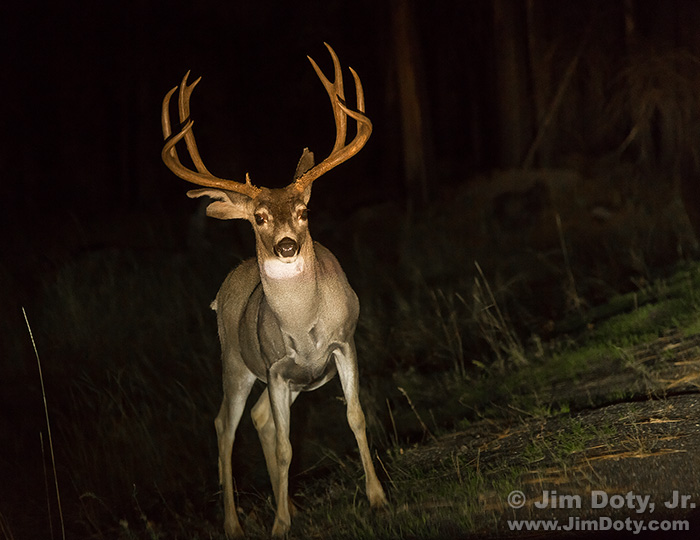
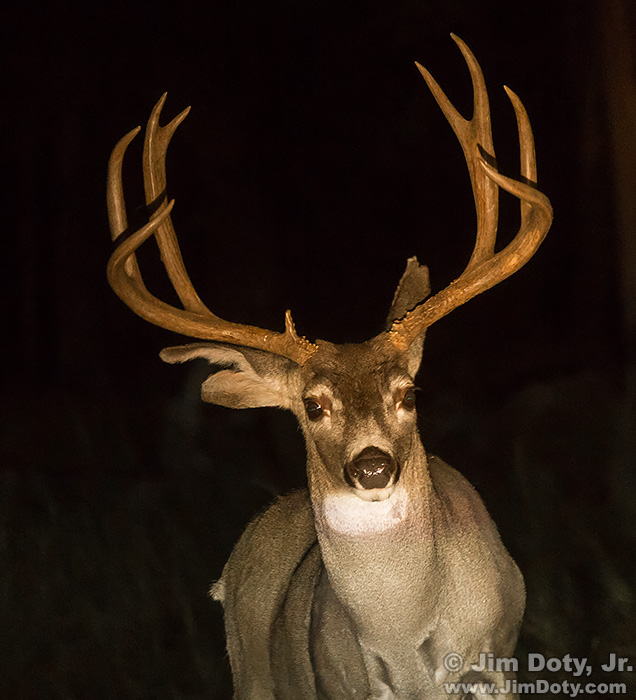
A “deer in the headlights look” is a common euphemism so I couldn’t resist taking some pictures when a deer was literally in my headlights. I was driving around Yosemite Valley taking pictures in the moonlight when I came upon two bucks browsing on the side of the road.
I slowly pulled over to the side of the road so I wouldn’t spook them. Many wildlife in national parks are quite comfortable with the presence of automobiles so long as no one gets out the car or makes any sudden movements or loud noises (my radio is always off when wildlife are around).

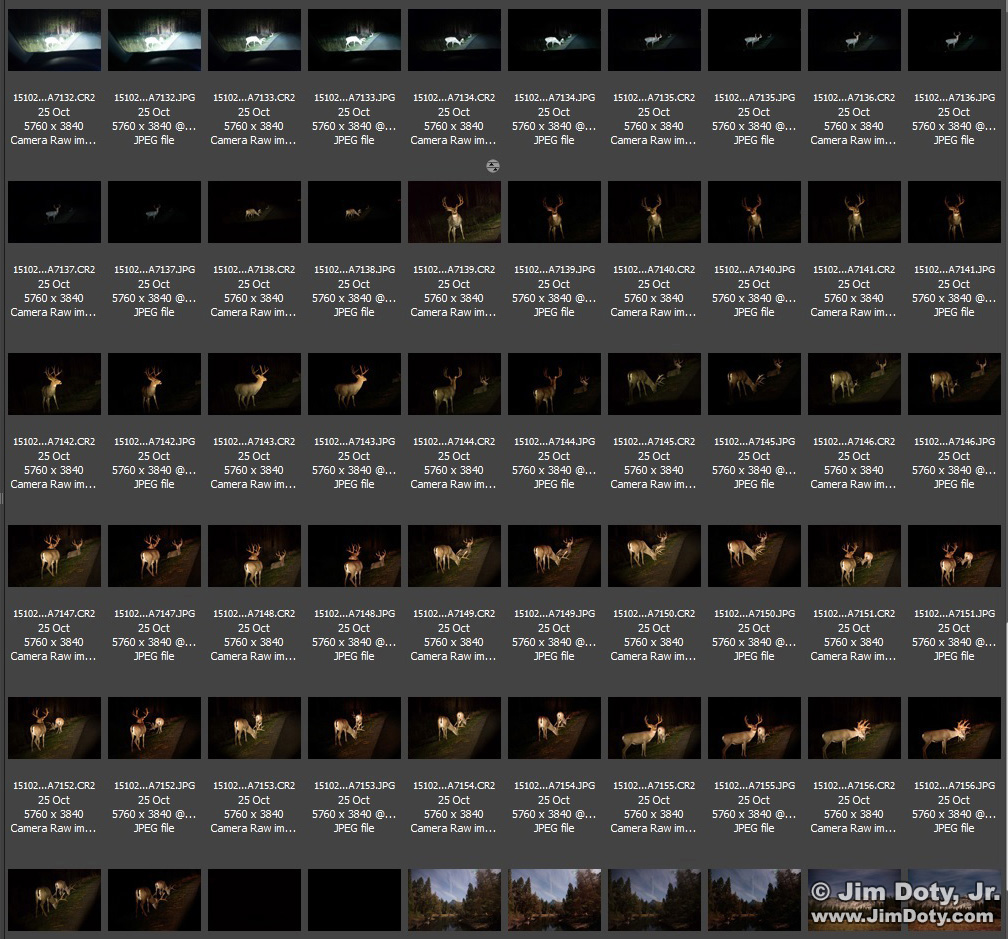
Adobe Bridge screen capture. All of the photos of two bucks. Yosemite Valley. Click to see a much larger version.
They were quite at ease with my presence and kept on browsing. I started taking pictures.
The initial exposures were way off. The camera meter was seeing all of the dark areas around the deer and trying to make them a medium tone. That is exactly what camera meters are designed to do. The camera succeeded as you can see from the top left image in this Adobe Bridge screen capture. But the camera’s desire to create a medium toned background (“middle gray” in black and white terms) gave me washed out deer. I had to manually correct the exposure so the deer were properly exposed and the background faded to black. The meter didn’t like the setting I chose, but there are a lot of occasions when a photographer can come up with a much better exposure than the camera.
Incidentally this is why there are so many terrible online photos of spotlit stage shows. The camera does its best to turn the whole stage into a medium tone and the performers in the spotlight end up totally washed out. The solution is the same. Take over the exposure and darken the stage so the performers are properly exposed.
Once the exposure was sorted out, I gave some attention to the white balance. With my own car, a tungsten white balance works best for photos lit by the headlights so I started with that setting. But I was in a rental car with a different kind of headlamp and the initial photos were way too blue as you can see in the top row of photos (above in Adobe Bridge). I switched to a daylight white balance between photos 7137 and 7138 (closeup of Bridge below). You can see the dramatic difference. In post processing I had to do some minor tweaking with Adobe Camera Raw to get the colors right.

Adobe Bridge. Deer in the headlights. Switch from tungsten to daylight white balance. Click to see a larger version.
Composition came next. An image of deer browsing beside the road was ok, but to get the deer in the headlights look I wanted I needed one of the bucks to be looking at the camera. So I waited. Most of the time they were browsing, so I mostly watched through the lens. They would look around when they moved up and down the road, so I grabbed as many photos as I could when they did that. Fortunately for me, they would occasionally look my way.
Shooting through a windshield is not ideal for several reasons. One, windshields are not premium quality optical glass and they cause minor to major distortions in an image. Windshields are fine for the human eye, but you can see the critical difference when you enlarge an image file after the fact. Problem two, windshields are often slightly tinted. Problem three, shooting through the night bugs that have splattered on the windshield can be a problem, especially in the summer.
Thanks to the windshield, not all of my photos were sharp. I was deliberately shooting through different areas of the windshield, trying to find a sweet spot with less distortion. I had a clean windshield so bugs weren’t a problem. I could have gotten out of the car so I wouldn’t have to shoot through the windshield but I was pretty sure that would spook the deer.
Despite all of the problems, the final image isn’t so bad. It isn’t as razor sharp as a photo that isn’t photographed through a windshield, but it came out better than I would normally expect. And I got my deer in the headlights image. Even if the circumstances of an image seem challenging to you, it is worth a try. No one needs to see our experimental failures!
I did wish I had a longer lens on my camera for a tighter view, and I usually have a camera with a long lens ready to go. But it was at night and I wasn’t planning on any wildlife photography. I was with the deer long enough to change lenses, but I was afraid that while I was doing that, I might miss the one moment that the buck gave me the look I wanted. I was looking through the lens all the time, waiting for that moment, and I didn’t want to miss it if and when happened. There is a potential trade off. The longer the focal length the worse windshield distortion becomes. That is one reason why smart phone through the windshield photos often work. That is also true of airplane windows.
Once I was reasonably sure I had the best photo I could get under the circumstances, I eased slowly out onto the road and left the deer happily eating their peaceful meal.
When I got to my next location, I forgot to switch my camera settings from headlights to moonlight and I ended up with a totally black image (bottom row of photos). A quick switch back to a 30 second shutter speed and I was back in business.
Photo Location
I have been experimenting with an add on GPS for my Canon camera body. It adds the GPS location to the metadata of the image. Photo editors seem to like that information. Smart phones and a lot of point and shoot cameras have been adding GPS data to images for several years, but the process has been slower with DSLRs. You can see the GPS unit in the photo at the top of my last article.
With the photo selected in Adobe Bridge and the coordinates visible (right), I opened Google Earth (left) and typed the coordinates in the search box (not visible in this screen capture). For some reason it only works if you add the degree symbol for both latitude and longitude. For example, if I typed in 37,42.9761N Google Earth could not find the location. It had to be 37°42.9761N. The same is true for longitude. To get the degree symbol on a PC, hold down the ALT key and type 0176 on the numeric keypad to the right of your keyboard (don’t use the numbers across the top of your keyboard. On a Mac use Option Shift 8.
The deer were next to Southside Drive, right next to the meadow that is across the river from Valley View (also known as Gates of the Valley). I added the “Valley View” and “Deer Photo Location” captions to this screen capture. The deer most likely won’t be there if you head to this location some night, but Valley View will be there and it is a great location for a photograph late in the afternoon and at night.
Photo Data: Canon 5D Mark III. Canon EF 24-105mm lens at 105 mm. 1/50, d/4, ISO 1600.
Links
Your Camera Loves Middle Gray – and what to do about it.
Yosemite Valley in the Moonlight
In a Photo Rich Environment: Be Prepared
How to Photograph “Gates of the Valley”


